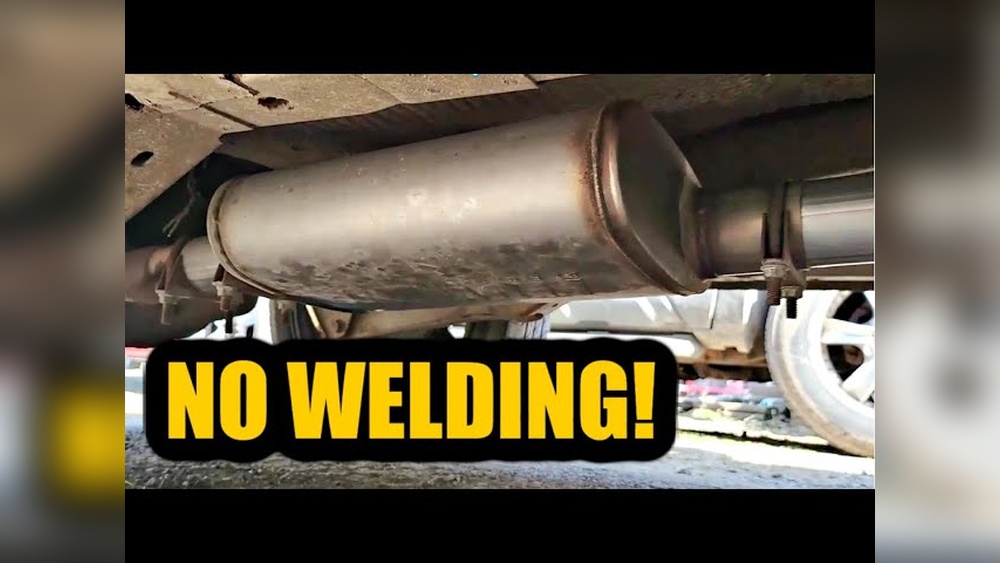
How to Install Aftermarket Muffler Without Welding: Easy Step-by-Step Guide
Are you ready to upgrade your car’s sound and performance without the hassle of welding? Installing an aftermarket muffler might seem like a tough job, but it doesn’t have to be.
You can easily do it yourself with the right tools and a simple step-by-step approach. Imagine saving money on labor costs and getting that deep, powerful exhaust note you’ve been wanting—all without a single weld. Keep reading, and you’ll discover how to install your muffler quickly, safely, and with zero welding involved.
Your car—and your wallet—will thank you.
Credit: www.youtube.com
Tools And Materials Needed
Before starting the installation of an aftermarket muffler without welding, gather the right tools and materials. Having everything ready makes the job smoother and faster.
These tools and materials help fit the muffler securely and safely. They also prevent damage to your vehicle’s exhaust system.
Basic Hand Tools
You’ll need a set of wrenches and sockets to tighten clamps and bolts. A screwdriver can help with removing old parts. Pliers are useful for holding small components in place.
Exhaust Clamps
Exhaust clamps hold the new muffler firmly to the exhaust pipes. Choose clamps that fit your pipe size. Stainless steel clamps resist rust and last longer.
Rubber Hangers
Rubber hangers support the muffler and reduce vibrations. They prevent noise and protect the exhaust system from damage. Select hangers that fit your vehicle’s mounting points.
Exhaust Sealant
Exhaust sealant ensures a tight, leak-free connection. Use a high-temperature sealant designed for exhaust systems. This helps keep fumes from escaping.
Lubricant Spray
A lubricant spray makes it easier to slide pipes and clamps together. It also helps remove rust and loosen stuck bolts. Choose a spray safe for metal parts.
Safety Gear
Wear gloves to protect your hands from sharp edges. Safety glasses keep debris out of your eyes. Always work on a cool exhaust system to avoid burns.

Credit: www.wikihow.com
Preparing Your Vehicle
Start by parking your vehicle on a flat surface and letting the exhaust cool completely. Gather all tools and parts needed for the muffler installation before starting. Check the exhaust pipes for any damage or rust to ensure a secure fit.
Gather Necessary Tools And Materials
Start by collecting all tools and parts needed for the job. You will need a new muffler, exhaust clamps, a rubber hanger, a wrench set, and a screwdriver. Prepare a jack and jack stands to safely lift your vehicle. Having everything ready saves time and avoids interruptions.
Ensure Vehicle Is Cool And Stable
Never work on a hot exhaust system. Let your vehicle sit for several hours after driving. This prevents burns and damage. Park on a flat surface and engage the parking brake. Use wheel chocks to stop any movement. Safety first.
Lift The Vehicle Safely
Use a jack to lift the rear of your vehicle. Place jack stands under the frame for support. Never rely on the jack alone. Check stability before crawling underneath. This step gives easy access to the muffler area.
Inspect Existing Exhaust System
Look for rust, holes, or loose parts in the exhaust. Check the condition of hangers and clamps. Remove any debris or dirt. A clean and sound system ensures a better fit and longer life for the new muffler.
Removing The Old Muffler
Removing the old muffler is the first step in installing a new one without welding. This process needs care and the right tools. A proper removal ensures the new muffler fits well and works correctly.
Start by preparing your workspace. Make sure the vehicle is cool to avoid burns. Use safety gloves and goggles to protect yourself during the removal.
Locate The Muffler And Inspect Its Attachments
Find the muffler under your vehicle. Check how it is attached. Look for clamps, bolts, or hangers holding it in place. Understanding the setup helps in removing the muffler smoothly.
Loosen The Clamps And Bolts
Use a wrench or socket set to loosen the clamps and bolts. Apply penetrating oil if parts are rusted or stuck. Let the oil sit for a few minutes to ease removal.
Remove The Muffler From The Exhaust Pipe
Gently twist and pull the muffler away from the exhaust pipe. Avoid using excessive force to prevent damage. Use a rubber mallet for light tapping if needed.
Detach The Muffler From The Hangers
Slide the muffler off the rubber hangers holding it. Use hanger removal tools or pry bars if the hangers are tight. Take care to not tear the hangers.
Fitting The Aftermarket Muffler
Fitting the aftermarket muffler is an important step in the installation process. It needs to be secure and fit well to work properly. This section breaks down the steps to fit the muffler without welding. Following these tips helps avoid leaks and ensures a good sound.
Preparing The Exhaust Pipe
Start by cleaning the exhaust pipe where the muffler will fit. Remove rust, dirt, and old sealant using a wire brush. This creates a smooth surface for the muffler to slide onto. Check the pipe diameter to match the muffler inlet size.
Sliding The Muffler Into Place
Gently slide the muffler onto the exhaust pipe. It should fit snugly but not be forced. Twist the muffler slightly if it feels tight. Make sure it aligns correctly with the rest of the exhaust system.
Securing The Muffler With Clamps
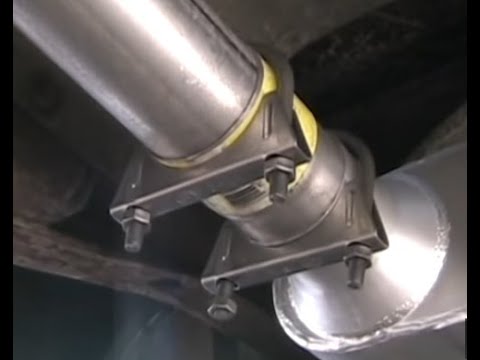
Use exhaust clamps to hold the muffler in place. Position the clamp over the joint between pipe and muffler. Tighten the clamp bolts evenly with a wrench. Check that the muffler does not move and the clamp is firm.
Checking For Gaps And Leaks
Look closely at the connection for any gaps. Gaps can cause exhaust leaks and noise. Use exhaust sealant or a high-temperature gasket if needed. Tighten clamps again after applying sealant to ensure a tight fit.
Securing And Testing The Installation
Securing and testing the installation of your aftermarket muffler is key. It ensures the muffler stays in place during driving. This step also confirms there are no leaks or noises that should not be there. Proper securing and testing will give peace of mind and improve driving safety.
Checking All Clamps And Hangers
Start by tightening all clamps firmly. Use a wrench to secure clamps around the pipes. Check hangers to make sure the muffler hangs correctly. The muffler should not move much when pushed by hand. Loose clamps or hangers can cause rattling or damage.
Inspecting For Gaps And Leaks
Look closely at all connections for gaps. A small gap can cause exhaust leaks. Use your hand to feel for escaping air when the engine runs. Listen for unusual sounds like hissing. Seal any gaps with exhaust sealant if needed.
Performing A Road Test
Drive the vehicle slowly at first. Listen for any new noises or vibrations. Check if the muffler stays in place without shifting. Stop and re-tighten clamps if needed. A smooth ride with no odd sounds means a good installation.

Credit: www.carparts.com
Frequently Asked Questions
How Do I Install An Aftermarket Muffler Without Welding?
Use a clamp-on muffler kit designed for bolt-on installation. Slide the muffler onto the exhaust pipe and secure it with clamps. No welding tools or skills needed.
What Tools Are Needed To Install A Muffler Without Welding?
You need a wrench, screwdriver, exhaust clamps, and possibly a lubricant spray. These tools help loosen bolts and secure the muffler tightly. Simple hand tools work fine.
Can I Install An Aftermarket Muffler Without Removing The Old One?
Yes, you can slide the new muffler over or replace parts of the old system. Sometimes loosening clamps or cutting a small section helps. No full removal is always required.
Will A Clamp-on Muffler Leak Without Welding?
Clamp-on mufflers can leak if not tightened properly or if the fit is loose. Using high-quality clamps and checking for gaps prevents leaks. Proper sealing is key.
How Long Does It Take To Install A Muffler Without Welding?
Installation usually takes 30 minutes to 1 hour depending on experience. Clamp-on methods are faster than welding. It’s a simple, quick DIY task.
Conclusion
Installing an aftermarket muffler without welding saves time and effort. You only need basic tools and some patience. Follow each step carefully for a secure fit. This method works well for most vehicles and avoids complex repairs. Enjoy better sound and performance without extra costs.
Keep safety in mind and double-check all connections. Simple, fast, and effective—no welding required.