Can You Use Starting Fluid to Find a Vacuum Leak 2026
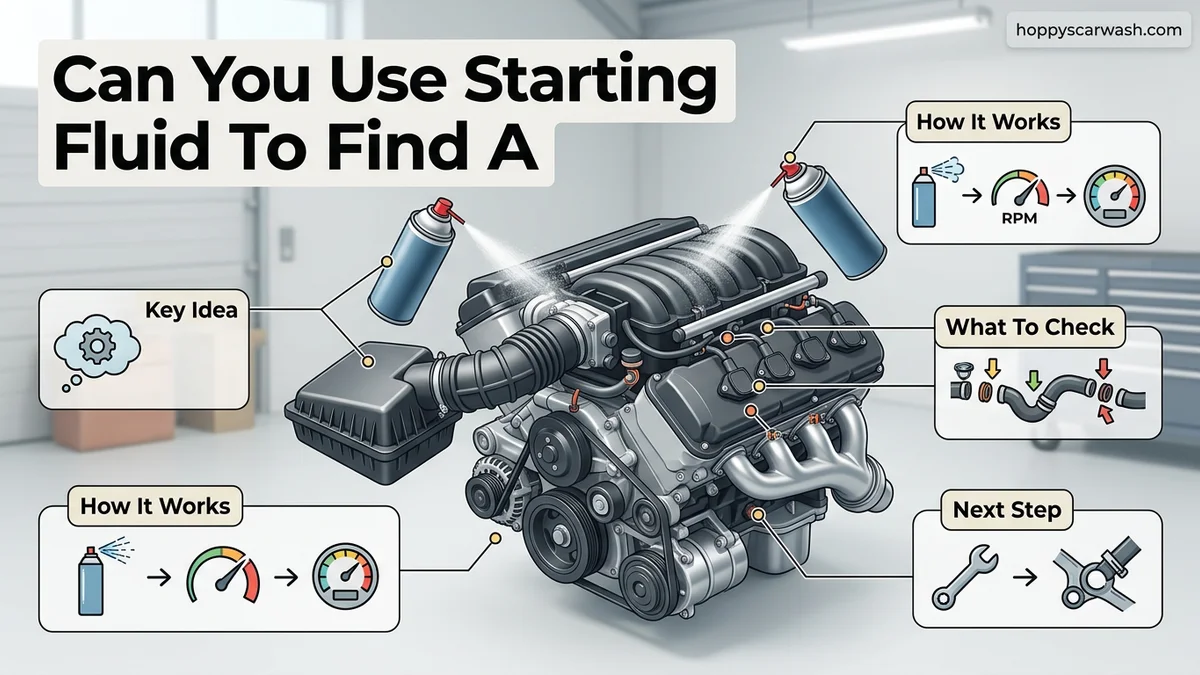
Yes, you can use starting fluid to find an engine vacuum leak by spraying it around suspected areas and listening for a sudden increase in engine RPM. However, extreme caution is required due to the high flammability of ether-based aerosol sprays near hot engine components.
Yes, you can use starting fluid to find a vacuum leak on an internal combustion engine. When sprayed near a compromised gasket or cracked hose, the highly volatile ether is sucked into the engine, temporarily enriching the air-fuel mixture and causing a noticeable, immediate increase in idle speed.
While this diagnostic trick has been used by professional mechanics for decades, doing it incorrectly in 2026 can lead to severe engine damage or an under-hood fire. Understanding the exact mechanics and safety precautions before you grab a can will save your vehicle from a catastrophic flash fire.
Key Takeaways
- Starting fluid dramatically increases engine idle speed when sucked directly into an active vacuum leak.
- Always prioritize safety by avoiding hot exhaust manifolds and keeping a fire extinguisher nearby.
- Apply short, controlled bursts rather than continuous spraying to prevent pooling and flash fires.
- Target vulnerable areas like intake gaskets, vacuum lines, and PCV valve connections.
- Alternative methods include unlit propane torches or automotive smoke machines for safer diagnostics.
Why Starting Fluid Works for Vacuum Leak Diagnosis
Vacuum leaks happen when unmetered air sneaks past the throttle body and enters your engine’s combustion chambers. This throws off your air-fuel ratio, triggering rough idling, engine stalling, and check engine lights. Finding the exact source of that leak is notoriously difficult with just your eyes or ears.
The Ether RPM Spike Mechanism
Starting fluid relies heavily on petroleum-based ether, which is extremely flammable and volatile. When your engine runs a lean mixture due to a vacuum leak, it is starved of the ideal ratio. If you spray a jet of starting fluid right at the leak site, the engine vacuum draws that rich ether vapor directly into the cylinder.
- The sudden influx of highly combustible fuel instantly changes the air-fuel mixture.
- The cylinders that ingest the ether experience a stronger, faster combustion cycle.
- Your overall engine idle speed jumps up by 100 to 300 RPM for a couple of seconds.
- Once the ether burns off, the idle drops back down to normal, confirming you found the leak.
Risks Versus Safer Alternatives
Even though starting fluid works well, it is not always the safest choice for a DIY mechanic. Ether has an extremely low flash point and can ignite from a tiny spark, hot exhaust manifold, or malfunctioning alternator. If you want a safer diagnostic approach, many modern shops in 2026 prefer unlit propane torches or automotive brake cleaner, though non-chlorinated brake cleaner still carries some chemical risks.
- Starting fluid is cheap and available at any auto parts store.
- It offers an instantaneous reaction due to high volatility.
- The extreme flammability demands strict safety protocols to avoid fires.
Master Using Starting Fluid to Find a Vacuum Leak in 6 Simple Steps
Tracking down an elusive engine vacuum leak can be frustrating, often causing rough idling, engine stalling, and decreased fuel economy. One of the oldest and most effective tricks in the mechanic’s handbook is using pressurized ether-based starting fluid to pinpoint these leaks safely. When sprayed near a compromised gasket, cracked hose, or loose fitting, the flammable aerosol is sucked into the engine, causing a temporary and noticeable change in RPMs. This comprehensive guide will walk you through the entire process from preparation to execution, ensuring you can locate and fix your engine troubles like a seasoned professional while avoiding common safety hazards.
Step 1: Gather Your Safety Gear and Materials
What you need: A can of aerosol starting fluid with a thin plastic straw applicator, a fully charged ABC-rated fire extinguisher, safety glasses, and heat-resistant work gloves.
Instructions: Before you even pop your vehicle’s hood, safety must be your top priority. Starting fluid is extremely volatile and flammable. Park your car in a well-ventilated outdoor space away from direct sunlight, open flames, and electrical sparks. Put on your safety glasses and gloves. Inspect your fire extinguisher to ensure it is readily accessible within arm’s reach of the engine bay. Having these safety measures prepared sets the stage for a secure diagnostic session, protecting both you and your vehicle from accidental flare-ups.
Pro Tip: Never perform this diagnostic test inside a closed garage, as aerosol vapors can quickly accumulate and ignite from a stray garage heater spark.
Step 2: Locate the Engine and Vacuum Diagram
What you need: A flashlight, a microfiber towel, and your vehicle’s under-hood emissions label (or a digital repair manual on your phone).
Instructions: Pop the vehicle hood and secure it with the prop rod. Use your flashlight to inspect the top and sides of the engine. Look for the under-hood emission control information sticker, which often features a schematic diagram of the vacuum routing. If your vehicle doesn’t have this sticker, take a few minutes to search online for your specific year, make, and model’s vacuum line layout. Take a clean microfiber towel and gently wipe down excessively dirty areas around intake components so you can easily spot cracked rubber hoses or misaligned gaskets during the upcoming inspection.
Pro Tip: Familiarize yourself with the location of the brake booster line, PCV valve hose, and intake manifold plenum gasket, as these are the most common culprits for vacuum leaks.
Step 3: Start the Engine and Stabilize Idle
What you need: The vehicle ignition key and a helper (optional, but helpful if idle drops severely).
Instructions: Climb into the driver’s seat and start the engine. Allow the vehicle to run for 3 to 5 minutes so it reaches its normal operating temperature. This ensures that all rubber components, gaskets, and plastic intake runners are fully expanded to their operational dimensions, which can sometimes reveal hairline cracks that disappear when the engine is entirely cold. Pay close attention to how the engine idles; if it is hunting, surging, or running exceptionally rough, you are dealing with a significant vacuum leak that should respond quickly to the starting fluid test.
Pro Tip: If the engine stalls immediately upon starting, you may need to keep slight pressure on the accelerator pedal to maintain a smooth 1,000 RPM idle during testing.
Step 4: Systematically Spray Suspect Areas
What you need: The can of starting fluid with the long red extension straw securely attached.
Instructions: Carefully approach the running engine, keeping your hands, loose clothing, and the starting fluid can away from spinning serpentine belts, cooling fans, and hot exhaust manifolds. Insert the red straw and deliver short, precise 1-second bursts of starting fluid around known vacuum junctions. Start at the base of the throttle body, move along the intake manifold gasket mating surfaces, and systematically target every rubber vacuum line, the PCV valve grommet, and the brake booster check valve. Move slowly and methodically, giving the engine 2 to 3 seconds between bursts to react to the aerosol.
Pro Tip: Spray in small, targeted amounts. Flooding the entire engine bay with starting fluid makes it impossible to isolate the exact location of the leak.
Step 5: Listen and Watch for RPM Changes
What you need: Your eyes on the tachometer and your ears tuned to the engine’s acoustic pitch.
Instructions: As you spray starting fluid around a compromised area, the engine will instantly ingest the highly combustible ether through the vacuum breach. Watch the instrument cluster tachometer closely. If the engine idle suddenly surges upward by 100 to 300 RPM, or if the engine suddenly smooths out from a rough idle, you have successfully located the exact point of the vacuum leak. The chemical composition temporarily richens the air-fuel mixture at that specific cylinder or port, confirming a leak exists right where you aimed the straw.
Pro Tip: Turn off the engine immediately if the RPMs drop severely or backfire, as this indicates you’ve sprayed too much fluid or hit a hot exhaust component.
Step 6: Mark the Leak and Plan the Repair
What you need: A roll of bright painter’s tape or a white paint marker.
Instructions: Once the engine has cooled down completely, return to the spot where you observed the RPM surge. Use painter’s tape or a paint marker to clearly flag the cracked hose, loose vacuum tree fitting, or degraded gasket. Inspect the component closely to determine if it requires a simple hose replacement or a more involved gasket swap. If a vacuum line is brittle or split, measure its inner diameter and length so you can purchase exact-replacement rubber or silicone vacuum tubing from your local auto parts store.
Pro Tip: Replace all surrounding vacuum lines at the same time if they show signs of dry rot, as failure of one usually means the others are close behind.
✅ Final Checklist
- Engine reached normal operating temperature before testing began
- Aerosol starting fluid was applied in short, controlled bursts using the extension straw
- All potential leak sources (intake gaskets, PCV hoses, vacuum lines) were systematically checked
- Engine RPM surges were successfully matched to a specific physical component
- Engine was completely turned off and cooled before performing any permanent repairs
Important Notes:
- Safety considerations: Starting fluid is extremely flammable and hazardous if inhaled or ignited near hot exhaust manifolds. Always keep a charged fire extinguisher nearby.
- When to seek professional help: If your vehicle has an internal intake manifold gasket leak buried beneath complex superchargers or wiring harnesses, or if RPMs change without a discernible external leak, consult a professional mechanic with a smoke machine.
- Estimated time and cost range: This diagnostic procedure takes approximately 15 to 30 minutes. The cost of a can of starting fluid is roughly $5 to $8.
How to Safely Use Starting Fluid to Find a Vacuum Leak
If you decide to use starting fluid, safety is your absolute top priority. A stray spark from a worn spark plug wire or hot exhaust headers can instantly ignite the heavy mist hanging in your engine bay. Take your time, work methodically, and keep proper safety gear nearby.
Essential Safety Preparations
Before you even pop the hood, you need to set up a controlled environment. Never spray starting fluid on a dangerously hot, overheating engine, as the metal surfaces can act as an ignition source. Keep a fully charged chemical fire extinguisher within arm’s reach.
- Wear safety glasses and heat-resistant gloves to protect your skin and eyes.
- Ensure your vehicle is parked in a well-ventilated area, preferably outdoors.
- Inspect your spark plug wires and ignition coils for cracks that could throw sparks.
- Have a spray bottle of water handy to mist down hot areas if necessary.
Step-by-Step Application Guide
Start your vehicle and let it idle until it reaches normal operating temperature, ensuring the engine bay is stabilized. Take the red extension straw that comes with your starting fluid can and attach it firmly. This allows you to place microscopic amounts of fluid precisely where you need it without overspraying.
- Target high-risk areas first, such as vacuum hoses, PCV lines, and intake manifold gaskets.
- Apply short, one-second bursts of starting fluid directly onto suspected connection points.
- Wait two to three seconds between sprays to watch and listen for any RPM changes.
- Move systematically from the base of the intake manifold outward to all rubber vacuum trees.
- Note the exact spot where the engine surges, as that marks your vacuum leak.
Step-by-Step Instructions to Test Gaskets and Hoses
Executing a starting fluid test requires strict adherence to safety protocols. Automotive technicians emphasize preparation to mitigate fire hazards in 2026 engine bays.
Preparation and Safety Setup
- Park the vehicle on a level surface, engage the parking brake, and ensure the transmission is in park or neutral.
- Allow the engine to reach normal operating temperature so all rubber components and gaskets expand fully.
- Keep a fully charged Class B fire extinguisher within arm’s reach before touching any chemical aerosols.
- Inspect the starting fluid can for any nozzle defects to ensure a precise, mist-like spray pattern.
Executing the Diagnostic Spray
- Start the engine and let it idle smoothly in park.
- Attach the red extension straw to the starting fluid nozzle to target tight spaces accurately.
- Spray a brief, targeted burst around suspected areas, including intake manifold gaskets, vacuum lines, and the throttle body base.
- Wait two to three seconds after each spray to observe any change in engine idle speed.
- Move systematically from the top of the engine downward to prevent missing hidden lower-tier hoses.
What to Do If the Spray Method Does Not Reveal the Leak
Sometimes a vacuum leak hides in areas inaccessible to an aerosol spray or sits deep inside a multi-piece intake manifold. If the starting fluid test yields no results despite persistent engine symptoms, alternative diagnostics are required.
- Inspect all rubber lines visually for dry rot, deep cracks, or soft spots that collapse under engine suction.
- Perform a propane enrichment test using an unlit propane torch, which offers a safer, highly localized alternative to chemical sprays.
- Construct or utilize a professional smoke machine to inject low-pressure smoke into the intake tract and watch for smoke escaping from hidden fissures.
- Consult professional automotive repair databases or local mechanics for diagnostic assistance if manual methods fail. Professional smoke testing typically costs between $100 and $200 at standard 2026 labor rates.
Conclusion
Using starting fluid remains a viable, rapid diagnostic technique for locating elusive vacuum leaks when executed with extreme caution. Pinpointing the compromised gasket or hose immediately restores proper air-fuel ratios and engine performance. According to verified research and expert sources from the Automotive Service Association, addressing vacuum leaks promptly prevents long-term catalytic converter damage. Actionable next step: inspect your vehicle’s most vulnerable rubber vacuum lines today using a targeted spray test.
❓ Frequently Asked Questions
Can you use starting fluid to find a vacuum leak safely?
Yes, it is safe if you maintain a safe distance from hot exhaust parts, use short bursts, and work in a well-ventilated area with a fire extinguisher ready.
Why does starting fluid cause engine speed to change?
Starting fluid contains highly volatile chemicals like ether. When sucked through a leak, it enriches the air-fuel mixture, causing the engine to temporarily speed up.
What are the risks of using ether-based starting fluid?
The primary risk is accidental ignition resulting in an engine bay fire, along with potential damage to rubber components if overused.
Are there safer alternatives to starting fluid for finding leaks?
Smoke machines are the safest and most effective method because they reveal leaks visually without introducing flammable chemicals.
Can water be used instead of starting fluid?
Yes, spraying a fine mist of water temporarily blocks the leak and causes the engine RPM to drop or stumble instead of rise.
What should I do after I locate the vacuum leak?
Replace the damaged hose, tighten the loose clamp, or install a new intake gasket to permanently resolve the issue.