How Do You Know When Rotors Need to Be Replaced 2026 Guide
Knowing how do you know when rotors need to be replaced can save your braking system from complete failure. Watch for physical warning signs like steering wheel vibrations, grinding noises, and visible rotor scoring.
You know your brake rotors need to be replaced when you feel a distinct steering wheel vibration during braking, hear a grinding metal-on-metal noise, or measure a rotor thickness that falls below the manufacturer safety limit stamped on the component. Catching these warning signs early prevents complete brake failure and protects your expensive caliper and pad assemblies from catastrophic damage on the road in 2026.
Ignoring worn rotors compromises your stopping distance and puts unnecessary stress on your entire braking system. While brake pads wear out predictably, knowing the exact tipping point for rotor replacement saves you from paying for unnecessary resurfacing or risking a dangerous loss of hydraulic friction when you need to stop suddenly.
Key Takeaways
- Vibrations or pulsing in the brake pedal indicate warped rotors.
- A grinding noise means pads are completely worn down, damaging the rotor surface.
- Deep grooves or scoring on the metal disc require immediate rotor replacement.
- Use a micrometer to check if rotor thickness has fallen below the safety limit.
- Thin rotors can overheat quickly, reducing overall braking effectiveness.
Warning Signs and Symptoms That Indicate Bad Rotors
Steering Wheel Vibration and Pedal Pulsation
When you press the brake pedal and feel a rapid pulsing sensation or a violent shake in your steering wheel, your rotors are likely warped or suffering from uneven thickness variation. As the brake pads clamp down on an uneven surface, the fluctuation transfers straight through the hydraulic system to your foot and hands. If this vibration only happens at high highway speeds, your front rotors have developed severe hot spots or lateral runout.
Unusual Grinding, Squealing, and Scraping Noises
Audible feedback is often the first indicator that your braking system requires immediate attention. High-pitched squealing usually points to worn brake pads, but a harsh grinding noise means your pads have completely disintegrated, and the steel backing plate is gouging directly into the rotor surface. Once a rotor develops deep physical grooves from metal-on-metal contact, resurfacing is no longer an option, and immediate replacement is mandatory.
- Pulsating brake pedal: Indicates warped rotors or uneven pad material transfer.
- Steering wheel shimmy: Usually points to warped front rotors shaking the front end under braking.
- Metallic scraping: Signals that the rotor face is being destroyed by worn-out components.
- Increased stopping distance: A glazed or deeply scored rotor cannot generate proper friction.
Master Brake Rotor Wear in 6 Simple Steps
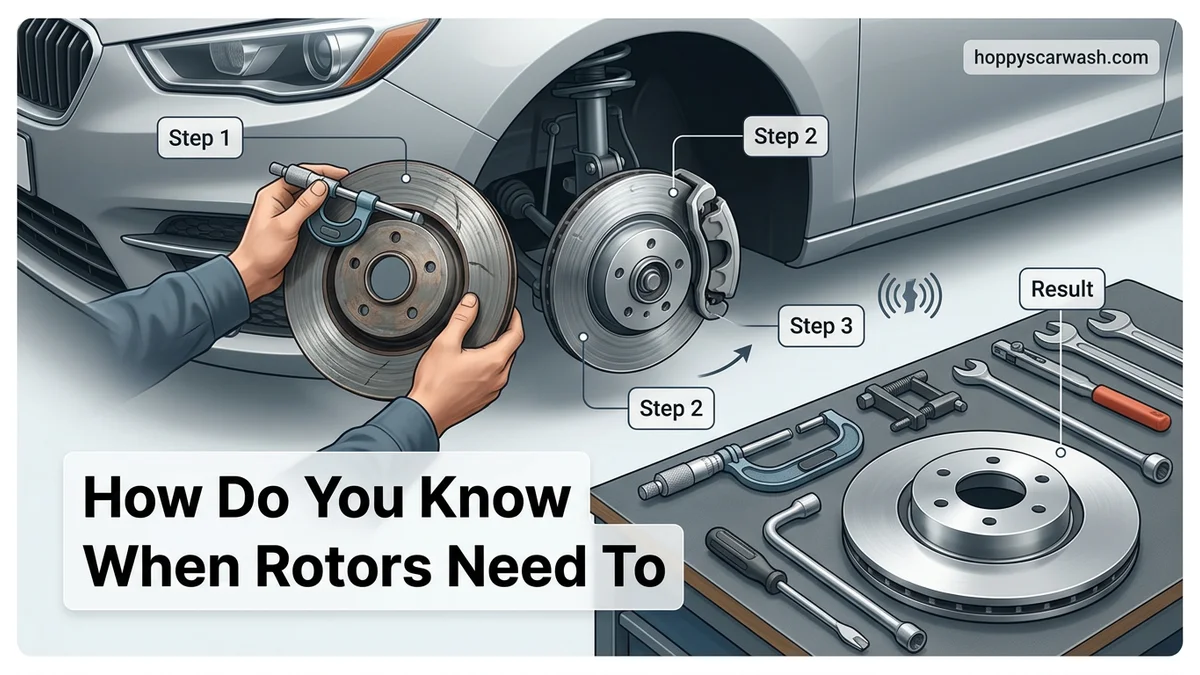
Knowing the exact moment your vehicle requires new brake rotors is vital for maintaining stopping power and keeping your daily commute safe. Over time, friction from brake pads constantly wears down the metal surface of your rotors, leading to reduced performance and potential hazards. This comprehensive walkthrough teaches you how to thoroughly inspect your braking system, identify the key warning signs of worn components, and determine whether you need a replacement or simply a resurfacing job. By following these professional assessment techniques, you will save money on unnecessary mechanic visits while ensuring your vehicle stops reliably every single time.
Step 1: Listen for Auditory Warning Cues
What you need: A quiet driving environment with the radio turned off and windows rolled up.
Instructions: Pay close attention to the sounds your car makes the moment you press the brake pedal. A high-pitched squealing or squeaking sound usually indicates that your brake pads are wearing thin, but a persistent grinding noise means the friction material is entirely gone, allowing the metal backing plate to claw directly into the rotor surface. If you hear a rhythmic scraping, clicking, or deep metallic growl while coming to a stop, your rotors have likely developed deep scoring marks and require immediate attention before total brake failure occurs.
Pro Tip: Do not ignore intermittent noises; if a sound happens only when turning or stopping downhill, it still points to rotor stress.
Step 2: Feel for Pedal Vibrations and Pulsation
What you need: Safe stretch of open road or empty parking lot to test braking speeds.
Instructions: Accelerate your vehicle to about 45 miles per hour and apply firm, steady pressure to the brake pedal as if coming to a normal stop. Notice how the pedal and steering wheel react. If you feel a distinct shuddering, vibration, or rapid pulsating sensation beneath your foot, your rotors are likely warped. Warping happens when uneven heat distribution causes the metal disc to develop high and low spots, which forces the brake pads to push back against the caliper with every rotation.
Pro Tip: Slight steering wheel shaking during braking usually points to front rotors being warped, while seat vibrations point to the rear.
Step 3: Conduct a Visual Inspection Through Wheel Spokes
What you need: A flashlight or smartphone light, and optionally a jack to remove the wheel for a better view.
Instructions: Shine your light directly through the gaps in your wheel rims to inspect the metal disc sitting behind the brake caliper. Look closely at the flat, silver surface of the rotor. Healthy rotors should look completely smooth and mirror-like. If you spot heavy vertical scoring, deep grooves, dark blue discoloration (caused by excessive heat), or visible cracks radiating outward from the center hub, the rotor is compromised and must be replaced immediately.
Pro Tip: Rust on the outer edge is normal due to weather exposure, but rust on the actual friction sweep area means the car has sat too long or pads are failing.
Step 4: Measure the Rotor Thickness with a Micrometer
What you need: A digital micrometer or specialized brake rotor caliper tool, safety glasses, and a tire iron.
Instructions: Safely lift your vehicle with a hydraulic jack, secure it with jack stands, and remove the wheel to expose the rotor. Locate the manufacturer’s minimum thickness specification, which is typically stamped directly onto the edge or hub of the rotor (usually measured in millimeters). Place your micrometer across the thickest part of the rotor sweep area to take a measurement. If your measurement falls at or below the stamped minimum threshold, the rotor is dangerously thin and lacks the structural integrity to handle heavy braking heat.
Pro Tip: Always measure in at least three different spots around the rotor circumference to check for uneven wear patterns.
Step 5: Check for Excessive Lateral Runout
What you need: A dial indicator magnetic base kit and basic hand tools.
Instructions: Mount a dial indicator magnetically to a stationary suspension component so the measuring tip rests perpendicular to the rotor face, roughly half an inch from the outer edge. Slowly and manually rotate the brake wheel hub. Watch the dial gauge needle fluctuate as the rotor spins. The total amount of movement (runout) should not exceed the vehicle manufacturer specification, which is typically around 0.002 inches. Excessive runout causes the brake pads to constantly slap against the rotor surface, creating pedal vibration and uneven pad wear.
Pro Tip: Clean any loose rust flakes off the rotor surface before setting up the dial indicator to ensure accurate measurements.
Step 6: Evaluate Brake Stopping Distance and Responsiveness
What you need: An open, dry stretch of road free from traffic.
Instructions: Test your vehicle’s overall stopping capability at low speeds. Notice if the car feels sluggish to respond when you press the pedal, or if you have to push the pedal much closer to the floorboards than usual to achieve braking action. Worn rotors paired with thin pads drastically reduce the friction coefficient of your braking system, resulting in significantly increased stopping distances. If your car takes longer to stop than it used to, your braking system is compromised.
Pro Tip: Never test stopping distances in wet or congested traffic conditions; always prioritize safety.
✅ Final Checklist
- Listened carefully for any grinding or squealing noises during stops
- Checked for pedal pulsation and steering wheel vibrations at highway speeds
- Visually inspected the rotor surface for deep grooves, cracks, and heavy scoring
- Measured rotor thickness against the manufacturer minimum specification stamped on the hub
- Tested overall vehicle stopping distance and pedal responsiveness
Important Notes:
- Never service your brakes without securing the vehicle on solid jack stands; relying solely on a hydraulic jack is extremely dangerous.
- Seek professional mechanic assistance if you encounter seized caliper bolts or stripped lug nuts during your inspection.
- Estimated time for a full rotor inspection is 30 to 60 minutes; professional replacement costs range from $150 to $400 per axle depending on your vehicle make and model.
How to Inspect Rotor Condition and Measure Thickness
Visual Inspection for Scoring and Cracking
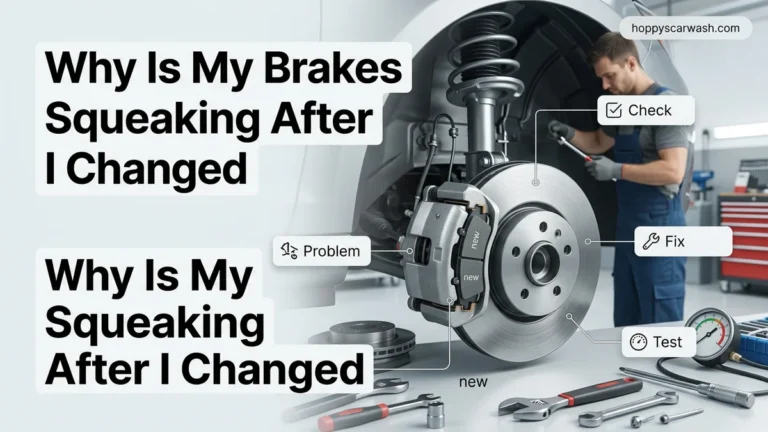
You can perform a quick visual check by looking through the spokes of your wheel, though removing the wheel gives you a complete view. Run your fingernail across the face of the rotor. If you feel deep grooves, ridges, or a sharp drop-off at the outer edge, the rotor is heavily worn. More dangerously, look for hairline thermal cracks radiating outward from the center hub toward the outer edge, which occur from extreme heat stress and require instant replacement.
Using a Micrometer to Check Minimum Thickness Specs
Every brake rotor has a minimum thickness specification—known as the discard limit—stamped directly onto the metal hub or outer edge by the manufacturer. Using a specialized micrometer, measure the thickness of the rotor face at several points avoiding the outer lip. If your measurement falls below this stamped threshold, or if machining the rotor would drop it below the limit, replacement is the only safe option for your vehicle in 2026.
- Visual check: Look for blue heat discoloration, heavy rust flaking, and thermal cracking.
- Fingernail test: Catching your nail in a groove deeper than one millimeter means the rotor is finished.
- Discard limit: Always compare your micrometer reading to the manufacturer stamping, never guess.
- Parallelism check: Measure thickness in at least four spots around the rotor to catch dangerous taper wear.
Step-by-Step Guide to Fixing and Replacing Worn Rotors
Replacing brake rotors is a standard mechanical procedure that restores stopping power and safety. Automotive experts from the Automotive Service Association recommend addressing worn rotors as soon as minimum thickness stamps are breached. Modern 2026 vehicle platforms often require specific electronic service modes before beginning mechanical disassembly.
Preparation and Lifting
- Park the vehicle on a flat, level surface and engage the parking brake firmly.
- Loosen the lug nuts on the target wheels using a breaker bar before lifting the vehicle.
- Raise the vehicle securely using an automotive-grade hydraulic floor jack and rated jack stands.
- Remove the lug nuts completely and take off the wheel assemblies to access the braking system.
Component Removal and Installation
- Remove the mounting bolts securing the brake caliper and hang it securely with a bungee cord to prevent tension on the brake line.
- Slide the old brake pads out of the caliper bracket and unbolt the bracket from the steering knuckle.
- Slide the old rotor off the wheel hub assembly, applying penetrant spray to the center hub ring if rust causes binding.
- Clean the new rotor thoroughly with brake cleaner to remove manufacturing protective oils before installation.
- Mount the new rotor onto the hub, reinstall the bracket, insert fresh brake pads, and bolt the caliper back into place.
What If It Still Doesn’t Work?
If brake vibrations or pulsing persist immediately after installing brand-new rotors, underlying mechanical issues require attention. According to automotive service data from 2026, unresolved brake shudder typically stems from secondary component faults rather than defective new parts.
- Check Wheel Hub Runout: A warped or debris-laden wheel hub will distort a brand-new flat rotor within miles. Measure hub face runout with a dial indicator, ensuring lateral play stays below 0.002 inches.
- Inspect Caliper Slide Pins: Seized or poorly lubricated slide pins cause uneven pad pressure and localized rotor heating. Clean and re-grease pins with high-temperature silicone brake lubricant.
- Perform Proper Bedding-In: New rotors and pads require a specific break-in procedure to transfer an even friction layer. Execute a series of moderate slowdowns from 45 mph to 10 mph without coming to a complete stop.
- Evaluate Suspension Components: Worn lower control arm bushings or failing tie rod ends can mimic warped rotor vibrations during deceleration. Professional diagnostic inspections at certified shops typically cost between $100 and $150 if troubleshooting fails.
Conclusion
Recognizing the early warning signs of worn brake rotors—such as steering wheel vibration, grinding noises, or visible scoring—prevents catastrophic braking failures and expensive secondary damage. Replacing compromised rotors restores immediate stopping confidence and vehicle safety. According to verified research and expert sources from leading automotive safety associations, routine brake inspections should be performed at every tire rotation interval. Schedule a professional brake evaluation today if your vehicle exhibits any stopping irregularities to ensure optimal road performance.
❓ Frequently Asked Questions
What are the primary physical symptoms of bad brake rotors?
The most common symptoms include a vibrating steering wheel when stopping, a pulsing brake pedal, high-pitched squealing, and a harsh grinding noise.
How can you visually inspect brake rotors for damage?
Remove the wheel and look for deep grooves, scoring, rust pitting, discoloration from overheating, and a heavy lip forming on the outer edge.
What is the minimum thickness specification for brake rotors?
The minimum safe thickness is usually stamped directly on the rotor hat or hub. You must use a micrometer to measure the thinnest part of the friction surface against this specification.
Should you replace brake pads when changing rotors?
Yes, it is standard industry practice to install new brake pads whenever you replace rotors to ensure even wear and optimal stopping power.
What causes brake rotors to warp prematurely?
Warping is typically caused by extreme thermal stress from heavy braking, stuck brake calipers, or uneven wheel lug nut torque.
Can bad rotors cause your car to pull to one side?
Yes, a stuck caliper combined with a severely damaged or uneven rotor can cause the vehicle to pull strongly to the left or right during braking.