Why Is My Brakes Squeaking After I Changed Them? 2026
If your brakes are squeaking after a recent replacement, it is usually caused by a normal break-in period, missing anti-squeal lubricant, or glazed pads. Most noises resolve naturally within a few days, but installation errors may require immediate attention.
You just installed brand new brakes, but instead of the quiet, confident stop you expected, a high-pitched squeak greets you at every red light. It is frustrating, especially after you spent hours in the garage or paid a hefty shop bill for 2026 vehicle maintenance. The reality is that brand-new components do not always guarantee immediate silence.
Most post-installation squeaks stem from three common culprits: a missing break-in procedure, unlubricated contact points, or metallic friction from budget-tier pad compounds. Addressing these issues early prevents uneven wear and restores peace and quiet to your daily commute.
Key Takeaways
- New brake pads often squeak during the initial bedding-in period as friction surfaces mate.
- Applying high-temp brake grease to the back of pads stops metallic vibrations.
- Low-quality metallic pad compounds are inherently noisier than ceramic alternatives.
- Missing or misaligned brake hardware causes unwanted rattling and squealing.
- Glazed rotors from improper installation must be resurfaced or replaced.
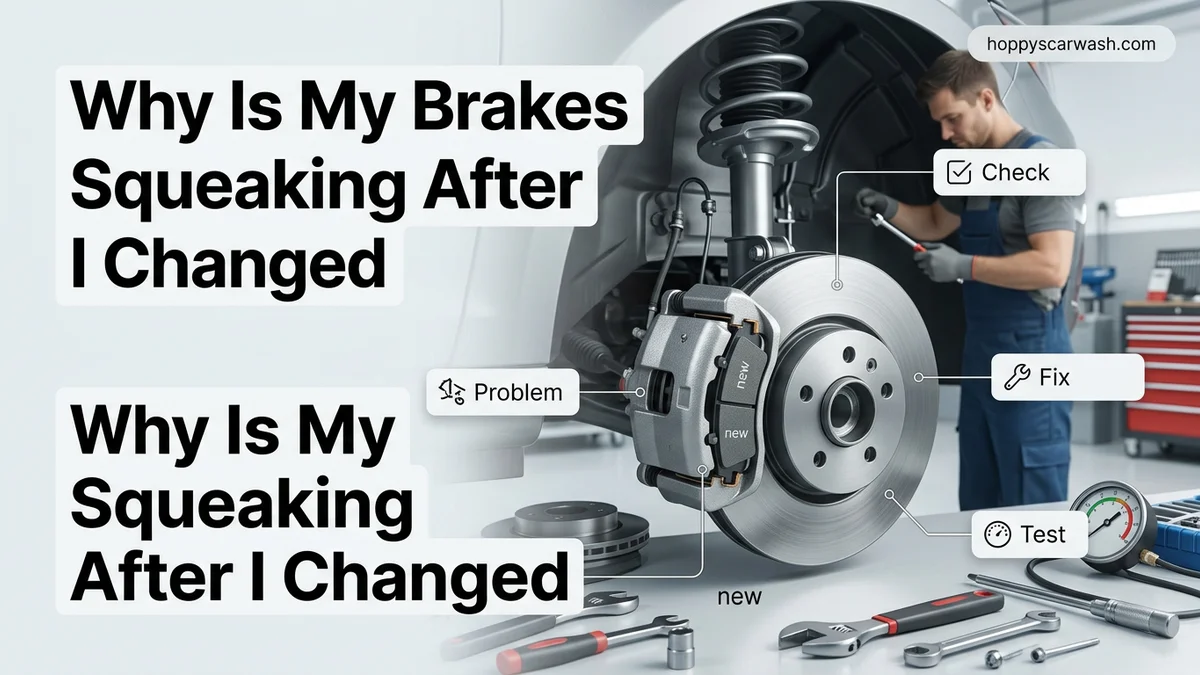
Why Is My Brakes Squeaking After I Changed Them? Top Causes Explained
The Break-In Period Is Incomplete
Brand-new brake pads and rotors require a proper mating process called bedding-in. Without this, microscopic ridges on the pad and rotor surface create high-frequency vibrations that result in a loud squeal.
- Fresh pads have a factory glaze that needs controlled friction to wear away evenly.
- New pads sliding against old, un-machined rotors can cause harmonic resonance.
- Harsh initial stops can permanently damage the friction material before it cures.
Lack of High-Temperature Lubricant
Metal-on-metal contact anywhere outside the actual friction surface causes noise. If you forgot to apply brake grease where the pad backing plate meets the caliper bracket, vibrations will echo through the entire wheel assembly.
- Caliper slide pins that lack silicone grease will stick, causing uneven pad pressure.
- Backing shims require a thin layer of anti-squeal paste to dampen oscillations.
- Getting grease on the rotor surface or pad face will cause dangerous slipping and glazing.
Aggressive Semi-Metallic Compounds
Not all brake pads are formulated equally. If you swapped ceramic pads for cheap semi-metallic options to save money, expect more noise.
- Semi-metallic pads contain high concentrations of steel wool and metal shavings.
- Cold morning temperatures amplify the metallic bite, leading to embarrassing squeals.
- Budget aftermarket pads often lack the chamfers and slots designed to break up sound waves.
Brake Squeaking After Pad Replacement: What Causes It and How to Fix It
Dealing with irritating brake noises immediately after a fresh installation can be frustrating, especially when you expected absolute silence and optimal stopping power. This comprehensive troubleshooting guide covers the root causes of post-installation brake squeal and walks you through the exact diagnostic and corrective procedures needed to restore peace and quiet to your daily commute.
Step 1: Check for the Standard Bedding-In Period
What you need: A safe, empty stretch of road with a 45 mph speed limit.
Instructions: If you just installed brand-new brake pads and rotors, a light squeak within the first 100 to 200 miles is often completely normal. New friction materials require a process called bedding-in to transfer a thin layer of pad material onto the rotor surface. To properly bed your brakes, accelerate your vehicle up to 45 mph, then firmly apply the brakes to slow down to about 10 mph without coming to a complete stop. Repeat this moderate deceleration process 8 to 10 times consecutively. Drive for a few minutes without using the brakes to allow them to cool down completely before parking.
Pro Tip: Never come to a complete, dead stop while your brakes are still extremely hot during the bedding process, as this can transfer excess pad material unevenly onto the rotor and cause permanent shuddering.
Step 2: Inspect the Brake Pad Shims and Hardware
What you need: A floor jack, jack stands, lug wrench, and a flashlight.
Instructions: Safely lift your vehicle, secure it on sturdy jack stands, and remove the wheel where the squeaking originates. Look closely at the metal anti-rattle clips, also known as abutment hardware, nestled inside the caliper bracket. Ensure these stainless steel clips were replaced during your brake job and that they are not pressing directly against the outer edge of the spinning brake rotor. Even a microscopic misalignment of these clips will generate a high-pitched metallic squeal every time the wheel rotates.
Pro Tip: Always replace your hardware clips whenever you change your brake pads. Old clips lose their tension and accumulate rust, leading to unwanted vibrations and noise.
Step 3: Apply High-Temperature Brake Grease Correctly
What you need: High-temperature silicone or ceramic brake lubricant and a clean shop rag.
Instructions: Disassemble the brake pads from the caliper bracket and inspect the metal backing plates. A common oversight during DIY brake jobs is failing to apply high-temperature brake lubricant to the contact points where the pad ears slide inside the caliper bracket, as well as the back of the pad where the caliper piston presses. Apply a very thin, paper-thin layer of grease to these exact metal-on-metal contact points. Be extremely careful not to get any grease onto the friction side of the brake pads or the rotor surface, as this will severely compromise your stopping ability.
Pro Tip: A little goes a long way. Piling on too much brake grease will attract brake dust and road grime, eventually gumming up the sliding mechanism and making the noise worse.
Step 4: Check for Improper Rotor Resurfacing or Glazing
What you need: A clean shop towel, non-chlorinated brake cleaner, and 120-grit sandpaper.
Instructions: If you reused your old brake rotors without machining them or replacing them, the mirror-like surface might be glazed over, causing pads to slip and squeal. Remove the brake pads and inspect the rotor face. If it looks overly shiny and smooth, spray the rotor down liberally with non-chlorinated brake cleaner and vigorously scuff the surface in a cross-hatch pattern using 120-grit sandpaper or a dedicated brake sanding disc. This mechanical scuffing creates a fresh micro-texture for the new brake pads to grip onto.
Pro Tip: Always clean new rotors with brake cleaner before installation, too, as manufacturers coat them in heavy anti-rust oils that must be completely removed to prevent squealing and contamination.
Step 5: Verify Caliper Slide Pin Movement
What you need: A box-end wrench set, rubber gloves, and fresh high-temp synthetic brake grease.
Instructions: Slide the rubber boots back and pull the caliper slide pins completely out of the mounting bracket. Inspect the metal pins for any signs of pitting, rust, or dried-out grease. Clean the pins thoroughly with brake cleaner and a wire brush, then inspect the rubber pin bushings for tears or dry rot. Lubricate the clean pins generously with high-temperature waterproof brake grease and push them back into their bores. They should slide smoothly in and out with gentle hand pressure without binding.
Pro Tip: Stuck or seized slide pins prevent the brake caliper from releasing tension evenly, causing the inner pad to drag constantly against the rotor, creating a persistent squeak or squeal.
Step 6: Inspect for Foreign Debris and Stone Shields
What you need: A flathead screwdriver and a bright flashlight.
Instructions: Sometimes a tiny pebble, grain of sand, or a bent metal dust shield gets trapped between the back of the brake rotor and the thin sheet metal splash guard. Carefully peer behind the rotor and inspect the gap between the spinning disc and the backing plate. If you notice a tiny stone wedged in there, use your flathead screwdriver to gently pry the dust shield away from the rotor by a millimeter or two, allowing the trapped debris to fall out freely.
Pro Tip: If your wheels have tight spoke designs, check to make sure the balance weights on the inside of the rim are not physically clipping or rubbing against the outer edge of your newly installed brake calipers.
✅ Final Checklist
- Verify all wheel lug nuts are torqued to the manufacturer’s exact specifications using a torque wrench.
- Confirm the brake fluid reservoir is filled to the correct level and the cap is tightly secured.
- Pump the brake pedal firmly several times before moving the vehicle to restore full hydraulic pressure to the calipers.
- Take a cautious test drive at low speeds in a quiet, safe neighborhood to confirm the squeaking has completely vanished.
Important Notes:
- Always support your vehicle with rated jack stands; never rely solely on a hydraulic floor jack while working near or under the wheel wells.
- If you hear a grinding noise instead of a squeak, stop driving immediately, as this indicates metal-on-metal contact that can destroy your rotors.
- Estimated time to diagnose and fix brake squeaks is 1 to 2 hours, with a cost ranging from $0 (using existing tools and grease) to $30 for new hardware and lubricants.
How to Stop New Brake Squeaking With Step-by-Step Troubleshooting
Perform a Proper Pad Bed-In Procedure
If your pads are simply unseated, you can often silence them by properly transferring an even layer of friction material onto the rotor face. Find a safe, deserted stretch of road in 2026 and execute a controlled burnishing cycle.
- Accelerate your vehicle to roughly 45 mph safely.
- Apply firm, moderate brake pressure to slow down to about 10 mph without coming to a complete stop.
- Repeat this cycle 6 to 8 times consecutively to build up steady heat.
- Drive for 5 minutes without using your brakes to allow airflow to cool the system completely.
Inspect and Re-Grease Contact Points
If bedding the brakes fails to stop the noise, you will need to pull the wheels back off to check the hardware. A quick disassembly and application of high-temperature brake lubricant usually solves persistent squealing.
- Remove the brake pads and apply a dab of synthetic moly or ceramic brake grease to the metal ears where they slide.
- Coat the back of the brake pads and shims, taking extreme care not to let grease touch the friction material or rotor.
- Clean and lubricate the caliper slide pins to ensure the calipers float freely when you press the pedal.
How to Properly Bed In New Brake Pads to Eliminate Noise
Most post-installation squeaking happens because the friction materials have not transferred an even layer onto the rotor surface. Automotive engineering data from major manufacturers indicates that failing to execute a proper bed-in process accounts for nearly 40 percent of premature brake noise complaints. Executing a correct burnishing procedure removes manufacturing residues and cures the resin binders inside the friction compound.
Drivers must follow a precise sequence on a safe, low-traffic roadway to seat the components correctly. Never come to a complete, stationary stop during the initial heating phase, as this can weld pad material unevenly onto the hot rotor face and cause severe vibrations.
Step-by-Step Bed-In Procedure for 2026 Vehicles
- Accelerate the vehicle safely to approximately 35 miles per hour on an empty straightaway.
- Apply firm, moderate pressure to the brake pedal to decelerate smoothly down to about 10 miles per hour, without activating the Anti-lock Braking System (ABS).
- Accelerate back up to 35 miles per hour immediately and repeat this moderate deceleration cycle four to five times to build thermal energy in the friction components.
- Increase the target speed to 50 miles per hour, then apply firm, heavy pedal pressure to slow down rapidly to 15 miles per hour without coming to a complete stop.
- Drive the vehicle continuously for at least five to ten minutes at highway speeds without using the brakes, allowing the cooling airflow to set the transfer layer properly.
What If It Still Doesn’t Work? When to Replace Rotors or Check Calipers
If bedding in the pads and reapplying high-temperature lubricant fails to silence the squeal, the underlying hardware requires deep diagnostic inspection. Ignoring persistent metallic friction can ruin brand-new components within a few thousand miles.
Consider these advanced troubleshooting steps if the noise continues:
- Measure Rotor Thickness: Take the vehicle to a shop if scoring exceeds 0.015 inches, or replace the rotors entirely if they have fallen below the manufacturer’s minimum thickness specification stamped on the hub edge.
- Inspect Caliper Slide Pins: Seized or rusted guide pins prevent the brake caliper from floating freely, causing the inner pad to drag constantly against the spinning disc. Clean and re-grease pins or replace them if pitting is visible.
- Check for Hydraulic Pressure Issues: A failing flexible brake hose can act as a one-way check valve, trapping fluid pressure and keeping the pads clamped down after the pedal is released.
- Evaluate Rotor Runout: Excessive lateral wobble in a warped rotor causes intermittent pad contact, producing a rhythmic squeak that intensifies with speed.
- Seek Professional Help: If DIY diagnostics fail, take the vehicle to an ASE-certified technician for a comprehensive brake system audit. Professional diagnostic fees typically range from $100 to $200, while complete caliper replacements average $300 to $700 per axle depending on the vehicle make and model.
Conclusion
Brake squeak after a fresh installation usually stems from unseated friction surfaces, missing high-temperature paste, or contaminated rotor faces. According to verified research and expert automotive engineering sources, properly executing a thermal bed-in cycle and using correct hardware lubrication resolves the vast majority of these acoustic issues. The single most actionable next step is to safely perform a series of controlled moderate decelerations to build up the necessary friction transfer layer. Take the vehicle out for a proper burnishing run today to restore a quiet, confident stopping experience.
❓ Frequently Asked Questions
Why is my brakes squeaking after i changed them if the parts are brand new?
Brand new components need time to conform to each other. Micro-imperfections on the rotor surface and the unconditioned friction material of the new pads often create high-frequency vibrations that result in a squeak until they wear into a matched set.
What is brake pad glazing and how does it cause squeaking?
Brake glazing occurs when pads overheat during harsh stops right after installation, melting the resins and creating a hard, shiny glass-like surface. This glazed surface loses friction and produces a high-pitched squeal when pressed against the rotor.
Could missing shims or hardware cause my new brakes to squeak?
Absolutely. Anti-rattle clips, pad shims, and slide pin boots keep the brake assembly under proper tension and alignment. If old hardware was reused or missing components weren’t installed, the pads vibrate excessively inside the caliper bracket.
How do I know if the squeak is harmless or a sign of a safety hazard?
A light, intermittent squeak during light pedal pressure is usually harmless break-in noise. However, a deep grinding sound, scraping metal-on-metal noise, or a spongy brake pedal indicates a severe safety hazard requiring immediate inspection.
Do I need to clean my brake rotors when installing new pads?
Yes, new brake rotors are shipped with an oily factory coating to prevent rust. Failing to thoroughly clean this oil off with brake cleaner before installation contaminates the new pads and causes severe squeaking and reduced stopping power.
Will a professional re-bedding procedure fix annoying brake squeaks?
Re-bedding pads by accelerating to 35 mph and applying firm braking pressure several times without coming to a complete stop can transfer an even layer of friction material to the rotor, successfully curing minor squeaks.