Can I Change My Oil Without Changing the Filter 2026 Guide
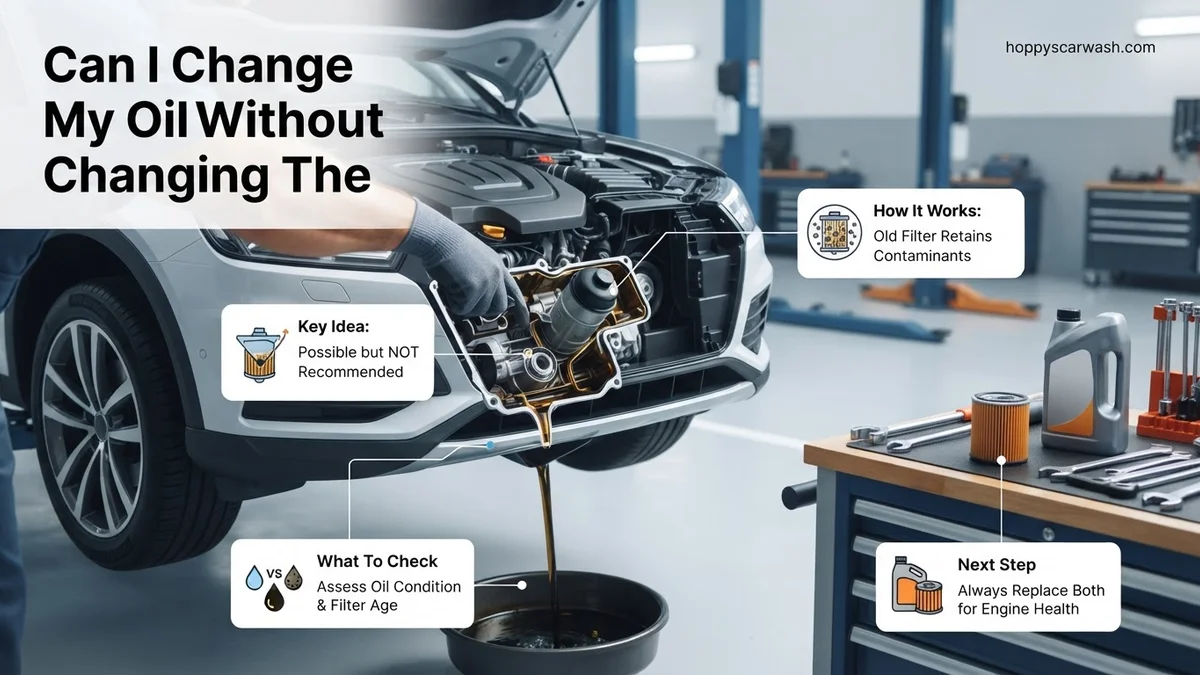
Technically, yes, you can drain and replace your engine oil without changing the filter, but it is strongly discouraged by mechanics. Doing so leaves up to a quart of dirty, contaminated oil trapped in the old filter, which immediately pollutes your fresh oil and reduces engine protection.
Yes, you can physically change your engine oil without changing the filter, but automotive experts strongly advise against it. Skipping the filter replacement leaves a cup or more of dirty, sludge-filled oil trapped inside the housing, which immediately contaminates your fresh, expensive oil the moment you start the engine.
As vehicle maintenance standards evolve in 2026, modern engines operate under tighter tolerances and higher operating pressures than ever before. Reusing an old filter is a false economy that undercuts the entire purpose of an oil change. Let’s break down the mechanics of why this shortcut compromises your engine’s health and how the process actually works.
Key Takeaways
- Reusing an old filter leaves dirty oil inside your engine.
- New oil becomes contaminated immediately upon starting the car.
- Always replace both components during standard oil change intervals.
- Skipping the filter saves minimal money but risks long-term engine wear.
- Always replace the filter if you are changing oil types or viscosities.
Why Reusing Your Old Oil Filter Contaminates Fresh Engine Oil
Trapped Debris and Dirty Oil Volume
Your oil filter’s sole job is to capture microscopic metal shavings, carbon buildup, and combustion byproducts. By the time your oil change interval arrives, that filter media is packed with contaminants. When you drain the oil pan, roughly 10 to 20 percent of your total oil volume stays trapped inside the filter and its housing. If you screw that old filter back onto a fresh batch of oil, that stagnant, contaminated fluid mixes instantly with your clean fluid. You are essentially pouring fresh oil through a dirty rag.
The Bypass Valve Risk
Modern oil filters feature an internal bypass valve designed to open if the filter becomes completely clogged. This prevents your engine from starving of oil. However, an old, heavily loaded filter reaches this bypass threshold much faster. When it opens, unfiltered oil circulates freely through your engine bearings and cylinder walls. Keeping an old filter in place for a second oil change cycle drastically increases the likelihood that your filter will go into bypass mode long before your next 2026 service interval.
- An old filter holds approximately 8 to 16 ounces of dirty oil depending on engine size.
- Clogged filter pleats restrict proper oil flow and reduce overall oil pressure.
- Fresh detergent additives in new oil will loosen trapped deposits in an old filter, causing them to break free and circulate.
Master Changing Your Oil Without Changing the Filter in 7 Simple Steps
Welcome to your definitive guide on whether you can change your car engine oil without swapping out the oil filter, and how to safely execute the process if you choose to do so. While standard automotive practice strongly recommends replacing both simultaneously, certain emergency scenarios, tight budget constraints, or very low-mileage filter intervals might force you to drain the old fluid while leaving the existing canister in place. This walkthrough covers the exact protocol, necessary precautions, and critical mechanical insights to help you perform this maintenance shortcut without damaging your vehicle’s engine. Follow along carefully to protect your investment while getting fresh lubricants circulating through your motor.
Step 1: Understand the Risks and Evaluate Your Situation
What you need: Vehicle owner’s manual, flashlight, and a clear understanding of your vehicle’s current mileage and oil condition.
Instructions: Before grabbing a wrench, you must determine if skipping the filter change is actually safe for your specific vehicle. Inspect your maintenance logs to see how long the current filter has been installed. If the filter has been on the car for less than 5,000 miles or one oil change cycle, leaving it in place is generally acceptable. However, if the filter is old, clogged, or you are switching from conventional to synthetic oil, you should never skip the filter replacement. A dirty filter traps harmful metal shavings, carbon deposits, and sludge. Leaving an exhausted filter means your fresh, expensive oil will immediately mix with trapped contaminants, severely degrading its lubricating properties and lifespan.
Pro Tip: Never skip a filter change twice in a row. Doing so guarantees premature engine wear and potential oil starvation.
Step 2: Prepare Your Workspace and Gather Tools
What you need: Hydraulic floor jack, heavy-duty jack stands, wheel chocks, oil catch pan, funnel, new engine oil matching your manufacturer specification, strap wrench, and clean shop rags.
Instructions: Park your vehicle on a completely flat, level surface such as a concrete driveway or garage floor. Engage the emergency parking brake firmly. Place wheel chocks securely behind and in front of the tires that will remain on the ground. Slide your hydraulic floor jack under the manufacturer-approved front lift point and elevate the vehicle safely. Position heavy-duty jack stands underneath the designated pinch welds or frame rails, then slowly lower the car onto the stands. Never rely solely on a hydraulic jack to hold a vehicle up while you work underneath it. Lay out your oil catch pan, rags, and fresh oil bottles within arm’s reach.
Pro Tip: Always run the engine for three to five minutes before starting to warm up the oil, making it less viscous so it drains faster and carries out more suspended dirt.
Step 3: Locate and Remove the Oil Drain Plug
What you need: Appropriate metric or standard socket wrench, oil catch pan, and protective mechanic gloves.
Instructions: Slide underneath the vehicle with your flashlight and locate the oil pan, which sits at the very bottom of the engine block. Identify the oil drain plug, typically a hexagonal bolt protruding from the bottom or side of the oil pan. Position your oil catch pan directly underneath the drain plug, keeping in mind that the hot stream of oil will initially arc outward before falling straight down. Using your socket wrench, turn the drain plug counter-clockwise to loosen it. Once it is loose enough, carefully unscrew the bolt by hand the final few turns, quickly pulling your fingers away as the plug releases to avoid getting hot oil on your skin.
Pro Tip: Push inward slightly as you unscrew the final threads of the drain plug to keep oil from leaking past your fingers until you intentionally pull the bolt completely clear.
Step 4: Drain the Old Oil Completely
What you need: Oil catch pan, clean shop rags, and patience.
Instructions: Allow the old, dark oil to drain completely out of the oil pan into your collection container. Because you are not changing the filter, keep in mind that roughly a quarter to a half quart of old, dirty oil remains trapped inside the housing and filter media. Let the stream slow down to a mere drip, which usually takes between 10 to 15 minutes. While the oil is draining, use your shop rag to clean the metal surrounding the drain plug opening on the oil pan. Inspect the drain plug threads and the crush washer or rubber gasket attached to it. If the gasket is flattened, cracked, or worn out, replace it immediately to prevent future slow leaks.
Pro Tip: Do not touch the exhaust manifold or catalytic converter while under the car, as these components stay dangerously hot for hours after the engine has been turned off.
Step 5: Reinstall the Drain Plug Correctly
What you need: Torque wrench, socket, and the cleaned oil drain plug with a healthy gasket.
Instructions: Once the oil has finished draining to an occasional drop, take your clean shop rag and wipe the perimeter of the drain hole clean of any residual grime. Take your drain plug and thread it into the oil pan by hand in a clockwise direction. Turning it by hand first is critical to ensure you do not cross-thread the delicate aluminum threads of the oil pan. Once finger-tight, grab your torque wrench fitted with the correct socket. Tighten the drain plug to your vehicle manufacturer’s specific torque specification—typically between 15 to 25 foot-pounds for standard passenger cars. Over-tightening can strip the oil pan threads, leading to a costly repair.
Pro Tip: Never use an air impact gun to tighten an oil drain plug; always use a hand-operated ratchet or torque wrench for precise control.
Step 6: Add Fresh Oil to the Engine
What you need: Clean funnel, specified volume and viscosity of fresh motor oil (e.g., 5W-30 synthetic), and your vehicle owner’s manual.
Instructions: Move out from under the car, remove your jack stands, and lower the vehicle back down to level ground. Open the hood and remove the engine oil filler cap, placing it somewhere prominent like on top of the engine latch so you remember not to close the hood without it. Insert your clean funnel firmly into the oil filler hole. Consult your owner’s manual to find the exact oil capacity without a filter change, as you will need slightly less oil than a full fluid-and-filter service. Pour in approximately 80 percent of the required fresh oil slowly, giving it time to drain down into the pan. Check your dipstick periodically to gauge the fluid level accurately.
Pro Tip: Because some old oil remains trapped in the old filter, always pour in slightly less than the standard total capacity first, then top it off after running the engine.
Step 7: Test Run, Check Levels, and Clean Up
What you need: Paper towels, dipstick, and old oil disposal container.
Instructions: Replace the oil filler cap securely and wipe away any spills around the engine bay. Start the vehicle’s engine and let it idle. Do not rev the engine. Watch the dashboard instrument cluster to ensure the oil pressure warning light turns off within three to five seconds of starting. While the engine idles, slide back under the front bumper with your flashlight and inspect the drain plug area to verify there are no active leaks. Let the engine run for two minutes, then shut it off. Wait three minutes for the oil to settle back down into the pan, pull out the dipstick, wipe it clean, reinsert it, and pull it out again to verify the oil level sits perfectly between the low and full marks.
Pro Tip: Pour your old used motor oil into an empty jug and take it to a local auto parts store or recycling center for safe, eco-friendly disposal.
✅ Final Checklist
- Oil drain plug is threaded correctly and torqued to exact manufacturer specifications.
- Fresh oil is filled to the correct dipstick level (accounting for the old oil remaining in the filter).
- Engine oil pressure warning light extinguishes immediately upon startup.
- No oil leaks are visible around the drain plug or the old oil filter when inspected with a flashlight.
- Used oil and contaminated rags are safely stored for proper recycling.
Important Notes:
- Always wear safety glasses and gloves, as hot motor oil can cause severe skin burns and eye irritation.
- If you notice metal flakes or debris in your drained oil, discontinue driving and consult a professional mechanic immediately.
- Estimated time for this process is 30 to 45 minutes, with a cost ranging from $25 to $60 depending on the price of fresh oil.
How to Change Your Oil Filter Correctly Step-by-Step
Preparation and Removal
Replacing your oil filter adds only about five minutes to your routine oil change, making the shortcut completely unnecessary. Once you drain the old oil from your engine pan, locate the filter. Spin-on filters require a simple filter wrench to loosen counter-clockwise, while cartridge-style filters found on many modern 2026 vehicles require removing a plastic housing cap. Keep a catch pan positioned directly underneath, because residual oil will spill out as soon as the seal breaks.
Proper Installation and Sealing
Before installing the new filter, take a small amount of fresh engine oil on your finger and smear it lightly across the rubber gasket. This ensures a proper seal and prevents the gasket from sticking or tearing during your next oil change. Spin the new filter on by hand until you feel the gasket make firm contact with the mounting pad, then turn it an additional three-quarters to one full turn. Never use a wrench to tighten a new filter, as over-tightening crushes the gasket and causes catastrophic leaks.
- Locate the oil filter and position your drain pan underneath.
- Remove the old filter and check that the old rubber O-ring came off with it.
- Lubricate the new filter gasket with clean engine oil.
- Screw the new filter on hand-tight to prevent leaks and thread damage.
Rare Scenarios Where Skipping the Filter is Temporarily Tolerated
While the automotive consensus strongly advises against reusing an oil filter, specific emergency scenarios exist where the practice is temporarily tolerated by mechanical experts. Knowing when this applies prevents catastrophic engine failure during unusual roadside dilemmas.
Immediate Fluid Emergencies
If a vehicle suffers a severe oil leak on a remote highway in 2026, dropping the oil to refill a completely dry system takes absolute priority over filter replacement. According to data from the Society of Automotive Engineers (SAE), running an engine with zero lubrication destroys critical bearings in less than sixty seconds. Under these extreme conditions, pouring fresh oil into the crankcase without a filter change is a viable temporary measure to limp the vehicle to a safe service station.
Mid-Interval Oil Flushes
Another rare exception occurs during specialized internal engine flushes. Technicians occasionally run a cheap, short-cycle mineral oil through a badly sludged engine for fifteen minutes to clean internal galleries before draining it immediately. Because this flushing oil runs for such a brief window and captures heavy debris, mechanics sometimes retain the old filter for the brief flush phase, then install a brand-new filter alongside the final, high-grade synthetic fill. However, mainstream vehicle manufacturers caution that even during flushes, trapping particulate matter in a dirty filter can restrict fresh flow.
What to Do If Your Oil Pressure Drops After Maintenance
Performing an oil change without replacing the filter frequently leads to unexpected warning lights or pressure drops. If dashboard diagnostics indicate abnormal oil pressure shortly after service, immediate intervention is required to prevent permanent engine damage.
Immediate Troubleshooting Steps
- Turn off the engine immediately and park the vehicle on a level surface to check the dipstick oil level.
- Inspect the exterior of the oil filter housing for active leaks, weeping seals, or loose threading.
- Verify that the correct oil viscosity was installed, as improper grades can alter operational pressure thresholds.
- Remove the existing filter to inspect the internal pleats for severe debris blockage or collapsed media.
- Install a brand-new, OEM-specified filter and top off any lost fluids before restarting the motor.
What If It Still Doesn’t Work?
If replacing the oil filter fails to resolve low oil pressure or unusual engine noises, deeper mechanical issues require professional intervention. Persistent pressure drops usually indicate a failing oil pump, worn main bearings, or a clogged internal pickup tube.
- Disconnect the battery and refrain from starting the vehicle to avoid scoring cylinder walls or seizing the crankshaft.
- Have the vehicle towed to a certified automotive repair facility for a manual mechanical pressure gauge test.
- Ask technicians to inspect the oil pressure sending unit and internal oil pump bypass valve for mechanical failure.
- Anticipate professional labor costs ranging from $150 to $600 depending on whether the oil pump or internal sump screen requires replacement.
Conclusion
Skipping a filter replacement during an oil change compromises engine longevity to save a trivial amount of money and time. According to verified research and expert sources from leading automotive lubrication councils, pairing fresh oil with a spent filter immediately contaminates the new fluid and accelerates mechanical wear. The definitive next step is to always replace the oil filter during every scheduled maintenance interval to protect vital engine components. Prioritize long-term reliability by utilizing OEM-approved filters every time you service your vehicle in 2026.
❓ Frequently Asked Questions
What happens if I change my oil and not the filter?
When you put fresh oil into an engine with an old filter, the trapped sludge, metal shavings, and carbon deposits inside the filter mix with the new oil. This instantly degrades the quality and lubricating properties of your fresh fluid.
How often should an oil filter actually be changed?
An oil filter should be replaced every single time you change your motor oil, typically every 3,000 to 7,500 miles depending on your vehicle and oil type.
Is there any situation where skipping a filter change is acceptable?
The only acceptable scenario is during a temporary engine flush procedure where you run cheap oil through the motor for a few minutes just to clean out debris before draining it again.
Does changing the oil filter take a long time?
No, removing and replacing an oil filter usually adds only about five minutes to a standard DIY oil change procedure once the oil pan is drained.
Will reusing an old filter void my car’s warranty?
Yes, failing to follow manufacturer maintenance schedules—which explicitly require replacing the oil filter with every oil change—can potentially void your powertrain warranty.
What tools do I need to change my oil filter?
Depending on the vehicle layout, you may need an oil filter wrench, a catch pan, clean rags, and a fresh replacement filter matching your specific engine make and model.