How to Clear Maintenance Light on Toyota Corolla 2026
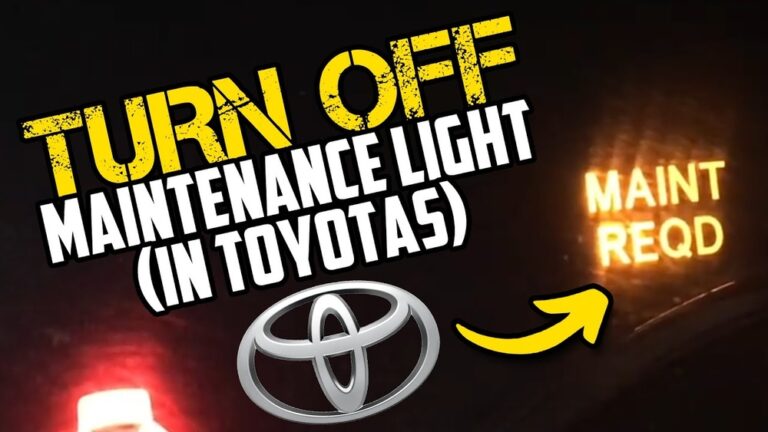
The Maintenance Required light on a Toyota Corolla is a simple mileage-based reminder for routine service like oil changes, not an engine warning. You can easily clear this light yourself using the ignition switch and dashboard button sequence tailored to your specific model year.
Clearing the maintenance required light on your Toyota Corolla takes less than two minutes using the buttons on your steering wheel or the instrument cluster. Whether you drive a classic model or the latest 2026 release, resetting this dashboard reminder is a quick process that does not require any special tools or an OBD-II scanner.
That annoying amber or flashing light simply means your vehicle has crossed the factory-set mileage threshold since its last service interval. Once you finish your routine oil change or tire rotation, you must manually reset the system so your Corolla knows to start tracking the mileage interval over again for 2026.
Key Takeaways
- The maintenance light triggers every 5,000 miles based on distance traveled.
- Resetting the light does not fix actual mechanical or fluid issues.
- Modern Corollas use the multi-information steering wheel display for resetting.
- Older models require turning the ignition key while holding the trip meter button.
- Always verify your vehicle’s oil was actually changed before clearing the alert.
Why the Maintenance Required Light Turns On in Your Toyota Corolla
Understanding the Mileage Trigger
Your Toyota Corolla relies on a simple internal mileage counter rather than an intelligent sensor analyzing your actual oil quality. Every 5,000 miles, the computer triggers the Maintenance Required (MAINT REQD) or Oil Maintenance light as a standard reminder for tire rotations and oil changes. When you reach 4,500 miles after your last reset, you will typically see a warning message pop up on your dashboard. Ignoring this light will not harm your car’s engine, but it will obstruct your view of important driving data until you finally clear it.

Distinguishing Dashboard Display Types
The method you use to clear the light depends entirely on your Corolla generation and its specific instrument cluster:
- Digital Multi-Information Displays: Found on modern models (2014 through 2026), these use steering wheel directional pad buttons to navigate through on-screen menus.
- Traditional Analog Odometer Screens: Common in older generations (2009 to 2013), these rely on physical trip meter stems poking directly out of the plastic instrument panel glass.
Master Clear Maintenance Light on Toyota Corolla in 6 Simple Steps
Seeing that stubborn maintenance reminder pop up on your Toyota Corolla dashboard can be slightly annoying, especially if you just finished changing your oil and rotating your tires. While this light is simply a mileage-based reminder designed to keep you on schedule with routine upkeep, it does not turn itself off automatically. Fortunately, resetting it at home requires no special mechanic tools or diagnostic scanners. Whether your Corolla features a traditional physical odometer button or a modern digital multi-information display steering wheel control, this comprehensive walkthrough will guide you through the exact process to wipe the slate clean and restore your dashboard to normal.
Step 1: Identify Your Corolla Model Year and Dashboard Type
What you need: Your Toyota Corolla owner’s manual (optional) and visual access to your instrument cluster and steering wheel controls.
Instructions: Before attempting any button combinations, you must determine which generation of Toyota Corolla you drive, as the reset procedure varies significantly between older and newer models. Corollas built roughly between 2009 and 2013 typically rely on the physical trip-meter stem protruding directly from the instrument glass. Models manufactured from 2014 onward usually feature digital instrument clusters with directional arrow pads and buttons located on the right-hand side of the steering wheel. Sit in the driver’s seat and take a close look at your steering wheel and dashboard gauges to identify which interface you have.
Pro Tip: Do not guess your model’s generation; attempting steering wheel commands on an older physical-stem model will do nothing and cause unnecessary frustration.
Step 2: Turn the Ignition to the ON Position Without Starting the Engine
What you need: Your car key or push-to-start fob.
Instructions: Insert your key into the ignition cylinder and turn it two clicks forward to the “ON” position (do not crank the starter motor to fire up the engine). If your Corolla utilizes a push-button start system, press the start button twice consecutively without your foot resting on the brake pedal. This powers up all the electrical accessories and dashboard lights, allowing the computer to recognize your reset commands. You should see all your cluster warning lights illuminate brightly and your odometer screen light up active.
Pro Tip: Make sure your foot is completely off the brake pedal; if the engine starts, the reset sequence will be interrupted and fail.
Step 3: Navigate to the Trip A Odometer Setting (For Older Mechanical Dashboards)
What you need: The physical odometer stem/button sticking out of the clear plastic instrument cluster cover.
Instructions: If you drive a 2009-2013 Corolla, repeatedly press the physical trip meter button (often labeled as “Trip” or styled as a small black stick) until the digital display screen strictly reads “Trip A”. Do not leave it on Trip B, total mileage, or any other sub-menu. The computer specifically looks for the Trip A parameter as the baseline starting condition to initiate the maintenance data wipe. Once “Trip A” is displayed clearly on the screen, turn the ignition key completely back to the “OFF” position.
Pro Tip: Double-check that you are genuinely on Trip A, as being on Trip B will prevent the maintenance reset from triggering.
Step 4: Execute the Button Hold and Ignition Power Sequence
What you need: Your right index finger holding the Trip A stem.
Instructions: For 2009-2013 models, press and securely hold down the physical Trip A button with one finger, keeping it depressed. While continuously holding that button down, turn your ignition key back to the “ON” position (two clicks forward, no engine start). Watch the small digital screen inside the odometer cluster. You will notice a series of dash lines appearing, such as “——-” flashing successively. Keep holding the button down continuously for about 5 to 10 seconds until those dashed lines disappear completely and the screen changes back to showing your normal mileage.
Pro Tip: Do not let go of the button early. If you release it before the dashes disappear and the normal mileage returns, you will have to restart the sequence from Step 2.
Step 5: Navigate the Multi-Information Display (For Newer Digital Dashboards)
What you need: The directional arrow pads and the central “OK” button on the right side of your steering wheel.
Instructions: If you drive a 2014 or newer Corolla with steering wheel controls, turn your ignition to the “ON” position. Using the right-hand directional pad on your steering wheel, press the left or right arrows until you highlight the gear icon representing the “Settings” menu on your multi-information screen. Scroll up or down using the arrow keys to find the “Vehicle Settings” or maintenance sub-menu (often represented by a car with a wrench symbol or labeled “Scheduled Maintenance”). Press the center “OK” button to select it.
Pro Tip: Take your time browsing the menus; Toyota structures these settings logically, but rushing can cause you to accidentally alter language or driver-assist features.
Step 6: Confirm and Reset the Oil Maintenance Data
What you need: Your steering wheel control pad.
Instructions: Inside the maintenance sub-menu of your modern Corolla, you will see options like “Oil Maintenance” or “reifen/tire pressure”. Highlight the specific maintenance reminder you wish to clear (such as “Oil Maintenance”). The screen will prompt you with a message asking: “Reset Data?” or “Are you sure you want to reset?”. Use the arrow keys to highlight “Yes” and press the center “OK” button firmly. A confirmation message stating “Reset Complete” will briefly flash on the screen to let you know the system has successfully logged the new baseline.
Pro Tip: If your Corolla has separate reminders for oil change and tire rotation, make sure to reset both if you performed comprehensive maintenance.
✅ Final Checklist
- Ignition is turned off and back on to verify the maintenance light has completely vanished from the display.
- Engine starts normally without any lingering warning symbols or persistent wrench indicators.
- Odometer display has successfully returned to standard mileage or your preferred trip meter setting.
- Oil change and filter replacement have actually been physically completed to ensure safe vehicle operation.
Important Notes:
- Never ignore a persistent or flashing maintenance light; if the light blinks rapidly upon startup, it may indicate a critical system fault requiring immediate scanning.
- If you perform the reset steps multiple times and the light refuses to clear, consult a certified mechanic or local auto parts store to check for hidden diagnostic trouble codes (DTCs).
- Estimated time: 3 to 5 minutes. Cost: $0 (completely free DIY procedure).
How to Fix and Clear the Maintenance Light on 2014 to Current Toyota Corolla Models
Using Steering Wheel Controls for 2020 to 2026 Models
If you drive a current-generation Corolla, you can reset the light entirely through the multi-information display using the right-side steering wheel controls. Follow this exact sequence with your car turned on but the engine off:

- Press the push-button start twice without holding the brake pedal to turn the ignition to the ON position (or turn your physical key to the second click).
- Use the right directional pad arrows on your steering wheel to scroll horizontally until you reach the Gear icon (Settings menu).
- Scroll vertically using the up and down arrows until you find Vehicle Settings, then press the center dot or OK button.
- Select Scheduled Maintenance or Oil Maintenance from the menu options.
- The screen will ask if you want to reset data. Highlight Yes and press the center button to confirm.
Using Dash Buttons for 2014 to 2019 Models
For slightly older modern Corollas that feature a small screen between the speedometer and tachometer, the button sequence shifts to the lower-left dashboard or the steering wheel face:
- Turn the ignition to the ON position without starting the engine.
- Use the left-side steering wheel arrow buttons to navigate to the Settings menu (represented by a gear).
- Scroll down to select Vehicle Settings (sometimes labeled with a car and a gear).
- Select Oil Maintenance and choose Yes to complete the reset.
Step-by-Step Procedure to Clear the Light on 2009 to 2013 Toyota Corolla Generations
The 2009 through 2013 Toyota Corolla generation utilizes a traditional digital display setup on the instrument cluster. Resetting the maintenance required light on these model years relies on a specific sequence involving the odometer and trip meter buttons.
Procedure for 2009-2013 Models
- Insert your key into the ignition switch and turn it to the ON position without starting the engine. If your Corolla features a push-button start, press the engine start button twice without depressing the brake pedal.
- Press the trip meter display stem repeatedly until the multi-information display shows ODO.
- Turn the ignition switch completely off or press the engine start button once more to power down the vehicle.
- Press and hold the odometer reset stem down firmly, and keep holding it while turning the ignition key back to the ON position (or pressing the start button twice without the brake).
- Observe the odometer display screen as dashes begin to appear, blink, and eventually disappear, accompanied by a solid beep indicating the reset is complete.
- Release the trip meter stem and start the engine to confirm the maintenance required light has successfully cleared.
What to Do If the Maintenance Light Still Doesn’t Turn Off After Resetting
If you have meticulously followed the correct reset procedure for your specific Corolla model year and the maintenance light remains illuminated, underlying issues likely require attention. Certified automotive data indicates that persistent warning lights often point to an incomplete reset sequence or an unresolved diagnostic trouble code.

Review the following troubleshooting steps if your dashboard light refuses to clear:
- Verify that your vehicle is not displaying a “Maintenance Required Soon” warning due to an overdue mileage interval, which requires completing the physical service before the system accepts a reset.
- Disconnect the negative battery terminal for approximately 10 to 15 minutes to perform a hard reset of the vehicle electronic control modules.
- Check for pending diagnostic trouble codes using an OBD2 scanner, as critical emissions or engine faults can override standard maintenance notification resets.
- Consult an authorized Toyota dealership or a certified technician if the instrument cluster fails to register button inputs, which typically indicates a faulty clock spring or dash switch assembly.
Professional diagnostic services typically cost between $100 and $150 depending on local labor rates. Seeking expert assistance ensures that safety-critical systems receive proper evaluation.
Conclusion
Clearing the maintenance required light on a Toyota Corolla is a straightforward process when utilizing the correct combination of steering wheel controls or cluster buttons matched to your specific model year. According to verified research and expert service guidelines, performing this reset routinely ensures accurate tracking of oil change intervals and mechanical upkeep. As an actionable next step, record your current odometer reading and scheduled service date in your owner manual to stay ahead of future maintenance alerts.
❓ Frequently Asked Questions
What is the difference between the Maintenance Required light and the Check Engine light?
The Maintenance Required light is simply a mileage reminder triggered every 5,000 miles for routine upkeep. The Check Engine light indicates a diagnostic trouble code detected by the car’s computer system.
How do I reset the maintenance light on a push-button start Corolla?
Press the engine start button twice without touching the brake to turn on the ignition without starting the engine. Navigate through the multi-information display using your steering wheel controls to select the gear icon, choose scheduled maintenance, and confirm the reset.
What if my Corolla has a traditional mechanical key ignition?
Turn the key to the ‘On’ position while holding the trip odometer reset button. Keep holding the button until the display shows a series of zeros or dashes and the light turns off.
Will disconnecting the car battery clear the maintenance light?
No, the maintenance interval memory is stored in non-volatile vehicle memory and will remain active even if the battery is disconnected for an extended period.
Can I drive my Toyota Corolla safely if the maintenance light is on?
Yes, the vehicle is safe to drive as long as routine services like oil changes and tire rotations are up to date. The light is only an informational reminder.
Why won’t the maintenance light reset procedure work on my car?
The reset procedure often fails if the ignition is not in the correct position or if the button sequence isn’t performed quickly enough. Double-check your specific model year instructions and try repeating the steps.