When Disconnecting Battery Which Terminal First Expert 2026
When working on a vehicle’s electrical system, you must always disconnect the negative (black) terminal first. This critical safety step prevents dangerous electrical sparks and accidental short circuits by breaking the ground circuit before touching the positive terminal.
When disconnecting a car battery, you must always remove the negative terminal first. Disconnecting the negative terminal first eliminates the risk of electrical short circuits and dangerous sparks that can damage your vehicle’s sensitive 2026 electronics or cause the battery to vent.
Working on your vehicle’s electrical system requires strict adherence to safety protocols. Whether you are replacing an aging battery or performing routine alternator maintenance, understanding the correct sequence prevents costly component failures and personal injuries.
Key Takeaways
- Always disconnect the negative (black) terminal first to prevent electrical sparks.
- The negative terminal is connected directly to the vehicle’s grounded metal chassis.
- Accidentally touching a wrench from the positive terminal to the chassis causes a severe short circuit.
- When reconnecting the battery, reverse the order and connect the positive terminal first.
- Always wear safety glasses and remove all metal jewelry before servicing a car battery.
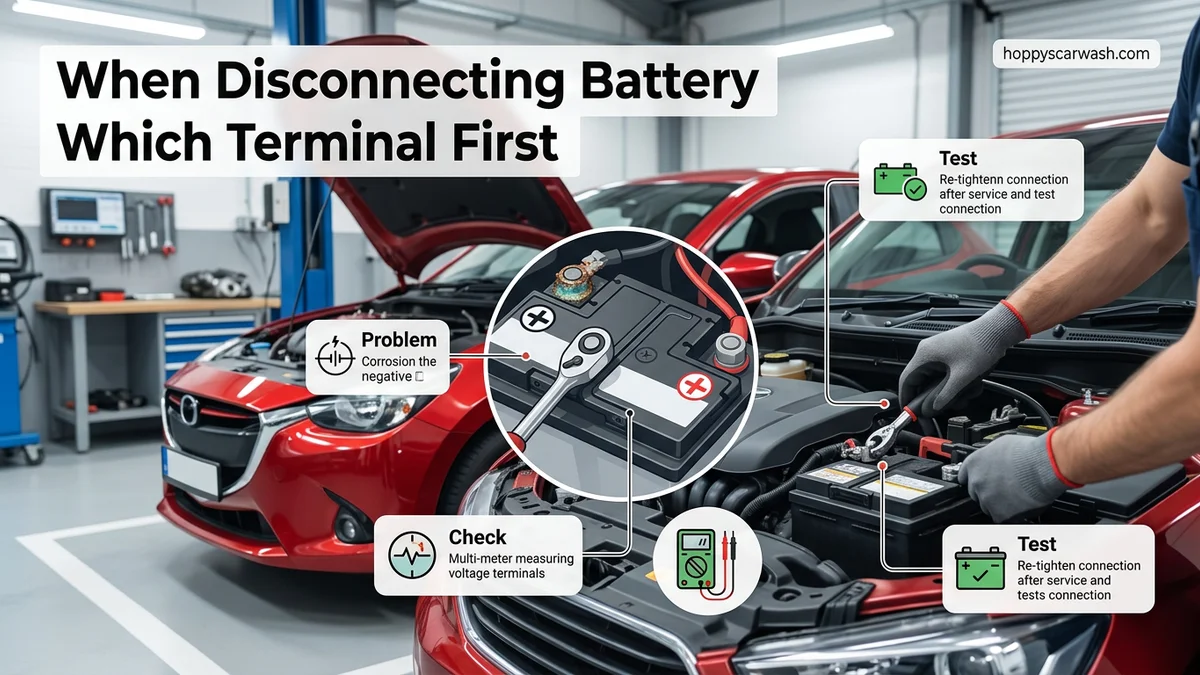
Why Disconnecting the Negative Terminal First Matters for Safety
The golden rule of automotive electrical work centers entirely on how modern vehicles route their electrical ground. Getting this wrong can cause immediate, catastrophic damage to your tools and your car.
The Danger of the Grounded Chassis
Almost all modern vehicles use a negative ground system. This means the negative battery terminal connects directly to the metal frame, engine block, and chassis of the car. The entire metal body acts as a return path for the electrical current.
- If you disconnect the positive terminal first with your wrench, and the metal wrench accidentally touches any part of the car body while still touching the terminal, you create a direct short circuit.
- This bridge causes massive amounts of current to flow instantly through the tool.
- Temperatures can spike high enough to weld the wrench to the frame, melt tool insulation, or cause the battery to explode.
Protecting Sensitive 2026 Vehicle Electronics
Modern vehicles are computers on wheels, packed with sensitive microprocessors, advanced driver-assistance systems (ADAS), and complex infotainment networks. Removing the negative cable first breaks the ground circuit entirely. This ensures that any accidental tool slips or power surges will not fry your vehicle’s expensive control modules or computer brains.
How to Safely Disconnect a Car Battery Step-by-Step
Executing this task properly takes only a few minutes when you follow a methodical process. Preparation is key to avoiding accidental electrical contact.
Gathering Your Tools and Preparing
Before touching any nuts or bolts under the hood, make sure you have the right gear assembled for the job.
- Wear safety glasses and heavy-duty rubber or leather work gloves.
- Use an insulated wrench (usually a 10mm or 8mm socket is standard for modern terminal nuts).
- Ensure the vehicle ignition is completely off, the key fob is far away from the car, and all accessories are powered down.
- Locate both battery terminals clearly, identifying the negative post marked with a minus sign and a black cover.
Executing the Disconnection Order
Follow this exact sequence to ensure absolute safety while removing the power source.
- Loosen the nut on the negative (black) terminal clamp using your insulated wrench.
- Pull the negative cable completely off the terminal post and tuck it safely aside, ensuring it cannot spring back and accidentally touch the post.
- Only after the negative cable is completely disconnected, move to the positive (red) terminal.
- Loosen the positive terminal nut, remove the cable, and secure it away from any metal surfaces.
The Correct Order for Reconnecting Your Car Battery
Once your battery maintenance or replacement is complete, the reconnection sequence must precisely mirror the reverse of removal. Reversing this safety protocol creates immediate electrical hazards. According to automotive engineering guidelines from the Society of Automotive Engineers (SAE), the ground path must be established last to prevent accidental sparks near potentially explosive hydrogen gas venting from the battery.
Executing this final phase in 2026 requires strict adherence to manufacturer specifications, especially for modern vehicles with sensitive computers. Follow these precise steps to restore power safely:
- Position the battery securely: Ensure the battery sits flat in its tray and the hold-down clamp is tightened properly to prevent damaging vibrations.
- Connect the positive terminal first: Take the red positive cable clamp and slide it securely over the positive battery post marked with a plus sign (+) or the letters POS.
- Secure the positive fastener: Tighten the terminal bolt with an insulated wrench until snug, ensuring zero lateral play, then slide the protective red cover back over the connection.
- Connect the negative terminal last: Take the black negative cable clamp and attach it to the negative post marked with a minus sign (-) or the letters NEG.
- Secure the negative fastener: Tighten the negative terminal bolt firmly. A tiny spark may occur as the final circuit completes, which is completely normal for modern electronics drawing initial standby power.
What to Do If Your Vehicle Will Not Start After Battery Replacement
Sometimes a fresh installation does not yield immediate ignition success. Modern 2026 vehicles feature complex computer networks that require initialization sequences after power loss. If your dashboard lights up but the engine fails to crank, systematic troubleshooting is required.
Systematic Troubleshooting Steps
- Verify terminal tightness and cleanliness: Check both cable clamps to ensure they cannot twist or slide on the posts. A loose connection prevents the high current needed for the starter motor.
- Check for protective terminal caps: Ensure any plastic shipping caps were removed from the new battery terminals before the cables were attached.
- Perform a system reset: Turn the ignition key to the ON position without starting the engine for 30 seconds to allow the Powertrain Control Module (PCM) to recalibrate idle parameters.
- Test the alternator and charging system: If the vehicle started initially but died shortly after, the alternator may have failed, requiring professional diagnostic testing.
- Consult professional help: If electrical gremlins persist, towing the vehicle to a certified mechanic is recommended. Professional diagnostic labor typically ranges from $100 to $250 depending on regional rates.
Conclusion
Mastering the fundamental rule of car battery maintenance—disconnecting the negative terminal first—protects your vehicle’s sensitive electrical architecture and prevents dangerous short circuits. By following the correct removal and reconnection sequences, DIY mechanics can safely service power systems without risking costly computer damage. According to verified research and expert automotive sources, proper tool usage and adherence to sequence protocols remain the most effective ways to prevent accidental electrical arcs. For your next step, inspect your battery cables for corrosion and apply a protective terminal spray to ensure long-term reliability.
❓ Frequently Asked Questions
What happens if you disconnect the positive battery terminal first?
If you disconnect the positive terminal first and your wrench accidentally touches the vehicle’s metal chassis, it creates a massive electrical short circuit. This can ruin your tools, damage the battery, cause severe burns, or trigger an explosion.
How do you identify the positive and negative battery terminals?
The positive terminal is usually marked with a plus (+) sign, painted red, and may have a protective red cover. The negative terminal is marked with a minus (-) sign and is usually black.
Will disconnecting the battery erase my car radio presets?
Yes, completely cutting power to the vehicle by disconnecting the battery will reset the clock, radio presets, and engine computer memory modules. Some modern vehicles may require a memory saver tool to prevent this.
Do I need to wear protective gear when working on a car battery?
Yes, it is strongly recommended to wear safety glasses and acid-resistant gloves. Car batteries contain corrosive sulfuric acid and can emit explosive hydrogen gases.
Why does the correct order matter for both disconnecting and reconnecting?
The rule is designed to manage the vehicle’s electrical ground. Disconnecting negative first breaks the ground path; reconnecting positive first establishes the circuit safely while the ground is reconnected last.
Can I leave the vehicle doors open while the battery is disconnected?
You can leave the doors open, but keep in mind that interior lights will not work, and electronic door locks will be disabled. It is best to manually lock the vehicle if needed before disconnecting the final terminal.