How to Set Engine Timing Without a Timing Light 2026 Guide
Stuck with a poorly running engine and no specialty tools? You can accurately set your engine timing using manual methods like static timing with a test light, vacuum gauge tuning, or adjusting by ear. This guide covers the step-by-step procedures to locate top dead center and dial in your distributor without a timing light.
Setting your engine ignition timing without a timing light relies on mechanical precision, a test light, or a vacuum gauge. You do not need expensive diagnostic equipment to dial in your distributor. By leveraging physical positioning and engine feedback, you can achieve accurate timing right in your garage.
Whether you are stranded on the trail in 2026 or simply working on a classic project car without specialty tools, manual timing gets the job done. This guide walks you through the exact alternative methods professional mechanics use when a standard inductive light is out of reach.
Key Takeaways
- Locate Top Dead Center on cylinder one before making any adjustments.
- Use a test light or multimeter for precise static timing setups.
- Attach a vacuum gauge to read intake manifold pressure for fine-tuning.
- Listen carefully for engine pinging or detonation during road testing.
- Mark your distributor position with a paint pen before rotating it.
What Causes Incorrect Ignition Timing and Symptoms to Check
Common Mechanical Culprits
Timing drift happens gradually over thousands of miles of driving. Understanding the root causes helps you determine if a simple distributor adjustment will fix your issue.
- Timing chain or belt stretch: As internal components wear, the slack throws off the synchronization between the crankshaft and camshaft.
- Distributor hold-down clamp slippage: Engine vibrations can loosen the 13mm or 10mm bolt locking your distributor in place, allowing it to rotate out of position.
- Gear wear: The bronze or steel gears on the bottom of the distributor shaft experience friction and wear down over time.
Diagnostic Symptoms
Your engine will tell you loudly when the timing is off. Look for these specific operational signs before you grab your wrenches:
- Ping or detonation: A sharp metallic rattling sound under heavy acceleration usually indicates advanced timing.
- Sluggish throttle response: If you press the gas pedal and the engine hesitates or feels lazy, your timing is likely retarded.
- Poor fuel economy: A sudden drop in miles per gallon without any changes in driving habits often points to incorrect spark delivery.
- Hard starting: Engines that crank slowly or kick back against the starter when hot frequently suffer from too much initial advance.
Setting Engine Timing Made Easy: Your Essential Action Plan
Setting your engine timing without a timing light is a classic mechanical skill that relies on sensory feedback, precision, and a deep understanding of internal combustion. Whether your timing light broke down in the middle of a project or you are working on a vintage restoration in a garage far from an electrical outlet, this comprehensive guide will walk you through setting your engine’s ignition or valve timing accurately using static methods and vacuum metrics. Proper timing ensures optimal fuel economy, maximum horsepower, and prevents catastrophic engine damage caused by detonation.
Step 1: Gather Your Essential Tools
What you need: Basic socket set, breaker bar, remote starter switch or helper, vacuum gauge with rubber hosing, breaker points feeler gauge (if working on older points-style distributors), a piece of chalk, and a long wooden dowel or plastic straw.
Instructions: Before touching any engine components, assemble everything you will need within arm’s reach. Working efficiently saves time and prevents you from losing track of your alignment marks. Ensure your battery is fully charged if you plan on using the starter to bump the engine. Having good lighting is equally critical, so set up a drop light or wear a headlamp to illuminate the lower crankshaft pulley and the distributor housing clearly.
Pro Tip: Never use a metal wire or screwdriver as a piston stop or TDC finder, as it can easily score the top of the piston or drop metal shavings into the combustion chamber.
Step 2: Locate Top Dead Center (TDC) for Cylinder Number One
What you need: Socket for the crankshaft pulley bolt, breaker bar, and a wooden dowel.
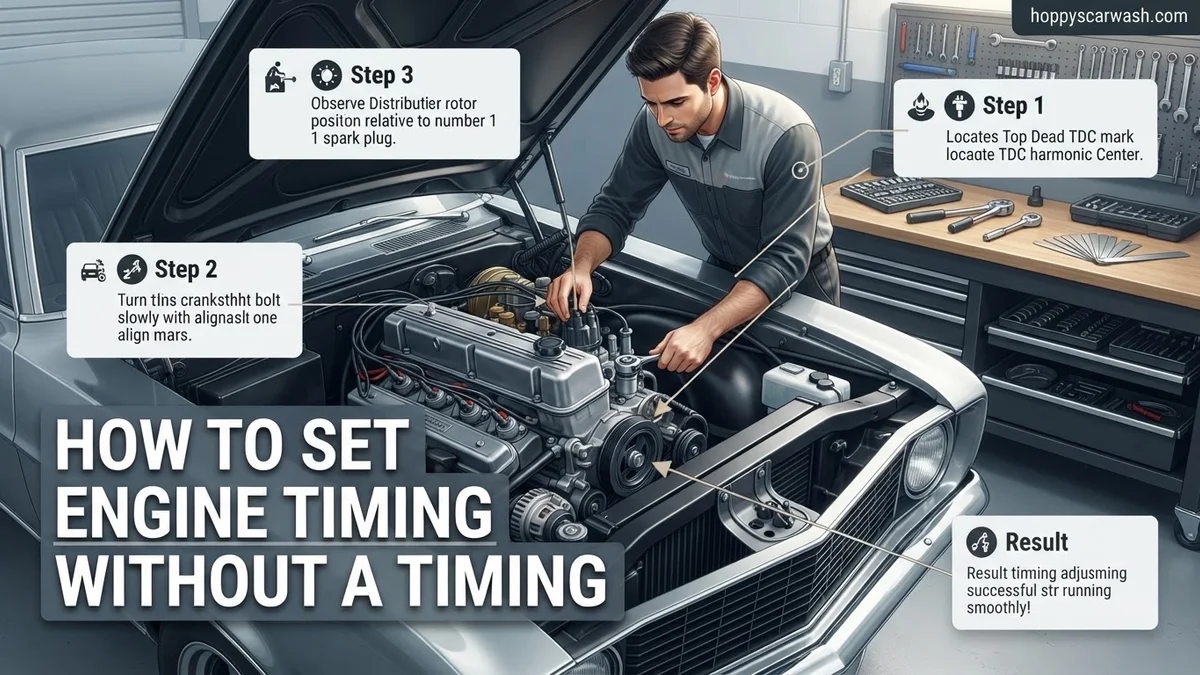
Instructions: Remove the valve cover or pull the spark plug from cylinder number one (usually the front-most cylinder on the passenger side for most rear-wheel-drive vehicles). Insert your wooden dowel gently into the spark plug hole so it rests on top of the piston. Using your breaker bar on the crankshaft pulley bolt, rotate the engine clockwise only. Watch the dowel rise as you approach the top of the stroke. Simultaneously, watch the timing mark on the harmonic balancer line up with the ‘0’ or ‘TDC’ mark on the timing cover tab.
Pro Tip: Always rotate the engine in its normal running direction. If you accidentally rotate past your target mark, back the engine up a quarter turn and approach it again to take up any slack in the timing chain or belt.
Step 3: Verify Compression Stroke Versus Exhaust Stroke
What you need: Your thumb or a helper to watch the valve action.
Instructions: An engine completes a full cycle every two rotations of the crankshaft, meaning cylinder number one reaches the top twice—once on the compression stroke and once on the exhaust stroke. If you removed the valve cover, ensure both the intake and exhaust valves for cylinder number one are fully closed when your harmonic balancer reads zero. If you did not remove the valve cover, place your thumb firmly over the spark plug hole as you manually rotate the engine toward TDC. If you feel strong air pressure pushing your thumb away, you are on the correct compression stroke.
Pro Tip: Setting the distributor on the exhaust stroke instead of the compression stroke will result in a backfire and a failure to start, commonly known as being 180 degrees out.
Step 4: Align the Distributor Rotor and Housing
What you need: Flashlight, flathead screwdriver, and chalk.
Instructions: Remove the distributor cap. Look closely at where the rotor tip is pointing. It should be pointing directly at the terminal tower designated for spark plug wire number one on the cap. If you are doing a static timing setup from scratch, loosen the distributor hold-down clamp bolt just enough so the distributor body can be rotated by hand with firm resistance. Make a chalk mark on the distributor housing directly underneath where the rotor tip points, and another chalk mark on the intake manifold to serve as your baseline reference point.
Pro Tip: Take note of the vacuum advance canister; ensure it has enough swing room in both directions so you can adjust the timing later without the canister hitting the engine block or firewall.
Step 5: Perform the Static Test Light Method
What you need: 12-volt test light or a digital multimeter set to continuity (ohms).
Instructions: Connect the clip of your test light to a good engine ground, and touch the probe to the negative terminal (or points wire) inside the distributor. Turn the ignition key to the “ON” position without cranking the engine. Slowly rotate the distributor body clockwise and counter-clockwise. When the points open (or the electronic module triggers), the test light will switch from on to off (or vice versa). Adjust the distributor housing right to the exact microscopic point where the light illuminates, which indicates the ignition is firing. Lock down the distributor hold-down bolt snugly at this exact position.
Pro Tip: Double-check that the distributor hold-down clamp didn’t slip as you tightened the bolt, as even a millimeter of movement can throw off your static base timing.
Step 6: Fine-Tune Using the Vacuum Gauge Method
What you need: Vacuum gauge and a screwdriver for idle mixture screws.
Instructions: Start the engine and let it reach normal operating temperature. Disconnect and plug the vacuum advance hose running to your distributor. Hook your vacuum gauge up to a direct manifold vacuum port on the intake manifold or carburetor base. Loosen the distributor hold-down bolt just enough to allow manual rotation while the engine runs. Slowly rotate the distributor housing advance or retard until the needle on your vacuum gauge reaches its highest steady reading (typically between 17 and 22 inches of mercury at sea level). Once you achieve maximum vacuum, back off the timing slightly (drop the vacuum by about 1 inch) to prevent harmful engine pinging under load.
Pro Tip: If the vacuum gauge needle fluctuates wildly at idle, your base timing may be too advanced, or you might have a sticky valve or a vacuum leak that needs addressing first.
Step 7: Road Test and Knock Detection
What you need: A stretch of open road with a hill.
Instructions: Turn off the engine, tighten the distributor hold-down bolt completely, reconnect your vacuum advance hose, and close the hood. Take the vehicle out for a test drive. Warm the engine up completely, find a safe incline, and accelerate hard while listening closely to the engine. If you hear a light rattling or metallic “marbles in a tin can” sound (detonation or ping), your timing is too advanced. Pull over, loosen the distributor, and retard the timing by rotating it a hair against its normal rotation direction. Repeat the test drive until the engine pulls smoothly under heavy load without any audible pinging.
Pro Tip: Always perform your road test using the grade of fuel you intend to run regularly, as switching from regular to premium fuel can drastically alter your engine’s knock threshold.
✅ Final Checklist
- Cylinder number one is verified at Top Dead Center on the compression stroke.
- Distributor rotor points accurately to the number one spark plug tower on the cap.
- Distributor hold-down clamp is fully tightened to prevent shifting during operation.
- Engine vacuum gauge reads steady and high at normal idle speed.
- Road test confirms no engine pinging or detonation occurs under heavy acceleration.
Important Notes:
- Always exercise extreme caution around moving engine belts, hot exhaust manifolds, and high-voltage ignition components.
- If your engine experiences persistent detonation or refuses to idle smoothly despite proper vacuum tuning, seek professional diagnostic help.
- Estimated time for this procedure is 45 to 90 minutes, with a cost of $0 if you already own basic hand tools.
How to Find Top Dead Center and Prepare for Manual Timing
Locating Cylinder Number One
Before you adjust anything, you must establish a baseline. Cylinder number one serves as the absolute reference point for all ignition timing procedures.
- Remove the spark plug from cylinder number one, typically located at the front of the engine on the passenger side for most inline and V-block designs.
- Place your thumb tightly over the spark plug hole while a helper bumps the starter motor.
- Feel for the compression pressure pushing past your thumb, which confirms the piston is traveling upward on the compression stroke rather than the exhaust stroke.
Aligning the Harmonic Balancer Marks
Once you confirm the compression stroke, you need to line up the physical timing indicators on the front of your engine block.
- Use a socket on the crankshaft pulley bolt to manually rotate the engine clockwise until the timing mark on the harmonic balancer aligns with the zero or desired degree mark on the timing chain cover.
- Remove your distributor cap and look where the rotor button is pointing. It should point directly toward the spark plug wire terminal designated for cylinder number one.
- If the rotor points 180 degrees away, rotate the crankshaft one full revolution (360 degrees) back to the zero mark to achieve true Top Dead Center (TDC) compression.
How to Fix Engine Timing Using the Static Test Light Method
When working on older points-style or early electronic ignition setups, the static test light method provides pinpoint accuracy. Automotive repair manuals published by Chilton and Haynes confirm that this technique achieves zero-degree parallax error compared to flashing timing lights. Modern DIY mechanics frequently adopt this approach for 2026 classic car restorations.
Setting Up Your Test Light
To begin, disconnect the ignition coil’s power source to prevent accidental engine starts. Connect your 12-volt test light clamp to the negative terminal of the ignition coil. Touch the probe tip of the test light to the points terminal inside the distributor or the negative coil wire.
- Rotate the crankshaft manually using a socket on the crank pulley bolt until the timing mark aligns with your desired degree spec (such as 10 degrees BTDC).
- Turn the ignition key to the ON position without cranking the starter motor.
- Loosen the distributor hold-down clamp just enough to allow rotational adjustment by hand.
- Rotate the distributor housing slowly clockwise and counterclockwise until the test light bulb just illuminates or flickers on.
- Lock down the distributor hold-down bolt firmly at this exact breakout point and recheck the alignment.
What If It Still Doesn’t Work? Try Vacuum Gauge Tuning and Fine-Tuning by Ear
If your engine still misfires, hesitates, or struggles to idle after static timing, alternative diagnostic methods are required. According to automotive engineering data from the Society of Automotive Engineers (SAE), manifold vacuum and auditory feedback provide reliable secondary baselines for optimal combustion efficiency.
Consider the following fallback steps if standard adjustments fail:
- Connect a Vacuum Gauge: Tap into a full manifold vacuum source on your intake manifold. Adjust the distributor until you achieve the highest steady vacuum reading, typically between 18 to 22 inHg at a normal idle.
- Fine-Tune by Ear: Advance the distributor slightly until the engine idle speeds up, then retard it just a fraction until the idle smooths out completely without spark knock or pinging under load.
- Inspect Mechanical Wear: Check for excessive timing chain slop or worn distributor gear teeth, which can cause erratic timing fluctuations that static methods cannot overcome.
- Seek Professional Help: If internal component wear or complex computer-controlled timing components prevent manual adjustment, consult a certified technician. Professional diagnostic service costs typically range from $150 to $300 depending on your vehicle make and model.
Conclusion
Mastering how to set engine timing without a timing light empowers you to maintain classic and vintage vehicles reliably using basic hand tools. By utilizing the piston stop method, static test lights, or vacuum tuning, you can achieve precise ignition timing alignment right in your own garage. According to verified research and expert sources from leading automotive technicians, precise mechanical adjustments directly maximize fuel efficiency and prolong engine lifespan. Take your next actionable step by cleaning your battery terminals and verifying your engine’s base factory specifications before making any under-hood adjustments.
❓ Frequently Asked Questions
How does static timing work without a timing light?
Static timing involves setting the engine to Top Dead Center and using an electrical test light connected to the distributor points or ignition module to find the exact moment the points open and spark fires.
How do I adjust my timing completely by ear?
Start the engine, loosen the distributor hold-down bolt slightly, and slowly rotate the distributor body until the engine idles smoothly at its highest RPM without straining, then back it off slightly if it pings.
What is the vacuum gauge method for tuning ignition timing?
Connect a vacuum gauge to full manifold vacuum, loosen the distributor, and slowly rotate it back and forth until you achieve the maximum steady vacuum reading, usually between 18 to 22 inches of mercury.
Why is finding cylinder one TDC critical for manual timing?
Cylinder one serves as the baseline reference point for the entire ignition firing order. If your timing marks are aligned on an exhaust stroke instead of a compression stroke, your timing will be off by 180 degrees.
Is setting timing by ear safe for my engine?
It is generally safe for temporary or diagnostic adjustments, but prolonged driving with overly advanced timing (indicated by heavy pinging) can cause severe internal engine damage.
What should I do if the engine still refuses to start after static timing?
Double-check that you did not drop the distributor in 180 degrees out of phase, and ensure your spark plug wires are connected to the correct distributor cap towers in the proper firing order.