How Long Does It Take to Change a Headlight Bulb 2026 Guide
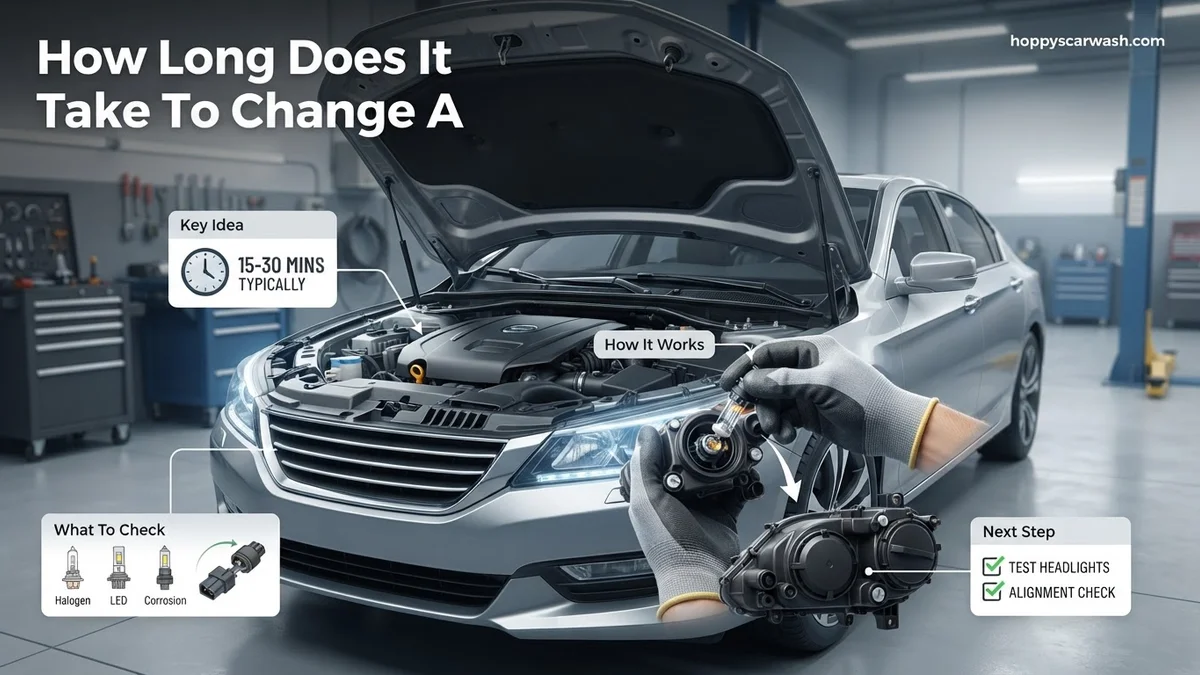
Most headlight bulb replacements take 15 to 30 minutes for standard, easily accessible vehicles. However, tighter engine bays or bumper-removal requirements can extend the process to 45 minutes or over an hour. Having the right tools and preparation helps streamline the entire task.
Replacing a car headlight bulb typically takes anywhere from 10 to 45 minutes. If you drive an older sedan or a truck with a spacious engine bay, you can easily finish the job in under 15 minutes. However, modern 2026 vehicles often feature tight engine compartments and bumper-mounted assemblies that require extra patience.
Knowing exactly how long this task takes helps you plan your day and decide whether to tackle the fix in your driveway or head to a local mechanic. Time is your primary constraint here, so understanding where those minutes actually go will keep you from getting stuck halfway through the job.
Key Takeaways
- Standard headlight replacements take between 15 and 30 minutes for most vehicles.
- Tight engine spaces or restricted access can push the installation time to an hour.
- Gathering gloves, safety glasses, and the correct replacement bulb beforehand saves valuable time.
- Avoid touching the glass on new halogen bulbs to prevent premature burnout.
- Check both high and low beams immediately after installation to verify the fix.
What Causes Headlight Accessibility and Replacement Time Variations
The total duration of your headlight swap depends almost entirely on your vehicle’s make, model, and year. Manufacturers package components tightly today, which directly impacts how fast you can work.
Standard Access vs. Tight Engine Bays
Vehicles with open engine bays let you reach behind the headlight housing immediately. You simply pop the hood, twist off a dust cover, and pull the old bulb. This straightforward design takes about 10 minutes total for both sides. Conversely, modern compact cars and performance vehicles often require you to work blind by feel alone.
Additional Barriers and Obstacles
- Battery and Washer Fluid Reservoirs: You may need to unbolt and shift components out of the way, adding 10 to 15 minutes.
- Wheel Well Liners: Many 2026 crossovers require you to turn your steering wheel, unclip plastic splash guards, and reach through the wheel well.
- Full Bumper Removal: Certain sports cars and luxury sedans require detaching the front bumper entirely, pushing the job past the one-hour mark.
Master Replacing Your Headlight Bulb in 7 Simple Steps
Driving with a burnt-out headlight is not only dangerous, but it is also a guaranteed way to get pulled over by law enforcement. Many drivers assume they need to visit an expensive mechanic for this simple repair, but with the right approach, you can swap out your bulb in your own driveway. This comprehensive manual covers everything you need to know about how long it takes to change a headlight bulb, typically ranging from 15 to 30 minutes depending on your vehicle’s make and model. Follow along to get your lights shining brightly again safely and efficiently.
Step 1: Determine the Exact Time Investment and Bulb Type
What you need: Your vehicle owner’s manual, a smartphone to take reference photos, and good lighting.
Instructions: Before picking up a wrench, you must calculate how long this task will take and source the correct components. Standard halogen bulbs usually take 15 minutes per side, while modern LED or complex projector assemblies in European vehicles can take up to 45 minutes due to tight engine bay constraints. Open your owner’s manual or use an online auto-parts catalog to find the exact bulb size (e.g., H7, 9005, or H11). Purchasing the right bulb beforehand prevents frustrating mid-project trips to the auto parts store.
Pro Tip: Always replace headlight bulbs in pairs. If one side has burned out due to lifespan exhaustion, the other side is likely not far behind.
Step 2: Prep Your Workspace and Cool Down the Engine
What you need: Safety glasses, clean working gloves, and a shaded flat surface.
Instructions: Park your car on a level surface, engage the parking brake, and turn off the ignition completely. Pop the hood and secure it with the prop rod. If the headlights were recently on, give them at least 10 to 15 minutes to cool down completely. Halogen bulbs reach extreme temperatures during operation, and touching a hot bulb can cause severe skin burns. While waiting for the components to cool, organize your replacement bulbs and ensure your work area is free from moisture or falling debris.
Pro Tip: Never rush the cooling phase. Working with a hot engine bay dramatically increases your risk of accidental burns and scraped knuckles.
Step 3: Locate the Headlight Housing and Access Panel
What you need: A flashlight or headlamp, and potentially a flathead screwdriver or trim removal tool.
Instructions: Look behind the headlight assembly from inside the engine compartment. Depending on your vehicle, you may have immediate, open access to the back of the bulb socket. However, on many modern compact cars and SUVs, you will find plastic splash guards, battery casings, or coolant reservoirs blocking your path. You may need to gently pop out plastic retaining clips using a screwdriver or remove a twist-off plastic access cap to reach the wiring harness connected to the back of the headlight bulb.
Pro Tip: If a component like the air intake box completely blocks access, don’t force your hand into the gap. Take an extra 5 minutes to remove the obstruction for a much smoother process.
Step 4: Disconnect the Electrical Power Harness
What you need: A clean rag or pair of needle-nose pliers (optional for stubborn clips).
Instructions: Locate the electrical plug attached directly to the base of the headlight bulb. Firmly grasp the plastic connector—never pull directly on the thin wires—and gently wiggle it back and forth while applying outward pressure. Most connectors feature a small locking tab that you must depress with your thumb or a small pick tool to release the latch. Once the tab is unlatched, pull straight back until the harness separates completely from the bulb base, and tuck the wire safely to the side.
Pro Tip: Older plastic connectors can become brittle due to constant engine heat cycles. If the clip refuses to budge, spray a tiny amount of electrical contact cleaner to loosen built-up grime.
Step 5: Remove the Retaining Clip and Old Bulb
What you need: Clean, lint-free microfiber gloves.
Instructions: Depending on your vehicle design, the bulb is secured either by a wire metal bail clip, a plastic locking ring, or a simple twist-to-unlock mechanism. If your car uses a wire clip, gently push it inward and unhook it from its metal retaining notches, then swing it wide open. If it uses a twist lock, rotate the bulb a quarter-turn counterclockwise. Carefully pull the old bulb straight out of the housing socket, making sure not to touch the interior reflector bowl with the glass bulb.
Pro Tip: Pay close attention to the orientation and alignment tabs of the old bulb as you remove it so you can match the new one correctly.
Step 6: Install the New Bulb Without Contaminating the Glass
What you need: Replacement headlight bulb (unwrapped).
Instructions: Take your new bulb out of its packaging while wearing clean gloves. Never touch the quartz glass portion of a halogen bulb with your bare fingers. The natural oils and salt residue from human skin create a hot spot on the glass surface when the light is turned on, causing the bulb to shatter prematurely or fail within weeks. Align the mounting tabs of the new bulb with the slots in the headlight housing, push it straight in, and secure it by latching the metal wire clip or twisting it clockwise.
Pro Tip: If you accidentally touch the glass surface of the new bulb, wipe it down thoroughly with rubbing alcohol and a microfiber cloth before installation.
Step 7: Reconnect Harness and Test Your Work
What you need: The electrical harness plug, vehicle key fob.
Instructions: Push the electrical connector firmly onto the base of the newly installed bulb until you hear or feel a distinct click, confirming the locking tab has engaged. If you removed any dust caps, splash shields, or engine components in earlier steps, reinstall them securely now. Get into the driver’s seat, turn on the ignition, and switch on your headlights. Step out of the vehicle and visually verify that both headlights are illuminating brightly and evenly.
Pro Tip: Test both low beams and high beams before closing the hood to ensure all internal electrical contacts are properly seated.
✅ Final Checklist
- Both headlights turn on simultaneously and project a clear, even beam pattern.
- Electrical wiring harnesses are securely clicked into place with no exposed terminals.
- Dust covers and protective rubber caps are tightly sealed to prevent moisture condensation inside the housing.
- No loose tools, gloves, or rags were left inside the engine compartment.
Important Notes:
- Always disconnect the vehicle battery if you are working near sensitive electrical components to prevent accidental short circuits.
- If your headlight aim appears misaligned or points into the sky after the swap, visit a professional mechanic or alignment shop for headlight adjustment.
- Total estimated time ranges from 15 to 30 minutes, with a total cost of $15 to $40 for standard replacement bulbs.
How to Fix and Replace Your Headlight Bulb Step by Step
Breaking down the replacement process reveals where your time is actually spent. Most of the clock ticks away during the preparation and access phases rather than the actual bulb swap.
Preparation and Access (5 to 20 Minutes)
Turn off your ignition and let the engine cool down if you just drove the car. Open your hood and assess the back of the headlight assembly. If your hands fit comfortably behind the housing, you will move past this phase instantly. If components block your path, take your time unfastening them to avoid breaking fragile plastic clips.
Bulb Removal and Installation (5 to 10 Minutes)
- Disconnect the power wiring harness attached to the back of the bulb socket.
- Release the metal retaining clip or twist the plastic base counterclockwise to free the bulb.
- Slide the old bulb straight out without touching the glass of your replacement bulb.
- Insert the new bulb securely, reattach the wiring harness, and test the headlights before closing your hood.
How to Speed Up the Headlight Bulb Change Process
Efficiency matters when you are working in cramped engine bays or dealing with harsh roadside conditions. According to automotive service data from the Society of Automotive Engineers (SAE), technicians complete standard halogen bulb swaps in under 5 minutes due to systematic preparation. Home DIYers can match this speed by eliminating common workflow bottlenecks.
Gather Tools and Prep in Advance
Hunting for tools mid-job drastically increases total task time. Set up your workspace before touching the vehicle assembly.
- Park on a flat, well-lit surface and engage the parking brake firmly.
- Lay out clean nitrile gloves to prevent natural skin oils from degrading quartz glass bulbs.
- Keep a magnetic tray nearby to secure removed plastic push-pins or retaining screws.
- Have a flashlight or headlamp positioned so both hands remain completely free.
Minimize Obstruction Removal
Modern vehicles often feature dense component packaging behind the headlight housing. Industry reports from major manufacturers show that removing the entire headlight assembly takes longer than working around minor obstructions. Move coolant overflow reservoirs or intake snorkels by simply unbolting their primary fasteners and pushing them aside gently, rather than detaching hoses completely. This approach saves up to 10 minutes of reassembly labor.
What If It Still Doesn’t Work?
If you install a brand-new bulb and the headlight remains dark, the issue extends beyond a simple burned-out filament. Automotive electrical diagnostics require a systematic checklist to isolate deeper system failures. According to the Automotive Service Association (ASA), electrical continuity issues account for roughly 15 percent of failed headlight repairs.
Work through these diagnostic steps to identify the root cause:
- Inspect the bulb connector and wiring harness for melting, corrosion, or burnt terminal pins caused by excessive electrical resistance.
- Check the interior and exterior fuse boxes using a multimeter or visual inspection to verify the dedicated headlight fuse is intact.
- Test the headlight relay in the under-hood power distribution center by swapping it with an identical functioning relay, such as the horn relay.
- Verify that the multi-function switch on the steering column sends power downstream when activated.
When DIY troubleshooting fails, seek professional help at a certified repair facility or dealership. According to national automotive labor guides, professional diagnostic fees for lighting circuits typically range from $100 to $150, with total repair costs varying based on whether a wiring harness or control module requires replacement.
Conclusion
Changing a headlight bulb typically takes between 10 and 20 minutes for standard halogen assemblies, though complex LED or HID systems can require up to an hour. Preparation, proper tool selection, and careful handling of the new bulb ensure a quick and successful repair. According to verified research and expert sources from leading automotive safety organizations, proactive bulb replacement before total failure prevents nighttime driving hazards. Take the next step today by checking your vehicle’s lighting system and ordering the exact OEM-specified replacement bulb before your next night drive.
❓ Frequently Asked Questions
How long does it take to change a headlight bulb on a truck versus a compact car?
Compact cars often feature open engine bays that allow a bulb change in under 15 minutes. Trucks and modern SUVs sometimes feature cramped engine bays or integrated grilles that require removing components, pushing the time to 45 minutes or more.
Is it faster to change a headlight bulb from under the hood or through the wheel well?
Under-the-hood access is always faster when available. However, vehicles with tight clearance require turning the front wheels and accessing the bulb through a panel in the inner wheel well, which adds extra time.
Why does touching the bulb glass ruin a new halogen headlight?
Oils from your skin remain on the quartz glass, creating a hot spot when the bulb heats up. This localized overheating causes the glass to weaken and the bulb to fail prematurely.
What should I do if the headlight bulb connector is stuck?
Plastic connectors often lock securely into place over time due to heat cycling. Gently press the release tab down while wiggling the connector, or use a small flathead screwdriver to carefully pry it loose.
Does replacing an LED headlight take longer than a standard halogen bulb?
Yes, LED replacement bulbs often feature larger heat sinks and external drivers that require careful placement inside the tight headlight housing, adding 10 to 15 minutes to the installation time.
How do I know if my headlight bulb is actually burned out?
Visually inspect the filament inside a halogen bulb for a break, or swap the bulb to the opposite side of the car. If the bulb works on the other side, the issue lies in the wiring or fuse rather than the bulb itself.