Will Bad Gas Cause Check Engine Light to Come On? 2026
Yes, poor quality or contaminated fuel will frequently trigger your vehicle’s check engine light. Bad gas causes immediate issues like engine sputtering, rough idling, and specific OBD-II diagnostic trouble codes such as P0300 misfires.
Yes, bad gas will definitely cause your check engine light to come on. When contaminated, stale, or low-octane fuel enters your engine, it disrupts the combustion process. Your vehicle’s powertrain control module detects this imbalance immediately through various sensors.
By 2026, modern vehicle computers have become hyper-sensitive to fuel quality issues. Understanding how poor fuel triggers dashboard warnings helps you avoid expensive, unnecessary repairs at the mechanic.
Key Takeaways
- Bad gas directly triggers check engine lights through oxygen sensor alerts and cylinder misfire codes.
- Common symptoms include rough idling, engine knocking, sputtering, and unexpected stalling.
- Diagnostic scanners will typically display code P0300 for random misfires caused by contaminated fuel.
- Diluting bad fuel with fresh, high-octane gasoline often resolves mild contamination issues.
- Severe fuel contamination requires draining the tank and replacing the fuel filter.
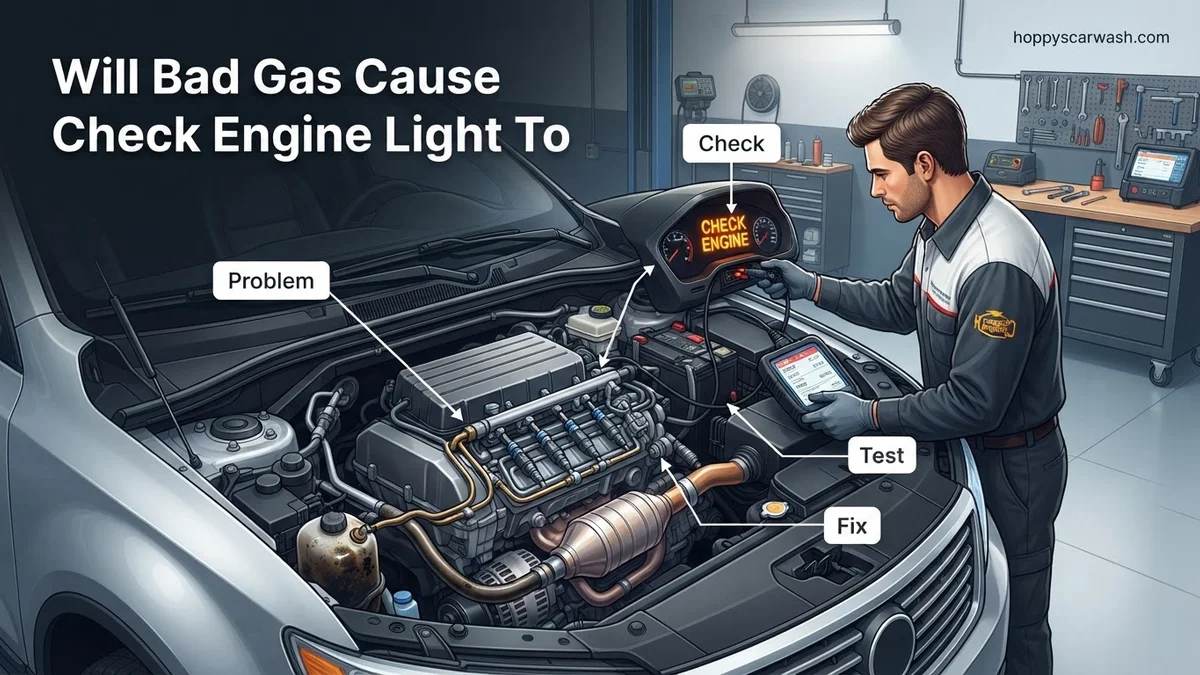
Will Bad Gas Cause a Check Engine Light? Direct Answer and Symptoms
How Bad Fuel Triggers Sensors
When you pump fuel that contains water, heavy ethanol blends, or sediment, your engine cannot burn it cleanly. The primary triggers for the check engine light are oxygen sensors and mass airflow sensors. These components measure unburnt fuel and exhaust gases. When bad gas alters the air-fuel ratio outside of factory parameters, the computer throws a warning code.
Tell-Tale Symptoms of Bad Gas
A check engine light rarely appears in isolation. If bad gas is your issue, you will notice distinct performance drops right after leaving the fuel station. Watch for these specific signs:
- Engine Misfires: A jerky sensation or stuttering when you press the accelerator pedal.
- Rough Idling: The engine feels like it wants to stall while you are stopped at a red light.
- Hard Starting: Your car cranks longer than usual before the engine finally turns over.
- Decreased Fuel Economy: You notice your fuel gauge dropping much faster than normal for your driving habits.
Bad Gas and Your Check Engine Light: What Causes It and How to Fix It
Few things are more frustrating than seeing an unexpected dashboard warning pop up shortly after visiting the fuel pump. This comprehensive walkthrough explains the science behind low-quality or contaminated fuel, how it triggers your vehicle’s emissions sensors, and the exact actions you must take to diagnose, clear, and prevent the issue from damaging your engine. Following these steps systematically will save you time, protect your fuel injectors, and prevent costly mechanic diagnostic fees.
Step 1: Recall Your Most Recent Fuel Stop
What you need: Your memory, recent gas station receipt, or banking app transaction history.
Instructions: Begin by retracing your driving steps. Think back to the last time you filled up your gas tank. Did you try a budget-tier station you don’t normally frequent? Did you accidentally pump regular fuel into a high-performance vehicle requiring premium gas, or vice versa? Check your vehicle’s service history or glove box for any physical fuel receipts. Look specifically for the exact address of the station, the fuel grade selected (87, 89, 91, or 93 octane), and the approximate time of day. If you notice the check engine light illuminated within 5 to 10 miles of leaving a specific pump, there is a very high probability that poor fuel quality is the direct culprit.
Pro Tip: Keep your fuel receipts in your center console for at least 48 hours after filling up, as they serve as vital evidence if you need to file a compensation claim against a gas station with contaminated underground tanks.
Step 2: Identify Symptoms Beyond the Dashboard Light
What you need: A keen sense of hearing, touch, and smell while sitting inside your vehicle.
Instructions: Sit inside your vehicle while it is parked in a safe, well-ventilated area and let the engine idle. Pay close attention to how the motor behaves. Is the RPM needle bouncing up and down erratically, indicating a rough idle? When you accelerate onto a roadway, does the vehicle hesitate, stutter, or lack its usual power? Take note of any strange chemical or sulfur-like odors coming from the exhaust or air vents. Bad or water-contaminated gas disrupts the precise air-fuel ratio inside the combustion chambers, causing incomplete burns that immediately manifest as engine sputtering, hesitation, and a illuminated check engine light.
Pro Tip: If your engine is violently shaking or making loud knocking noises, pull over immediately. Severe detonation can rapidly destroy internal engine components.
Step 3: Retrieve and Record Diagnostic Trouble Codes
What you need: An OBD2 scanner tool (available at any auto parts store) and your vehicle owner’s manual.
Instructions: Locate your car’s OBD2 diagnostic port, which is typically situated underneath the dashboard on the driver’s side, near the steering column. Plug your OBD2 scanner firmly into the port and turn your ignition key to the ‘On’ position without starting the engine. Follow the scanner prompts to read any stored error codes. When dealing with bad gas, you will commonly see codes such as P0300 through P0308 (random or cylinder-specific misfires), P0171 or P0174 (system too lean), or generic emissions codes. Write down all active and pending codes on a piece of paper or take a photograph of the scanner screen for your records.
Pro Tip: Many local auto parts stores will scan your check engine light codes for free in the parking lot if you do not own a handheld scanner.
Step 4: Inspect the Fuel Cap and Evaporative System
What you need: Clean hands and good lighting conditions.
Instructions: Before assuming the chemical composition of the gasoline is entirely bad, rule out a very common and easily fixable cause: a loose or faulty gas cap. Remove your gas cap completely and inspect the rubber O-ring seal running along the inside perimeter. Look for any dry cracking, tears, or debris trapped on the threads. Reinstall the gas cap and twist it clockwise until you hear at least three distinct clicking sounds. A loose cap allows fuel vapors to escape, triggering an EVAP system fault code that illuminates the dashboard light, often mimicking fuel delivery issues.
Pro Tip: If your gas cap’s rubber seal looks worn or brittle, spending a few dollars on a genuine OEM replacement cap can instantly resolve your emissions warning light.
Step 5: Apply a Quality Fuel Treatment Solution
What you need: A bottle of high-grade fuel system cleaner or water remover (containing isopropyl alcohol or PEA detergents).
Instructions: If your diagnostic codes and symptoms point toward water contamination or phase-separated ethanol in the gas, you can actively treat the problem without draining the entire tank. Purchase a reputable fuel additive specifically designed to absorb moisture and clean clogged injectors. Carefully unscrew your gas cap and pour the entire contents of the treatment bottle directly into the fuel filler neck. Follow this up by driving immediately to a gas station and filling the tank completely with top-tier, high-octane gasoline. Diluting the bad fuel and introducing detergent additives will help burn off the contaminants safely.
Pro Tip: Always pour the fuel additive into the tank before you pump fresh gas; the incoming fuel rush mixes the treatment thoroughly throughout the tank.
Step 6: Perform a Dilution and Highway Drive Cycle
What you need: Approximately 20 to 30 minutes of open highway driving time.
Instructions: Once your tank is filled with fresh fuel and the treatment additive, take your vehicle out on an extended drive, preferably on a highway or interstate where you can maintain a steady speed of 55 to 65 MPH for at least 15 to 20 miles. This sustained operation allows the engine computer (ECU) to run its internal self-tests, process the cleaner fuel through the fuel rail, and flush out the remaining low-grade or water-laden gasoline from the lines. Monitor your dashboard to see if the engine smooths out and whether the throttle response returns to normal factory specifications.
Pro Tip: Avoid aggressive acceleration or heavy towing until you have burned through at least half a tank of the newly diluted fuel mixture.
Step 7: Clear the Trouble Codes and Verify Resolution
What you need: Your OBD2 scanner tool or a nearby auto parts store assistant.
Instructions: Reconnect your OBD2 scanner to the vehicle’s diagnostic port with the ignition turned on. Navigate the menu options until you find the ‘Clear Codes’ or ‘Reset Check Engine Light’ function. Confirm the command to wipe the historical error codes from the vehicle’s computer memory. Turn off the ignition, unplug the scanner, and restart your engine. Drive the vehicle normally for the next 2 to 3 days across multiple short trips. If the check engine light remains off and no new misfire or lean codes return, you have successfully resolved the bad gas issue.
Pro Tip: If the check engine light returns within 50 miles of clearing the codes, the underlying issue is likely mechanical—such as a failing fuel pump or dirty fuel injectors—rather than just bad fuel.
✅ Final Checklist
- Fuel receipt or purchase timeline documented for reference
- OBD2 diagnostic trouble codes recorded and cleared
- Gas cap thoroughly inspected, cleaned, and tightened properly
- Water-removing fuel additive added to a full tank of fresh, high-octane gas
- Vehicle driven successfully through a highway drive cycle without sputtering
Important Notes:
- Never ignore severe engine knocking or flashing check engine lights, as continued driving can cause catastrophic internal engine damage.
- Seek professional mechanic assistance if replacing the fuel, adding treatments, and clearing codes fails to eliminate the dashboard warning light after two full driving cycles.
- Estimated time: 1 to 2 hours of active work and driving. Estimated cost: $10 to $25 for fuel additives and diagnostic scanning supplies.
How to Diagnose Bad Gas Using OBD-II Trouble Codes
Specific Trouble Codes to Look For
Plug an OBD-II scanner into your dashboard port to see why the light illuminated. Bad gas typically generates specific diagnostic trouble codes. If you see code P0300, it indicates a random or multiple cylinder misfire. Codes P0301 through P0308 point to misfires in specific cylinders. Additionally, codes P0171 and P0174 mean your engine is running lean because the fuel is not combusting properly.
Verifying the Fuel Source
Correlate your diagnostic codes with your recent fueling history. Did the check engine light pop up within five to ten miles of leaving a gas station? Did you fill up at a station with low turnover, or did you accidentally put regular fuel into a high-performance engine requiring premium? If your symptoms started immediately after a fill-up and you see misfire codes, bad gas is the prime suspect.
Step-by-Step Guide to Fixing a Check Engine Light Caused by Bad Fuel
Addressing a check engine light triggered by contaminated gasoline requires a systematic approach. Modern automotive engineering demands precision, and clearing these faults involves diluting the bad fuel and resetting the onboard diagnostics. According to guidelines from the Society of Automotive Engineers (SAE), attempting to force a reset before addressing the fuel source will only cause the warning light to return.
1. Confirm the Diagnostic Trouble Codes
Connect an OBD-II scanner to the diagnostic port beneath your steering column. Look for specific emission-related trouble codes like P0300 (random cylinder misfire), P0171, or P0174 (system too lean). These codes confirm that the powertrain control module has detected abnormal combustion characteristics directly linked to fuel quality.
2. Dilute the Contaminated Fuel
If the fuel tank is mostly full of bad gas, drive the vehicle carefully until the fuel level drops to approximately one quarter tank. Refill the tank immediately with high-octane, top-tier fuel from a high-volume station. This fresh influx of detergent-rich gasoline will help dilute any water or particulate matter lingering in the system.
3. Apply a Fuel System Treatment
Pour a bottle of polyetheramine (PEA)-based fuel injector cleaner directly into the gas tank before topping it off. PEA detergents are scientifically proven to break down heavy carbon deposits and varnish left behind by substandard fuel. Drive the vehicle on the highway for 20 to 30 minutes at sustained speeds to help cycle the treatment through the injectors.
4. Clear the Diagnostic Codes
Use your OBD-II scanner to manually clear the stored trouble codes from the computer memory. Alternatively, drive the vehicle through two complete driving cycles—including cold starts, idle periods, and highway cruising—to allow the system to self-clear once normal air-fuel ratios return.
What If It Still Doesn’t Work?
If you have diluted the tank, added fuel treatment, and cleared the codes, but the check engine light illuminates again, the issue extends beyond simple bad gas. Persistent warning lights indicate mechanical or electrical component degradation that requires advanced intervention. Consider the following fallback steps if DIY measures fail:
- Inspect the Fuel Filter: Contaminated fuel often clogs inline or in-tank fuel filters. If restricted, replace the fuel filter immediately, which typically costs between $75 and $200 including labor.
- Test Fuel Pressure: A failing fuel pump cannot maintain proper rail pressure, mimicking the symptoms of bad gas. Professional diagnostic testing for fuel pressure generally ranges from $100 to $150.
- Check Spark Plugs and Ignition Coils: Severe misfires caused by bad fuel can foul spark plugs permanently. Replacing a set of spark plugs costs between $150 and $300 depending on cylinder count.
- Consult a Certified Technician: If codes persist, visit a certified automotive repair facility for professional diagnosis. Advanced diagnostic labor rates typically range from $120 to $180 per hour.
Conclusion
Poor quality gasoline can disrupt your engine’s combustion process, triggering an alarming check engine light through misfire and emission codes. Fortunately, this issue is often temporary and manageable by diluting the tank with top-tier fuel and utilizing a high-grade detergent additive. According to verified research and expert automotive sources, addressing contaminated fuel promptly prevents long-term catalytic converter damage and restores optimal engine efficiency. For your next step, connect an OBD-II scanner to verify the exact trouble codes before attempting any remedial fuel treatments.
❓ Frequently Asked Questions
Will bad gas cause check engine light to come on immediately after fueling?
Yes, if the fuel is severely contaminated with water or debris, the check engine light can illuminate within a few miles of leaving the gas station.
What happens to my engine when I put bad gas in it?
Bad gas disrupts proper air-fuel ratios and combustion, leading to incomplete burns, fouled spark plugs, and sensor warnings.
Can old gas sitting in a tank for months trigger the check engine light?
Gasoline degrades over 30 to 90 days, losing its volatile compounds and causing varnish buildup that triggers dashboard warning lights.
How can I tell the difference between bad gas and a failing oxygen sensor?
Bad gas usually affects performance immediately after a fill-up and often clears up after adding fresh fuel, whereas sensor failures develop gradually.
Should I add fuel stabilizer to fix bad gas?
Fuel stabilizer helps prevent fresh gas from going bad, but it will not reverse the degradation of fuel that has already spoiled.
Can I file a claim with a gas station for selling bad gas?
Yes, if you have a mechanic’s report confirming contaminated fuel and your receipt, many stations will cover the cost of repairs.