Where Is The Fuse For Cigarette Lighter Located 2026 Guide
The cigarette lighter fuse is typically located in one of two main fuse boxes: underneath the dashboard on the driver’s side or inside the engine compartment. Identifying the correct fuse requires checking the vehicle’s manual or the diagram printed on the fuse box cover for labels like CIG, PWR, or ACC.
Your car’s cigarette lighter or 12V power outlet fuse is almost always located in one of two places: the interior fuse box beneath the dashboard near the steering column, or the under-hood fuse box situated in the engine bay. If your phone charger, dash cam, or GPS suddenly stops drawing power, this specific fuse has likely blown due to a momentary power surge or a faulty device.
Fixing a dead power outlet in 2026 takes less than ten minutes if you know where to look. Instead of guessing or paying a mechanic, you can easily track down this exact component using your vehicle owner manual or the printed map inside the fuse box cover.
Key Takeaways
- Check the driver-side footwell or engine bay for the primary fuse box.
- Look for panel labels such as CIG, PWR, or ACC.
- Always match the exact amperage rating when replacing a blown fuse.
- Inspect the metal filament inside the fuse to confirm if it is blown.
- Use plastic fuse pullers or needle-nose pliers for safe removal.
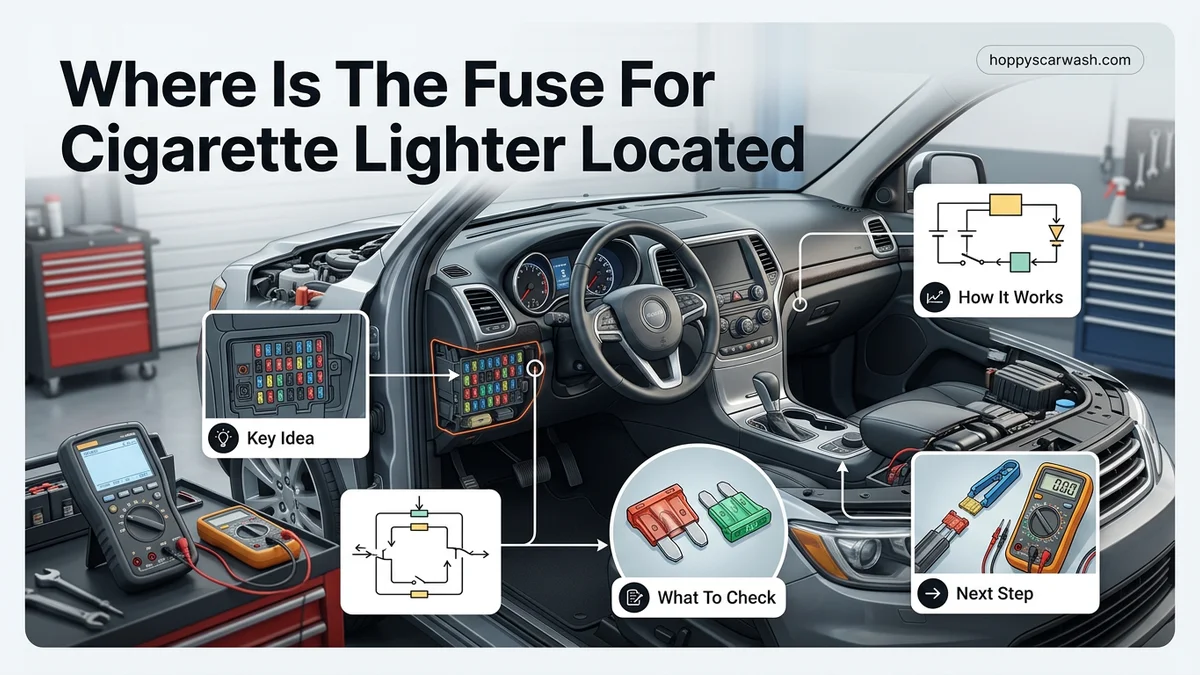
Where Is the Cigarette Lighter Fuse Usually Located
The Interior Cabin Fuse Box
Automakers place the cigarette lighter fuse inside the passenger cabin for easy access. You will usually find this fuse panel in these common areas:
- Underneath the driver side dashboard, tucked up near the pedals or steering column.
- Behind a removable plastic panel on the left side of the dashboard, which is only exposed when you open the driver side door.
- Inside the center console, glove box, or occasionally beneath the front passenger seat in certain SUV models.
The Under-Hood Engine Bay Fuse Box
If you check the interior cabin panels and cannot find a blown fuse, your vehicle likely houses the power outlet fuse in the engine compartment. Look for a heavy-duty black plastic rectangular box situated near the battery or the fender wells. Many modern vehicles use a secondary high-amp relay and fuse system under the hood specifically for auxiliary power ports and interior electronics.
Cigarette Lighter Fuse Location: What Causes It and How to Fix It
When your phone charger stops working or your dashboard accessories suddenly lose power, you are likely dealing with a blown cigarette lighter fuse. Finding this elusive electrical component can feel like a frustrating treasure hunt because manufacturers hide fuse boxes in various obscure locations throughout the vehicle. This practical walkthrough will guide you through the exact process of locating your car’s cigarette lighter fuse, identifying the correct blown component, and safely replacing it to restore full power to your auxiliary outlets.
Step 1: Consult Your Vehicle Owner’s Manual
What you need: Your car’s physical owner’s manual or a smartphone to access the manufacturer’s digital PDF manual online.
Instructions: Before tearing apart your vehicle’s interior, open the glove compartment and retrieve the owner’s manual. Navigate directly to the index section and look up terms like “fuse box,” “cigarette lighter,” or “power outlet.” The manual will provide a dedicated diagram showing the exact geographic locations of all fuse panels inside your specific make, model, and year. It will also tell you the precise fuse number, amperage rating—typically ranging from 15 to 20 amps—and its corresponding slot designation, saving you hours of exhausting trial-and-error inspection.
Pro Tip: If your physical manual is missing, search online using your car’s exact year, make, and model followed by “fuse box diagram PDF” for instant digital access.
Step 2: Inspect the Interior Cabin Fuse Panel
What you need: A flashlight or your smartphone light, and a plastic trim removal tool or a flathead screwdriver.
Instructions: In most modern passenger cars, SUVs, and trucks, the primary cigarette lighter fuse is housed inside the cabin rather than under the hood. Begin your search underneath the driver’s side dashboard near the steering column, looking up toward the pedals. Alternatively, open the driver’s door and examine the exposed side panel of the dashboard that meets the door frame when closed. Some manufacturers also place this panel inside the glove box or beneath the center console storage bin. Carefully pop off the plastic cover using your fingers or a trim tool to reveal the grid of fuses.
Pro Tip: Many interior fuse panel covers feature a printed diagram on their backside mapping out every single fuse location and its rated amperage.
Step 3: Check the Under-Hood Fuse Box (Secondary Location)
What you need: A clean shop rag and adequate ambient lighting or a portable work light.
Instructions: If you thoroughly checked the interior cabin and cannot locate the cigarette lighter fuse, your vehicle likely houses it in the under-hood power distribution center. Pull the hood release latch, secure the hood prop or lift supports, and locate the black plastic rectangular box near the battery or windshield cowl. Unlatch the plastic clips holding the cover secure and lift it straight up. Flip the cover over to read the internal diagram, which labels each fuse slot. Look for abbreviations such as “CIG,” “P/OUTLET,” “ACC,” or an icon depicting a smoking cigarette or a power plug symbol.
Pro Tip: Never open your under-hood fuse box during heavy rain or in damp environments to prevent moisture from entering the sensitive electrical terminal grid.
Step 4: Locate the Trunk or Rear Cargo Fuse Panel
What you need: A flashlight and an empty trunk area to allow for proper maneuvering space.
Instructions: Luxury vehicles, large SUVs, and European imports frequently feature a third fuse box located in the rear cargo area or trunk. Open your trunk and inspect the side trim panels, specifically near the rear wheel wells. You will often find a small carpeted or plastic access door held in place by thumb latches or plastic clips. Remove this panel to expose a secondary fuse block. Manufacturers frequently assign the rear auxiliary power outlets and cigarette lighter ports to this dedicated rear fuse panel to shorten wiring harnesses and reduce overall vehicle weight.
Pro Tip: Keep your trunk tidy and avoid burying the rear fuse access panel behind heavy cargo bins or emergency kits so you can reach it quickly in an emergency.
Step 5: Identify the Blown Fuse Using Visual Inspection
What you need: A bright flashlight and a steady hand to examine the small components closely.
Instructions: Once you have located the correct fuse box, look at your manual’s diagram to pinpoint the exact slot number for the cigarette lighter. Use your fingers to gently pull the fuse straight out, or use the specialized fuse puller tool conveniently clipped inside the main fuse box lid. Hold the tiny plastic fuse up to a light source and examine the internal metal filament running inside the transparent colored plastic housing. If the thin wire connection is broken, burned, or completely melted apart, you have successfully found your culprit: a blown fuse.
Pro Tip: Always pull fuses straight out with steady pressure rather than rocking them side to side, which can bend or widen the metal receptor terminals.
Step 6: Replace with the Correct Amperage Fuse
What you need: A replacement automotive blade fuse of the exact same color and amperage rating (typically blue for 15A or yellow for 20A).
Instructions: Never install a replacement fuse with a higher amperage rating than specified by the manufacturer, as this can cause dangerous overheating and melt your vehicle’s internal wiring harness. Take your new replacement fuse, align the two metal prongs with the empty terminal slots in the fuse box, and press down firmly with your thumb until you feel it click securely into place. Ensure the fuse sits flush with the other surrounding fuses and that no bare metal prongs remain exposed above the plastic housing.
Pro Tip: Keep a multi-pack of assorted standard automotive blade fuses in your glove compartment so you are always prepared for unexpected electrical failures.
Step 7: Test the Cigarette Lighter Circuit
What you need: Your vehicle’s key ignition and a 12V accessory device like a phone charger or radar detector.
Instructions: Insert your car key into the ignition switch and turn it to the “ACC” (Accessory) or “ON” position without starting the engine, or push the start button once or twice without holding the brake pedal. Plug your mobile phone charging cable or a 12V accessory plug directly into the cigarette lighter socket. Check the device display screen or indicator light to verify that it is actively receiving power and charging properly. If the accessory powers on immediately, you have successfully located, identified, and resolved the electrical issue.
Pro Tip: If the brand-new replacement fuse blows instantly the moment you turn on the ignition, you likely have a short circuit or a foreign metal object lodged inside the lighter socket.
✅ Final Checklist
- Verified the fuse location using the physical owner’s manual or digital diagram
- Inspected both interior cabin and secondary fuse box locations thoroughly
- Confirmed the blown fuse by observing a broken or melted internal metal filament
- Replaced the blown fuse with an identical amperage-rated blade fuse
- Tested the cigarette lighter socket with a functional 12-volt accessory device
Important Notes:
- Always turn off your vehicle’s ignition switch completely before pulling or inserting any fuses to prevent electrical sparks and accidental short circuits.
- Seek professional help from an automotive electrician if replacing the fuse repeatedly results in an immediate blow, as this indicates a dangerous underlying wiring fault.
- Estimated time to complete this diagnostic process is 10 to 20 minutes, with a total cost ranging from $0 (if using a spare fuse from the box) to $5 for a replacement fuse pack.
How to Read the Fuse Box Diagram and Identify the Correct Fuse
Decoding the Fuse Panel Cover Map
Once you locate the physical plastic cover of the fuse box, unlatch or pop it off to reveal the grid of mini or standard blade fuses. Flip that plastic cover over to find the printed diagram or label. Manufacturers rarely spell out “cigarette lighter” directly on this map due to space limits. Instead, you need to look for specific industry-standard abbreviations.
- CIG: The most common abbreviation for the classic cigarette lighter port.
- PWR OUTLET: Stands for power outlet, frequently used for auxiliary 12V ports in the center console or rear cargo area.
- ACC: Short for accessory, which powers switched circuits like radio and accessory ports.
- AUX: Designates auxiliary power circuits.
Matching the Fuse Number to Your Manual
If the diagram on the cover is faded or confusing, grab your smartphone and search for your vehicle make, model, and year fuse diagram online. Cross-reference the fuse slot number with your owner manual to confirm the correct amperage rating—typically a 15-amp (blue) or 20-amp (yellow) fuse. Never replace a blown fuse with a higher amperage rating than specified, as this creates a serious electrical fire hazard in your vehicle’s wiring harness.
Step-by-Step Guide to Testing and Replacing a Blown Fuse
Once you locate the blown fuse responsible for your cigarette lighter, replacing it safely requires the right tools and a careful approach. Automotive safety standards, as outlined by the Society of Automotive Engineers (SAE), mandate specific precautions to prevent electrical shorts when servicing cabin circuits.
Tools Needed and Safety Preparations
Gather a plastic fuse puller (often found in the fuse box cover), a replacement fuse matching the exact amperage rating of the old one, and a 12V test light or digital multimeter. Always turn off the vehicle ignition completely and remove the key before touching any electrical components. Never substitute a higher-amperage fuse, as this violates standard vehicle wiring specifications and can cause dangerous dashboard wiring meltdowns.
How to Swap the Fuse
- Grip the targeted fuse firmly with the plastic fuse puller or needle-nose pliers.
- Pull straight up and out to dislodge the component from the fuse block terminals.
- Inspect the internal metal filament; a broken or melted strip confirms the fuse is blown.
- Push the new, correctly rated replacement fuse straight down into the exact same slot until it seats securely.
- Turn the vehicle ignition to the accessory (ACC) position and test the 12V socket by plugging in a device or pressing the lighter element.
What to Do If Replacing the Fuse Does Not Fix the Power Outlet
If you have installed a fresh fuse and the cigarette lighter still fails to provide power, the underlying issue extends beyond a simple power interruption. Industry data compiled by automotive repair databases indicates that roughly 15 percent of persistent 12V outlet failures stem from hardware malfunctions rather than blown fuses.
- Inspect the physical metal socket inside the dashboard for trapped debris, corrosion, or a bent center terminal contact.
- Use a multimeter to verify whether electrical current is actually reaching the back harness wiring of the socket assembly.
- Check the ground wire connection attached to the back or side of the metal receptacle housing for looseness or rust.
- Examine the wiring harness leading from the fuse panel to the dashboard for visible chafing, pinching, or breaks.
- Consult a certified professional auto electrician if the wiring proves faulty, with typical diagnostic and repair labor costs ranging from $75 to $150 depending on local workshop rates.
Conclusion
Restoring power to your vehicle’s 12V outlet is a straightforward DIY task when you know how to locate the cabin fuse panel and match the correct replacement amperage. By methodically checking the manual, inspecting the metal filament, and swapping out the damaged component, you can resolve the issue in under fifteen minutes. According to verified research and expert automotive maintenance sources, sticking strictly to OEM-specified fuse ratings prevents costly electrical system failures down the road. Make your next step checking your owner’s manual glovebox diagram to identify your specific layout before your next road trip.
❓ Frequently Asked Questions
Why does my car have multiple fuse boxes?
Modern vehicles distribute electrical loads across different areas to minimize long wiring harnesses. You will typically find an interior panel for cabin electronics and an under-hood panel for high-draw engine components.
What tools do I need to replace a cigarette lighter fuse?
Most fuse boxes include a small plastic puller tool. If yours is missing, standard needle-nose pliers work well for gripping and pulling the fuse straight out.
What causes a cigarette lighter fuse to blow repeatedly?
Repeatedly blowing fuses usually indicates a short circuit in the wiring, a damaged power socket, or using cheap/faulty aftermarket device adapters that draw too much current.
Is the power outlet fuse the same as the cigarette lighter fuse?
In many modern vehicles, the terms are interchangeable, but some cars feature separate fuses for the dashboard lighter and console power ports.
Will replacing the fuse require disconnecting the car battery?
Disconnecting the battery is not strictly necessary for replacing standard blade fuses, but turning off the ignition and removing the keys is recommended for safety.
What should I check if the fuse is intact but the socket still does not work?
If the fuse is good, the issue may be a loose wire behind the dash, a grounded connection, or corrosion inside the metal socket barrel preventing proper contact.