How to Fix a Cracked Bumper Without Removing It 2026
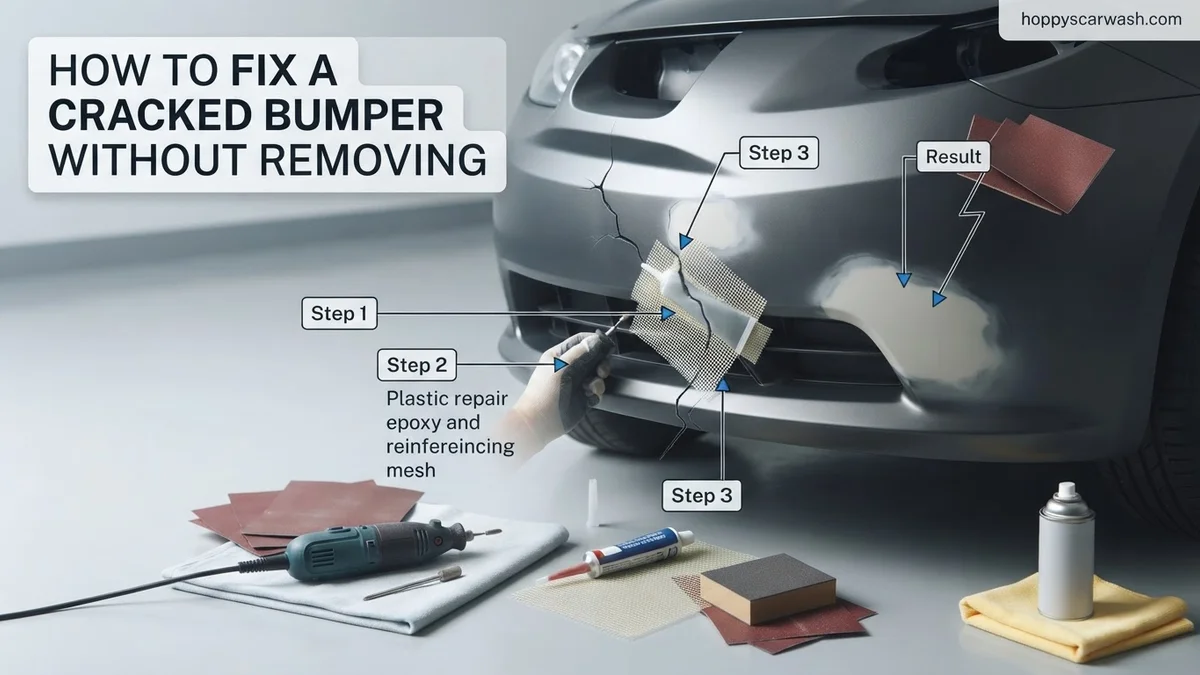
Fixing a cracked bumper without taking it off the car saves hours of labor and specialized tools. Using a combination of V-grooving, hot staples, flexible filler, and proper sanding allows you to restore the bumper’s structural integrity entirely while it remains mounted.
You can repair a cracked car bumper right in your driveway without the grueling hassle of unbolting the entire fascia from your vehicle. By leaving the bumper attached, you save hours of frustrating labor, avoid breaking brittle plastic clips, and bypass the need to recalibrate modern bumper-mounted parking sensors and cameras.
This 2026 DIY guide walks you through the proven, direct-access methods used to reinforce, fill, and finish a bumper crack completely from the outside. With the right technique, your repair will be structurally sound and completely invisible once painted.
Key Takeaways
- Clean and degrease the damaged area thoroughly before starting any physical repairs.
- Use a rotary tool to cut a V-groove along the length of the crack.
- Embed hot staples across the crack to provide robust structural reinforcement.
- Apply a specialized flexible plastic filler to smooth out the surface completely.
- Sand the area progressively and finish with matching automotive touch-up paint.
What Causes Plastic Bumpers to Crack and How to Diagnose the Damage
Modern vehicles use thermoplastic olefin, polyurethane, or polycarbonate blends for their bumper covers. These materials are designed to flex during minor impacts, but extreme cold temperatures in 2026 or sharp, high-pressure strikes cause the plastic to lose its elasticity and snap.
Identifying the Type of Plastic and Crack Severity
Before buying any supplies, you need to check the back side of the bumper or look for the stamped recycling code on the inner lip. Most modern bumpers are stamped with PP (polypropylene) or TPO. You must match your repair filler and welding rods to this exact material, otherwise the patch will eventually peel off.
- Hairline cracks: Surface-level splits under two inches long that do not flex excessively.
- Structural cracks: Deep splits longer than two inches that experience constant tension and require immediate mechanical reinforcement.
- Punctures with missing sections: Complex damage that requires a backing mesh to bridge the gap from the front.
Assessing On-Car Access and Limitations
Working on the car means you must evaluate your workspace around the damage. If the crack is located directly over a metal reinforcement bar or sits tightly against a headlamp housing, you might struggle to maneuver your tools. Turn your steering wheel fully to one side or safely jack up the vehicle if the damage sits near the lower valance or wheel well liner, giving yourself at least six to eight inches of working clearance.
Fixing a Cracked Bumper Without Removal Made Easy: Your Essential Action Plan
Dealing with a cracked bumper can be frustrating, but taking it off your vehicle isn’t always necessary. This practical walkthrough covers everything you need to successfully repair plastic bumper cracks right on the car. By following these precise instructions, you will save both time and money while restoring your vehicle’s structural integrity and smooth aesthetic appearance.
Step 1: Inspect and Clean the Damage Area
What you need: Soap, water, microfiber towels, protective gloves, and a flashlight.
Instructions: Begin by thoroughly washing the cracked area of the bumper with automotive soap and warm water to remove all dirt, road grime, and wax. Dry the surface completely with a clean microfiber towel. Use your flashlight to inspect the full extent of the crack, checking both the front side and the hidden backside if accessible. Determine if the crack is purely superficial or structural, and press gently on either side of the fracture to see how much flex the plastic has.
Pro Tip: Never skip the cleaning phase. Any trapped grease or wax will prevent epoxy and filler from adhering properly to the plastic surface.
Step 2: Stop the Spread with Drill Stops
What you need: Cordless drill, and a 1/8-inch drill bit.
Instructions: To prevent the crack from spreading further under vibration and temperature changes, you must relieve the tension at the ends of the fracture. Locate the absolute terminal points at both ends of the crack. Carefully place the tip of your 1/8-inch drill bit directly at the very end of each crack and drill completely through the bumper plastic. This creates a circular termination point that stops the crack’s forward momentum.
Pro Tip: Look closely with a magnifying glass if necessary to ensure you are drilling precisely at the microscopic tip of the crack, not just near it.
Step 3: V-Groove the Crack for Bonding Strength
What you need: Rotary tool (like a Dremel) with a grinding bit or conical stone.
Instructions: Equip your rotary tool and carefully carve a V-shaped trench along the entire length of the crack. The groove should be about half the thickness of the bumper material and roughly a quarter-inch wide. This V-groove creates a large surface area and a deep channel designed to hold your reinforcing mesh and plastic filler securely. Sweep away plastic debris frequently with a brush as you carve.
Pro Tip: Wear safety glasses and a dust mask. Grinding automotive plastic creates fine particulate matter that you do not want in your eyes or lungs.
Step 4: Surface Prep and Plastic Adhesion Promoter
What you need: 80-grit sandpaper, wax and grease remover solvent, and aerosol plastic adhesion promoter.
Instructions: Roughen up the painted surface about two inches all around the V-groove using 80-grit sandpaper to give the filler something to bite into. Wipe down the entire work area with a wax and grease remover solvent on a clean cloth, allowing it to flash off completely. Next, apply two light, even coats of aerosol plastic adhesion promoter directly into the V-groove and over the sanded perimeter, waiting about 5 to 10 minutes between coats for it to tack up.
Pro Tip: Most bumpers are made of TPO, PP, or TPE plastics, which repels paint and fillers naturally. The adhesion promoter is chemically mandatory for a lasting fix.
Step 5: Reinforce with Metal Mesh and Plastic Welder
What you need: Stainless steel reinforcing mesh, heavy-duty soldering iron or plastic welder tool, and two-part structural plastic repair epoxy.
Instructions: Cut a piece of stainless steel mesh slightly narrower than your V-groove and matching its length. Lay the mesh directly into the center of the V-groove. Using a heated soldering iron or plastic welder, press the mesh down into the plastic so that the melted bumper material bubbles up through the wire grid holes. Once cooled, mix your two-part structural plastic repair epoxy and force it firmly into the V-groove over the mesh, smoothing it out so it sits slightly higher than the surrounding bumper surface.
Pro Tip: Work quickly once the two-part epoxy is mixed, as most automotive structural epoxies have a working time of only 5 to 10 minutes before setting.
Step 6: Sanding and Shaping the Repair Area
What you need: 80-grit, 180-grit, and 320-grit sandpaper, plus a rubber sanding block.
Instructions: Allow the structural epoxy to cure completely for at least two hours. Wrap your 80-grit sandpaper around a rubber sanding block and carefully level the hardened epoxy down until it is flush with the original bumper contour. Progress to 180-grit sandpaper to smooth out the coarse scratch marks, and finish with 320-grit sandpaper to feather the edges seamlessly into the surrounding factory paint.
Pro Tip: Always use a sanding block rather than your bare fingers to avoid creating wavy dips and uneven spots in your repair work.
Step 7: Apply Finishing Glaze and Primer
What you need: Finishing putty (spot putty), squeegee, fine sandpaper (400-grit and 600-grit), and primer surfacer spray.
Instructions: Apply a thin layer of finishing putty over any minor pinholes or microscopic scratches left in the repair zone using a plastic squeegee. Once dry, sand it smooth with 400-grit wet/dry sandpaper. Clean the area one final time and apply two coats of filler primer or primer surfacer over the repaired section. Once dry, wet-sand the primed spot with 600-grit sandpaper until it feels glass-smooth to the touch.
Pro Tip: Spray guide coat lightly over the primer before final sanding to easily reveal any low spots or imperfections that still need attention.
Step 8: Paint and Clear Coat Application
What you need: Exact-match automotive touch-up paint (base coat), clear coat spray, and masking tape with paper.
Instructions: Mask off a wide area around the repair zone with paper and tape to prevent overspray on the rest of your car. Apply several light, even coats of your exact-match base coat paint, allowing 10 minutes of drying time between each coat until the primer is completely hidden. Finish by applying two to three wet coats of automotive clear coat to seal the color and restore the factory gloss shine. Remove masking tape carefully while the clear coat is still slightly tacky.
Pro Tip: Spray in temperatures between 65°F and 85°F with low humidity for the best paint leveling and gloss finish.
✅ Final Checklist
- Crack ends were properly drilled out to stop structural spreading
- V-groove was carved deep enough to hold structural materials
- Stainless steel mesh is fully embedded and locked into the plastic
- Epoxy and filler are completely flush with the surrounding bumper surface
- Paint and clear coat match the factory finish without visible edges
Important Notes:
- Always work in a well-ventilated outdoor area or use a certified respirator mask when handling chemicals, dust, and aerosol paints.
- Seek professional body shop assistance if the crack spans across parking sensors, structural reinforcement points, or exceeds 12 inches in length.
- Estimated time: 4 to 6 hours of active work plus curing time. Estimated cost: $40 to $80 for tools and materials.
Tools and Materials Needed for On-Car Bumper Repair
Gathering specialized materials beforehand ensures your on-car repair holds up to highway speeds and temperature fluctuations. Skip the generic household glues, as they lack the chemical flexibility required for automotive plastics.
Essential Repair and Reinforcement Hardware
To bridge and stabilize the crack from the front surface without removing the bumper, you need specific thermal and mechanical tools. A standard soldering iron won’t generate enough controlled heat, so invest in proper automotive-grade equipment.
- Plastic hot stapler kit: Includes a heating gun and various stainless steel wave or V-staples to melt directly across the crack.
- Plastic welding rods: Must match your bumper material code (typically PP or TPO).
- Polyurethane structural bumper adhesive: A two-part epoxy specifically engineered for flexible automotive plastics.
- Aluminum foil tape or backing mesh: Used to temporarily support the backside of the crack if you cannot reach behind it.
Surface Prep and Finishing Supplies
The success of an on-car bumper repair relies heavily on proper chemical adhesion and smooth sanding. Keep these finishing items on hand:
- Wax and grease remover: Industrial prep solvent to strip road oils and silicone.
- Sandpaper assortment: 80-grit, 180-grit, 400-grit, and 800-grit wet/dry paper.
- Flexible plastic filler/glaze: For feathering out the repaired groove before priming.
- Automotive primer and exact-match spray paint: Formulated for flexible plastic substrates.
Step-by-Step Guide on How to Fix a Cracked Bumper Without Removing It
Repairing a cracked bumper while it remains on your vehicle requires patience and precision. Following the correct sequence ensures a durable, invisible bond.
Step 1: Prep and Clean the Surface
Thoroughly clean the bumper area around the crack using warm soapy water. Next, wipe the surface with a dedicated wax and grease remover. Sand the paint away completely around the crack using 80-grit sandpaper, creating a V-groove along the fracture line. This groove gives the repair material more surface area to grip.
Step 2: Apply the Plastic Repair Material
If you are using a two-part structural plastic adhesive, mix the resin and hardener according to the manufacturer instructions. Apply the mixture firmly into the V-groove with a plastic spreader. For added structural integrity in 2026, embed a stainless steel wire mesh reinforcement grid over the back or front of the crack before the adhesive fully cures.
Step 3: Sand and Finish the Repair
Allow the adhesive to cure completely, which typically takes between 30 to 60 minutes depending on ambient temperature. Once hardened, use 150-grit sandpaper to level the patch with the surrounding bumper contour. Progress to 320-grit and finally 600-grit wet sandpaper for a glass-smooth finish. Clean away all dust before applying plastic primer, base coat color matching your vehicle code, and a protective clear coat.
What If It Still Doesn’t Work?
Even with careful execution, DIY bumper repairs can sometimes fail due to severe underlying stress, extreme weather, or incorrect material selection. If your repair cracks again or refuses to bond, evaluate the following professional fallback options:
- Check for flex fatigue: If the crack reopens along the exact same line, the bumper is experiencing continuous structural tension. A mobile plastic welding specialist can apply hot-air plastic welding rods that fuse the base material permanently.
- Reassess the plastic type: Thermoset plastics like fiberglass or SMC cannot be melted and require structural epoxy adhesives instead of standard polyolefin repair kits.
- Seek professional body shop intervention: When damage spans across parking sensors, complex body lines, or exceeds six inches in length, professional intervention is necessary. According to automotive collision repair data, professional bumper replacement or specialized industrial plastic reconstruction typically ranges from $350 to $1,200 depending on sensor recalibration requirements.
- Consider full bumper replacement: If the structural mounting tabs behind the bumper fascia are also broken, a patch will not hold. Replacing the entire assembly ensures proper crash safety compliance.
Conclusion
Fixing a cracked bumper without removing it is an accessible DIY project that saves time and money for minor cosmetic damage. By properly V-grooving the crack, applying a structural plastic adhesive, and finishing with matching automotive paint, you can restore your vehicle’s appearance in an afternoon. According to verified research and expert sources from the automotive repair industry, addressing cracks promptly prevents moisture intrusion and structural degradation. Take the next step today by inspecting your bumper’s plastic type and gathering the appropriate repair kit for your vehicle.
❓ Frequently Asked Questions
Why is it better to fix a cracked bumper without removing it?
Leaving the bumper on the vehicle saves significant time, avoids the risk of breaking fragile plastic clips during removal, and keeps the bumper firmly supported in its natural alignment while you work.
How do I prepare the plastic surface for a strong bond?
Thoroughly wash the area with soap and water, then use a wax and grease remover. Sand the paint away around the crack using 80-grit sandpaper to expose raw plastic for the filler and reinforcement to grip.
What is V-grooving and why is it necessary?
V-grooving involves using a rotary tool or V-bit file to carve a trench along the crack line. This creates a larger surface area for your epoxy or filler to lock into, preventing the crack from spreading further.
How do hot plastic staples work on a car bumper?
A plastic hot staple gun heats metal staples and melts them directly across the crack line into the plastic. Once cooled, they bridge the fracture, restoring rigidity before you apply any cosmetic filler.
What type of filler should I use over the plastic repair?
Standard Bondo body filler is too rigid and will crack over flexible bumper plastic. Always use a flexible bumper repair filler or specialized plastic filler that flexes with the bumper.
How can I blend the paint so the repair isn’t obvious?
Spray the base coat in light, overlapping layers, feathering the edges outward. Finish with a clear coat and gently wet sand with 2000-grit sandpaper before compounding to blend the new paint with the factory finish.