How Long Does It Take to Replace a Wheel Bearing in 2026
Replacing a wheel bearing typically takes 1 to 3 hours per wheel for a DIYer with the right tools, while professional shops usually complete the job in 1 to 2 hours of labor. The exact time depends heavily on whether the bearing is a bolt-on assembly or a press-in type requiring specialized hydraulic equipment.
Replacing a bad wheel bearing typically takes a professional mechanic 1 to 2 hours of actual labor time per wheel. If you are planning to tackle this job in your home garage as a DIY project in 2026, expect it to take anywhere from 2 to 4 hours per wheel, assuming you have the right tools and average mechanical experience.
Getting this repair done quickly matters because a failing wheel bearing is a serious safety hazard. Knowing the exact time commitment helps you plan whether to leave your car at the shop for a morning or clear out your entire weekend.
Key Takeaways
- Professional shop labor usually takes 1 to 2 hours per wheel.
- DIY replacements typically require 1 to 3 hours depending on your experience level.
- Pressed-in bearings take significantly longer than bolt-on hub assemblies.
- Severe rust and seized bolts can easily double the total repair time.
- Having a hydraulic press or specialty puller kit speeds up the DIY process.
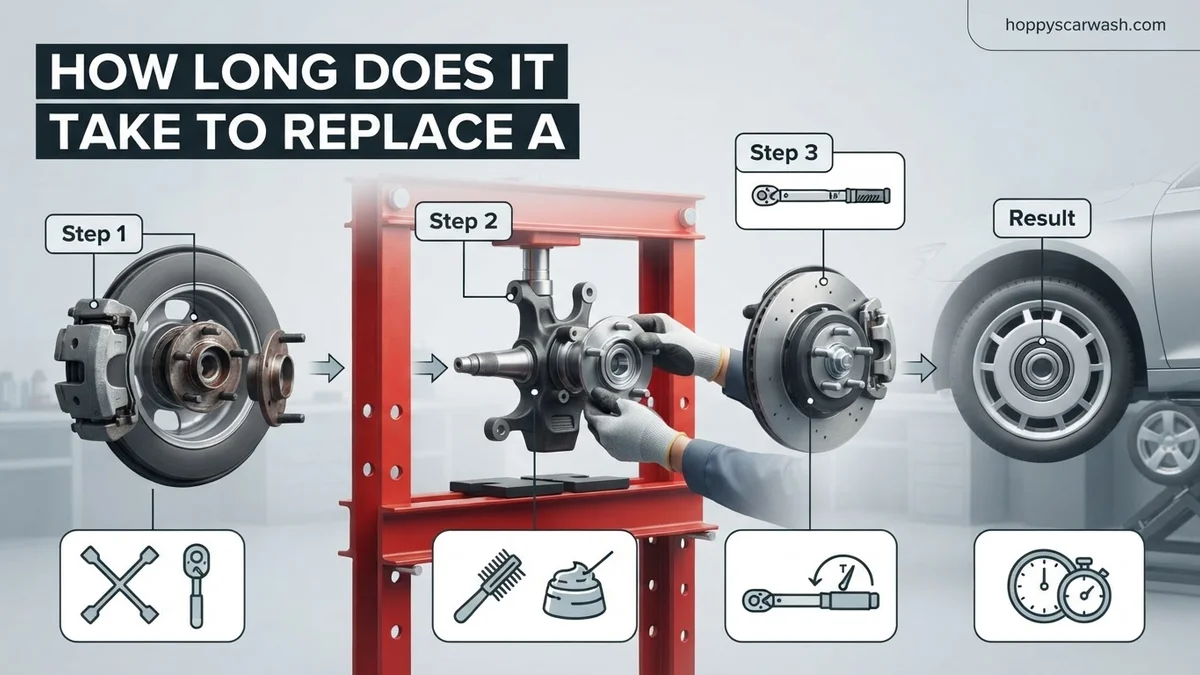
How Long Does It Take to Replace a Wheel Bearing
Professional Shop Time vs. DIY Garage Time
Professional service centers operate with pneumatic tools, vehicle lifts, and specialized hydraulic presses. Because of this efficiency, a technician can usually swap out a standard wheel bearing in just 60 to 120 minutes. If your vehicle uses a modern bolt-on hub assembly, a shop might even finish the job in under an hour.
For DIYers working on jack stands in 2026, the timeline stretches out. Without a lift, simple tasks like removing stubborn axle nuts and breaking loose rusted suspension bolts take significantly longer. Here is a realistic breakdown of what to expect:
- Bolt-on hub assembly: 1.5 to 2.5 hours for a DIYer.
- Pressed-in bearing: 3 to 5 hours for a DIYer, largely due to knuckle removal and press work.
- Rear wheels with integrated parking brakes: Add 30 to 60 minutes of complexity.
Time Breakdown by Assembly Type
The design of your specific vehicle dictates the clock more than anything else. Not all wheel bearings are created equal, and the engineering under your fenders changes the labor hours drastically.
- Complete Hub Assemblies: These bolt directly to the steering knuckle. You simply remove the wheel, brake caliper, rotor, and a few bolts to swap the entire unit out. This is the fastest repair.
- Pressed-In Bearings: These require you to completely remove the steering knuckle from the car, take it to a bench, and use a heavy-duty hydraulic press or a special on-car puller kit to push the old bearing out and press the new one in. This style easily doubles your project time.
Master Wheel Bearing Replacement in 7 Simple Steps
Replacing a wheel bearing is a crucial automotive repair that directly impacts your vehicle safety, handling, and ride comfort. If you have been hearing a persistent humming, growling, or roaring noise that gets louder as you speed up, your wheel bearing is likely failing. This comprehensive walkthrough breaks down the exact timeline and process, helping you understand how long the job takes and how to execute it efficiently from your own garage.
Step 1: Vehicle Preparation and Safety Setup
What you need: Hydraulic floor jack, heavy-duty jack stands, wheel chocks, breaker bar, and safety glasses.
Instructions: Park your vehicle on a flat, level surface and engage the emergency brake firmly. Place wheel chocks securely around the tires that will remain on the ground to prevent any rolling. Loosen the lug nuts on the wheel with the failing bearing by about a quarter turn using your breaker bar while the vehicle is still on the ground. Position your hydraulic floor jack under the manufacturer-approved jacking point, lift the vehicle, and lower it securely onto sturdy jack stands. Never rely solely on a hydraulic jack for support.
Pro Tip: Always give the car a gentle shake while it is on the jack stands to ensure absolute stability before crawling underneath or applying heavy force.
Step 2: Wheel and Brake Component Removal
What you need: Lug wrench, socket set, bungee cords or wire hangers, and a flathead screwdriver.
Instructions: Completely remove the loosened lug nuts and take the wheel off the hub. Next, you will need to unbolt the brake caliper. Remove the sliding pin bolts holding the caliper, slide it off the rotor, and use a bungee cord or wire hanger to suspend it safely from the coil spring. Do not let the caliper dangle by its rubber brake hose, as this can cause internal damage and dangerous fluid leaks. Finally, remove the brake rotor, spraying any rusted hub surfaces with penetrating oil if it resists coming off.
Pro Tip: Take clear reference photos of the brake line routing and caliper placement with your smartphone before disassembly to ensure smooth reassembly later.
Step 3: Unbolting Axle Nut and Suspension Elements
What you need: Impact wrench or long breaker bar, correct size socket for the axle nut (usually 32mm to 36mm), and pliers.
Instructions: Locate the center axle nut, which secures the CV axle to the wheel hub assembly. Remove any cotter pin or stake locking the nut in place. Have an assistant step heavily on the brake pedal to keep the hub from spinning while you apply massive torque with a breaker bar to remove the axle nut. Depending on your specific vehicle design, you may also need to unbolt the lower control arm ball joint, tie rod end, or strut mount bolts to allow the steering knuckle enough freedom of movement to extract the hub.
Pro Tip: Axle nuts are torqued down exceptionally high—often over 200 foot-pounds. A pneumatic or high-torque cordless impact wrench will save you significant time and physical strain here.
Step 4: Extracting the Hub and Old Bearing Assembly
What you need: Bearing puller tool kit, slide hammer, brass punch, and a heavy hammer.
Instructions: Push the CV axle inward out of the hub splines, supporting it so it does not pull apart at the inner boot. For modern bolt-in hub assemblies, locate and remove the four rear mounting bolts holding the bearing to the steering knuckle. You may need a slide hammer or specialized hub puller to pop the rusted assembly free. If your vehicle uses a press-in style bearing, you will need to remove the entire steering knuckle and take it to a hydraulic shop press, or use a portable ball-joint style press kit to press out the old bearing race.
Pro Tip: Apply generous amounts of penetrating fluid around the bearing seating surface and let it soak for at least 15 minutes if the old unit is seized with rust.
Step 5: Cleaning and Preparing the Mounting Surface
What you need: Wire brush, emery cloth or fine sandpaper, brake cleaner spray, and anti-seize lubricant.
Instructions: A clean mounting surface is vital for the longevity of your new wheel bearing. Use a wire brush and emery cloth to thoroughly scrub away all built-up rust, brake dust, and corrosion from inside the steering knuckle bore or mounting flange. Wipe the area clean with brake cleaner and a lint-free shop towel. Once dry, apply a very thin layer of anti-seize lubricant to the mating surfaces. This prevents galvanic corrosion and ensures that if you ever need to replace the bearing again, it will slide out effortlessly.
Pro Tip: Never get anti-seize or grease on the wheel studs, brake rotor friction surfaces, or brake pads, as this will severely compromise your braking performance.
Step 6: Installing the New Wheel Bearing and Hub
What you need: New wheel bearing assembly, torque wrench, and new axle nut or bolts.
Instructions: Carefully guide the new wheel bearing and hub assembly into position, ensuring it seats completely flush against the mounting surface without pinching any ABS wheel speed sensor wires. Hand-thread all mounting bolts to prevent cross-threading. Using a calibrated torque wrench, tighten the bolts to the vehicle manufacturer specification in a crisscross pattern. Reinsert the CV axle spline carefully through the center of the new hub, making sure the splines engage cleanly without forcing them.
Pro Tip: Always replace the axle nut with a brand new one. Many axle nuts are designed as single-use stretch-bolts and will not hold proper clamping force if reused.
Step 7: Reassembling Brakes, Wheel, and Torque Verification
What you need: Torque wrench, socket set, brake cleaner, and floor jack.
Instructions: Reinstall the brake rotor over the new hub face. Unhook the brake caliper from its bungee cord and slide it back down over the rotor, ensuring the brake pads are properly seated in their brackets. Thread and torque the caliper slide pin bolts to factory specs. Mount the wheel back onto the lug studs and hand-tighten the lug nuts. Lower the vehicle back down to the ground using the hydraulic jack. Finally, use your torque wrench to tighten the wheel lug nuts in a star pattern to the correct foot-pound rating.
Pro Tip: Before driving on the road, pump your brake pedal 3 to 5 times until it feels firm. This resets the brake caliper pistons against the pads after removal.
✅ Final Checklist
- All suspension bolts, caliper bolts, and axle nuts are torqued to precise factory specifications.
- The axle nut is properly secured with a new cotter pin or stake lock.
- ABS sensor wire is routed safely away from moving parts and plugged in securely.
- Wheel lug nuts are torqued properly in a star pattern.
- Brake pedal pressure has been restored by pumping the pedal prior to movement.
Important Notes:
- Always wear safety glasses and gloves, as heavy hammer strikes and rust particles pose eye and skin hazards.
- If you encounter a press-in bearing that requires specialized hydraulic press tools and you do not own them, remove the steering knuckle and take it to a professional mechanic shop to save hours of frustration.
- Estimated time: 1.5 to 3 hours for bolt-in assemblies, or 3 to 5 hours for press-in bearings. Estimated cost: $100 to $300 for parts if DIY, or $350 to $700 if performed at a professional repair shop.
What Causes Wheel Bearing Failure and Extends Repair Time
Rust, Corrosion, and Seized Components
The single biggest factor that turns a quick two-hour job into an all-day nightmare is rust. If you live in the rust belt or drive on salted winter roads, metal components fuse together over time. A seized axle nut or a rusted steering knuckle will halt your progress instantly.
When bolts round off or bearings weld themselves into the knuckle housing due to galvanic corrosion, you will spend hours dealing with extraction tools, heat torches, and penetrating oil. Always factor in extra time if your car has high mileage or severe underside rust.
Lack of Specialized Tools
Trying to hammer out a pressed-in wheel bearing with a basic socket set and a mallet will waste hours of your time and likely ruin the new part. If you lack the proper equipment, your repair time skyrockets.
- Impact wrenches: Essential for spinning off high-torque axle nuts quickly.
- Bearing press kits: Mandatory for pressed-in bearings unless you remove the knuckle and drive to a local machine shop.
- Torque wrenches: Necessary for properly tightening the axle nut to factory specs upon reassembly to prevent premature failure.
Step-by-Step Guide to Replacing a Wheel Bearing
Executing a wheel bearing replacement requires precision and adherence to strict automotive safety standards. Modern 2026 vehicle platforms often utilize sealed hub assemblies rather than traditional tapered bearings, which streamlines the process slightly. Following a structured procedure prevents premature failure and ensures proper torque specs are met.
Preparation and Disassembly
- Park the vehicle on a flat, stable surface, engage the emergency brake, and loosen the lug nuts before lifting the car with a hydraulic jack.
- Secure the vehicle with heavy-duty jack stands and remove the wheel assembly completely to access the braking components.
- Unbolt the brake caliper and hang it securely with a bungee cord, ensuring you never let it dangle by its rubber hydraulic brake line.
- Remove the brake rotor and the central axle nut, which frequently requires a high-torque breaker bar or pneumatic impact wrench.
Extraction and Installation
- Disconnect any ABS wheel speed sensors carefully to avoid damaging sensitive electronic wiring harnesses.
- Unbolt the steering knuckle or unbolt the old hub assembly directly from the suspension knuckle, depending on your vehicle layout.
- Use a specialized wheel bearing press kit to push the old bearing out of the knuckle, or unbolt the bolt-on hub assembly.
- Clean the mating surfaces thoroughly with a wire brush to remove rust and debris before pressing or bolting the new 2026-spec component into place.
- Reassemble the brake rotor, caliper, and wheel, torquing all critical suspension fasteners strictly to the manufacturer’s specifications.
What If Seized Parts and Rust Delay Your Repair
Rust and corrosion are the primary variables that blow past standard time estimates during a wheel bearing job. When saltwater exposure or harsh winter road treatments fuse steel components together, a standard 2-hour job can easily stretch into a full-day ordeal. Here is how professional technicians handle stubborn components:
- Thermal Expansion: Mechanics often use an oxy-acetylene torch to heat the steering knuckle carefully, exploiting thermal expansion to release a seized bearing race.
- Heavy-Duty Pullers: Standard two-jaw pullers frequently slip; professional-grade hydraulic hub pullers apply tons of linear force to pop stubborn hubs loose.
- Pneumatic Air Hammers: Specialized air hammer attachments vibrate rusted splines and stubborn press-fit outer rings free without damaging the surrounding structural knuckle.
What If It Still Doesn’t Work?
If you complete a wheel bearing replacement and still notice a humming noise, vibration, or ABS warning light, the underlying issue requires advanced troubleshooting. Consider these fallback steps to resolve persistent symptoms:
- Verify that the axle nut was torqued to the exact factory specification; under-torqued or over-torqued nuts destroy brand-new bearings within hundreds of miles.
- Inspect the CV axle and transmission output shafts, as worn internal CV joints produce a humming noise that mimics a failing wheel bearing.
- Check tire cupping and uneven tread wear, which generate similar rotational noise frequencies at highway speeds.
- Scan the vehicle computer for diagnostic trouble codes to ensure the ABS sensor was not damaged or improperly spaced during reassembly.
- If mechanical troubleshooting fails, seek professional help from a certified ASE technician. Professional diagnostic labor typically costs between $100 and $150 per hour, while specialized hub press services range from $250 to $600 in total labor fees.
Conclusion
Replacing a wheel bearing takes anywhere from one to four hours depending on whether your vehicle uses a bolt-on hub or a press-fit design. While DIY repairs save significantly on labor costs, rusted components can quickly extend your project timeline. According to verified research and automotive service data from major industry authorities, tackling this job safely requires proper torque equipment and patience. Your next actionable step is to inspect your vehicle’s specific hub assembly type to determine if specialized press tools are required before you begin.
❓ Frequently Asked Questions
Why do pressed-in wheel bearings take longer to replace?
Pressed-in bearings require removing the steering knuckle entirely and using a hydraulic press to push the old bearing out and press the new one in, adding considerable time compared to bolt-on assemblies.
Is it safe to drive with a bad wheel bearing while waiting for repair?
No, driving on a severely worn wheel bearing is dangerous because the wheel can lock up, detach from the vehicle, or cause a complete loss of steering control.
Should wheel bearings be replaced in pairs?
While not strictly required unless both have failed simultaneously, mechanics often recommend replacing wheel bearings in axle pairs because they experience similar wear.
Do I need a wheel alignment after a wheel bearing replacement?
Yes, replacing a wheel bearing often requires disconnecting suspension or steering components, which alters your vehicle’s alignment angles and necessitates a professional alignment.
What are the common signs of a failing wheel bearing?
The most common symptoms include a loud humming, roaring, or grinding noise that gets louder as vehicle speed increases, along with steering wheel vibration or loose handling.
Can I rent the special tools needed for a bearing replacement?
Many major auto parts stores offer a tool rental program where you can borrow master puller kits and bearing press sets for free after leaving a refundable deposit.