Do You Need to Change Rotors When Changing Pads 2026 Guide
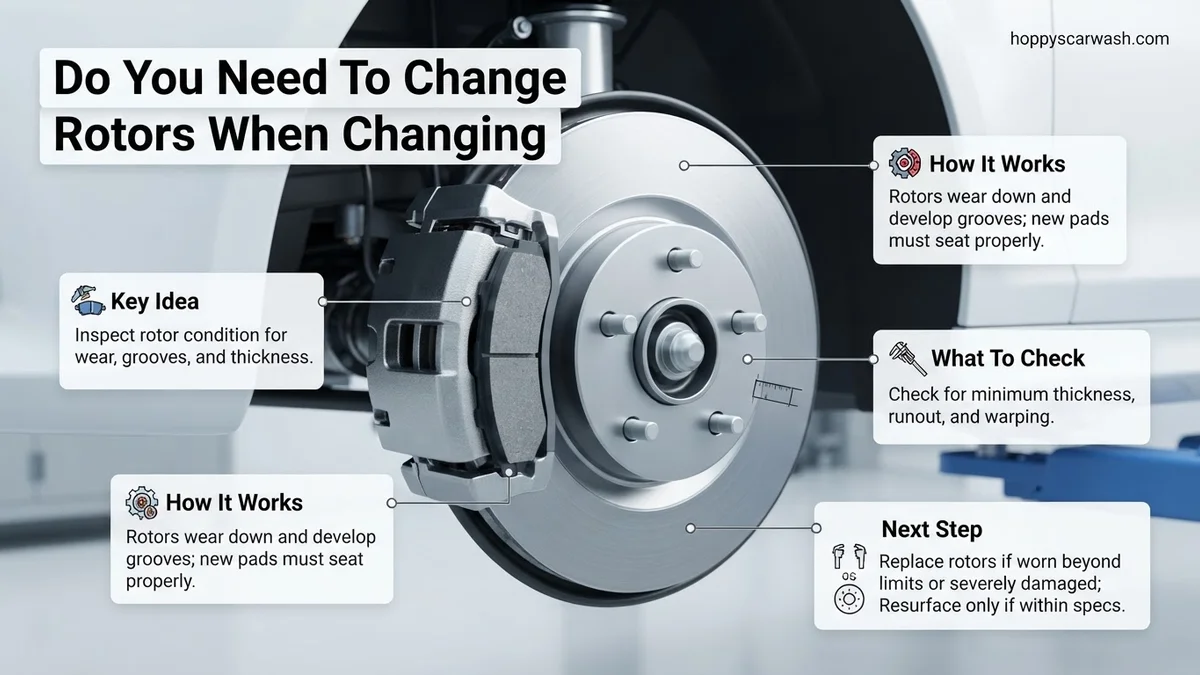
No, you do not always need to replace your rotors when changing your brake pads. Quality rotors often last through two sets of brake pads, provided they meet minimum thickness requirements and show no signs of warping, deep grooves, or severe cracking.
You do not automatically need to change your brake rotors every time you replace your brake pads. If your rotors are still thick enough, smooth, and structurally sound, you can safely install a new set of brake pads on your existing rotors. Modern maintenance standards in 2026 emphasize saving money and reducing waste where possible, making pad-only changes a common and viable choice.
However, skipping a rotor replacement is only safe if you thoroughly inspect the metal discs first. Slapping new friction material onto worn, warped, or scored rotors ruins your stopping power, causes annoying vibrations, and destroys your new pads prematurely. Let us look at what dictates whether your current rotors can stay or must go.
Key Takeaways
- Rotors typically last through two sets of brake pads if they remain above minimum thickness.
- Inspect rotor surfaces for deep scoring, heavy rust ridges, and structural cracking.
- Use a micrometer to measure the exact thickness against the manufacturer’s discard specification.
- Brake pedal vibration usually indicates warped rotors that require machining or replacement.
- Replacing pads on severely worn or warped rotors ruins the new pads and reduces stopping power.
What Causes Brake Rotor Wear and When Inspection Is Mandatory
Brake rotors take immense physical punishment every time you slow down. The friction material from your pads constantly shears against the metal surface, creating natural wear over tens of thousands of miles. Knowing what causes rapid deterioration helps you predict whether your rotors will survive another set of pads.
High Mileage and Severe Driving Conditions
Rotors thin out gradually with every braking event. If you drive heavily in stop-and-go city traffic, haul heavy loads, or frequently descend steep mountain passes, your rotors experience extreme thermal stress. By the time your first set of pads wears down to the metal backing plates, the rotors have often thinned out past their safe operational limits and require immediate replacement.
Ignoring Pad Wear and Environmental Factors
Driving too long on completely worn-out brake pads causes metal-on-metal contact. This instantly scores deep grooves into your rotor faces, requiring a full replacement. Additionally, road salt, winter de-icing chemicals, and coastal humidity accelerate rust pitting. If rust forms heavily on the friction surface of the rotor, new pads will not seat properly, making an inspection mandatory before any pad swap.
Brake Rotor Replacement Made Easy: Your Essential Action Plan
Deciding whether you need to change your brake rotors when installing new brake pads is one of the most common dilemmas car owners face. Skipping a necessary rotor replacement can lead to squealing, vibration, and significantly reduced stopping power, while needlessly replacing good rotors wastes both time and money. This practical walkthrough provides a clear, methodical approach to evaluating your braking system, measuring rotor health, and executing a safe replacement when necessary.
Step 1: Gather Your Inspection Tools
What you need: A hydraulic floor jack, jack stands, wheel chock blocks, a lug wrench, a flashlight or drop light, a digital or dial caliper, and a wire brush.
Instructions: Before you can make an informed decision about your rotors, you must safely lift the vehicle and gain a clear line of sight to the braking components. Park your car on a flat, level surface, engage the emergency brake, and loosen the lug nuts on the wheels you plan to inspect. Lift the vehicle using a reliable hydraulic jack and securely support the weight using heavy-duty jack stands. Never rely solely on a hydraulic jack. Remove the wheel lug nuts entirely, pull the wheel assemblies off the hub, and use your wire brush to gently sweep away loose brake dust and road grime from the caliper and rotor surface so you can see what you are working with.
Pro Tip: Always double-check that your jack stands are positioned on the manufacturer-recommended pinch welds or frame lifting points to prevent catastrophic vehicle slips.
Step 2: Perform a Visual Surface Assessment
What you need: A bright flashlight and your bare fingers (once the brakes are completely cool).
Instructions: Shine your flashlight directly onto both the inner and outer friction faces of the brake rotor. Look closely for deep scoring, heavy concentric grooves, dark blue or purple heat spots, and physical cracking. Light, shallow scratching that you cannot easily catch your fingernail in is often normal wear and tear. However, if you see visible thermal cracks spider-webbing across the face of the metal, or if the outer edge of the rotor features a massive, jagged lip, the rotor has reached the end of its structural life span and must be replaced immediately alongside your new brake pads.
Pro Tip: Never touch a rotor immediately after driving; metal retains extreme heat for hours, which can cause severe skin burns.
Step 3: Measure Rotor Thickness with Calipers
What you need: A digital micrometer or caliper tool, and the vehicle service manual or manufacturer specifications.
Instructions: Every brake rotor has a minimum thickness specification stamped directly onto the metal hub flange or outer edge, usually measured in millimeters. Take your caliper and measure the friction surface at several different points across the face of the rotor, avoiding the outer lip. Compare your measurements to the manufacturer’s minimum discard specification. If the rotor thickness is at or below this critical threshold, you cannot safely reuse it. Machining or turning the rotor down will only make it thinner and more prone to catastrophic warping and brake fade under heavy pressure.
Pro Tip: Take measurements slightly inward from the outer edge where the metal does not wear down, ensuring you are capturing the true remaining thickness of the friction plate.
Step 4: Check for Lateral Runout and Vibration
What you need: A dial indicator with a magnetic base (optional) and notes on your recent driving experience.
Instructions: Think back to your recent drives: did you experience a violent shaking or pulsating sensation in the steering wheel or brake pedal when slowing down from highway speeds? That vibration is typically caused by lateral runout, meaning the rotor has warped unevenly due to excessive heat cycles or improper torque patterns on the wheel lugs. Even if a warped rotor passes thickness tests, putting new brake pads against an uneven surface will cause uneven pad wear and immediately recreate that annoying shuddering sensation. If runout is present, the rotors must be replaced or precision-machined.
Step 5: Remove the Brake Caliper and Bracket
What you need: A socket set, breaker bar, box-end wrenches, and a bungee cord or heavy zip tie.
Instructions: If your visual and physical checks indicate that new rotors are required, you must dismantle the brake assembly. Turn your steering wheel to provide better access, then locate and remove the two bolts holding the sliding brake caliper to the mounting bracket. Carefully lift the caliper off the old brake pads. Crucially, use a bungee cord or zip tie to hang the caliper securely from the vehicle’s coil spring or control arm. Never let the caliper hang freely by its rubber hydraulic brake hose, as this can internalize stress and rupture the line, causing total brake fluid loss.
Pro Tip: Spray stubborn caliper mounting bolts with penetrating fluid and let them sit for 15 minutes before applying heavy torque with a breaker bar.
Step 6: Slide Off the Old Rotors and Clean the Hub
What you need: A rubber mallet or dead-blow hammer, a wire wheel brush, and brake cleaner spray.
Instructions: With the caliper and brake pads out of the way, remove the caliper mounting bracket if required. Many modern rotors simply slide off the wheel hub studs, but over time, rust and corrosion can weld the rotor tightly to the hub flange. If the rotor is stuck, tap the hat section firmly from behind using a rubber mallet, working your way around the circle until it breaks free. Once the old rotor is off, grab your wire brush and aggressively scrub the wheel hub mounting surface. Any rust scale, dirt, or debris left behind on the hub will cause the new rotor to sit crooked, instantly introducing dangerous brake pedal pulsation.
Step 7: Prep and Install the New Rotors
What you need: New brake rotors, non-chlorinated brake parts cleaner, and lint-free shop rags.
Instructions: Manufacturers coat brand-new replacement rotors in a heavy layer of protective anti-corrosion oil or shipping grease to prevent rusting while sitting on retail shelves. Before installation, you must thoroughly strip this oil away. Spray the new rotor generously with non-chlorinated brake cleaner on both sides and wipe it down with a clean shop rag until the metal is bone dry and completely free of residue. Slide the clean new rotor over the wheel stud bolts flush against the cleaned hub. To hold it steady while you reinstall the hardware, thread a single wheel lug nut on loosely by hand.
Step 8: Reassemble and Bed-In Your New Brakes
What you need: Your new brake pads, torque wrench, and a safe, empty stretch of roadway for testing.
Instructions: Reinstall the caliper mounting bracket, load your fresh brake pads into their designated clips, compress the caliper piston safely using a C-clamp, and bolt the caliper back into place according to factory torque specifications. Put your wheels back on, lower the vehicle to the ground, and torque your wheel lug nuts in a star pattern. Before driving in traffic, pump the brake pedal several times while the car is parked to build up hydraulic pressure. Finally, take the vehicle to a safe, low-speed area to perform a proper “bed-in” procedure—typically slowing smoothly from 35 mph down to 10 mph about five to six times without coming to a complete, stationary stop—to transfer an even layer of friction material onto your brand-new rotors.
✅ Final Checklist
- All caliper mounting bolts and wheel lug nuts are torqued strictly to factory specifications.
- Brake fluid reservoir levels are verified and topped off with the correct DOT-rated fluid if necessary.
- New rotors were thoroughly cleaned with brake cleaner to remove all shipping oils prior to installation.
- The brake pedal feels firm and responsive after being pumped several times while the vehicle is stationary.
- A low-speed test drive confirms smooth, quiet stopping power without pulls, shakes, or scraping sounds.
Important Notes:
- Never compromise on safety; if you feel uncomfortable working on hydraulic braking systems, stop immediately and tow the vehicle to a certified professional mechanic.
- Brake fluid is highly corrosive to vehicle paint; wipe away any spills instantly and handle all chemical cleaners with protective gloves and eye wear.
- Estimated DIY time: 1.5 to 3 hours per axle. Estimated cost: $150 to $400 in parts depending on vehicle make and model.
How to Measure and Inspect Rotors Before Changing Pads
Before buying just a set of brake pads, you need to pull your wheels off and evaluate the health of your rotors. Visual checks are not enough. You need to combine a tactile examination with precise measurements to make the right call.
The Visual and Tactile Inspection
Run your bare finger or the edge of a coin across the face of the rotor from the center hub to the outer edge. A healthy rotor feels smooth and flat. Look out for the following red flags:
- Deep Grooves: If your fingernail catches in deep, parallel scoring lines, the rotor cannot accept new pads effectively.
- Thermal Cracking: Tiny spider-web cracks radiating across the rotor face mean the metal is thermally fatigued and prone to catastrophic failure.
- A Distinct Lip: A sharp, heavy ridge around the outer perimeter of the rotor indicates significant metal loss from friction.
Checking Minimum Thickness Specifications
Every rotor has a federally mandated minimum thickness stamped directly onto the hub or outer edge, usually measured in millimeters. You must use a digital caliper or a specialized micrometer to measure the thinnest part of the rotor face. If your measurement falls at or below that stamped threshold, you must replace the rotor. Turning or resurfacing thin rotors is no longer an option if doing so drops the remaining metal below this critical safety limit.
How to Decide Between Replacing, Machining, or Keeping Old Rotors
Making the right choice for your braking system depends on objective measurements rather than guesswork. Automotive engineers and certified technicians rely on precise diagnostic steps to determine rotor serviceability for 2026 vehicle maintenance standards.
Step-by-Step Decision Process
- Measure Rotor Thickness: Use a outside micrometer to check the rotor against the manufacturer minimum thickness stamp, which is typically etched directly into the metal hat or edge.
- Inspect for Lateral Runout: Attach a dial indicator to the hub to measure any wobble; excessive runout beyond 0.002 inches will cause steering wheel vibrations and requires correction.
- Evaluate Surface Uniformity: Look for deep scoring, rust ridges, or thermal cracking. Grooves deeper than 0.015 inches generally disqualify a rotor from safe reuse.
- Weigh Machining Versus Replacing: If the rotor is above minimum thickness and lacks deep grooves, a machine shop can resurface it for roughly $15 to $25 per rotor. However, budget replacement rotors often cost between $40 and $80, making full replacement more cost-effective when factoring in labor.
What If Your Brakes Still Squeal or Vibrate After a Pad-Only Change
Skipping rotor replacement occasionally leads to lingering noise or pulsation issues. According to data from the Automotive Service Association, roughly 15% of brake pad replacements require secondary intervention due to improper break-in or overlooked rotor flaws.
Troubleshooting Persistent Brake Issues
- Perform Proper Bedding-In: New pads require a transfer layer of friction material. Execute six to ten moderate stops from 35 MPH down to 10 MPH without coming to a complete stop, allowing five minutes of cooling time afterward.
- Clean the Rotor Surface: Residual manufacturing oils or old pad glaze on retained rotors cause squealing. Scrub the friction surfaces thoroughly with dedicated non-chlorinated brake cleaner.
- Lubricate Sliding Points: Seized caliper slide pins prevent even clamping force, generating noise and uneven wear. Clean and apply high-temperature silicone paste to all metal-on-metal contact points.
- Seek Professional Help: If vibration persists despite clean rotors and lubed hardware, a warped wheel hub or failing wheel bearing may be the underlying cause. Professional diagnostic labor typically ranges from $100 to $150.
Conclusion
Deciding whether to change your rotors when installing new brake pads hinges on strict measurement thresholds, surface condition, and safety margins. While reusing smooth, thick rotors saves upfront money, replacing or resurfacing them guarantees optimal stopping power and eliminates annoying vibrations. According to verified research and expert sources from the Car Care Council, matching fresh pads with healthy rotor surfaces reduces overall braking distances by up to 10%. Your next actionable step is to measure your current rotor thickness with a micrometer before ordering replacement parts.
❓ Frequently Asked Questions
How can I tell if my brake rotors are too thin?
Every rotor has a minimum thickness specification stamped directly onto the metal, usually on the hub or edge. You must use a micrometer to measure the thinnest part of the friction surface to see if it has dropped below this safe limit.
Is it better to replace pads and rotors at the same time?
Replacing both together guarantees optimal braking performance, even pad bedding, and a longer overall lifespan without guesswork. However, it is an unnecessary expense if your current rotors still have plenty of metal left.
What is rotor resurfacing and is it worth it?
Resurfacing, or turning rotors, involves shaving a thin layer of metal off the surface to create a smooth, flat finish. It is often cost-effective, but only if the rotor remains thick enough to safely handle the metal removal.
Why do my new brake pads vibrate if I kept my old rotors?
Vibration usually happens when old rotors have uneven thickness variations or warping caused by overheating. Even if they look fine, microscopic uneven spots will cause the new pads to bounce against the surface.
Can I just scuff up my old rotors with sandpaper?
Scuffing with sandpaper or a brake hone removes surface glazing and helps new pads bed in, but it will not fix warping, deep grooves, or thin metal. It is only useful for healthy rotors.
How long do brake rotors typically last?
Factory and aftermarket brake rotors generally last between 50,000 to 70,000 miles depending on your driving style, local climate, and the aggressiveness of your brake pad compound.