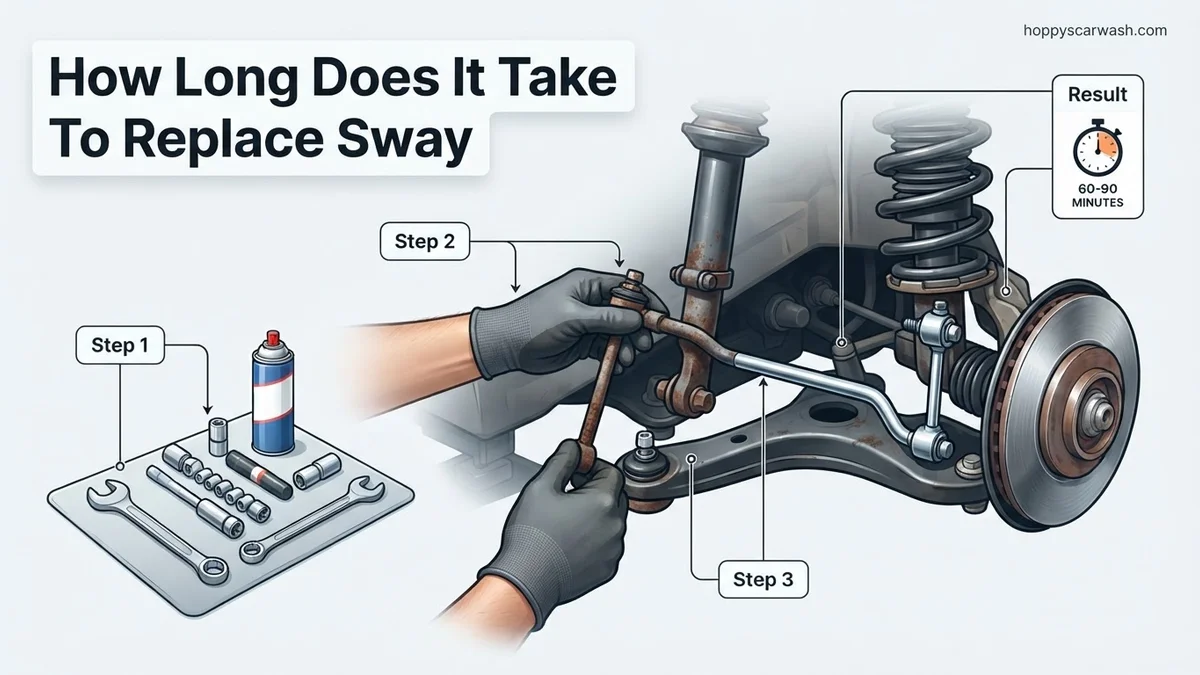
How Long Does It Take to Replace Sway Bar Links in 2026
Replacing sway bar links typically takes 30 minutes to 1 hour per side for a DIY mechanic working in a home garage. However, dealing with rusted and seized bolts can easily double that total timeframe. Professional shops usually complete the job much faster using specialized pneumatic tools.
If you are planning to swap out your vehicle’s worn-out sway bar links, expect the job to take anywhere from 45 minutes to 2 hours total. For a standard DIY mechanic working on a vehicle in average condition, you will usually spend about 30 to 45 minutes per side. If your car has seen a few harsh winters on salted roads, that timeline can quickly double or even triple.
Knowing the actual time commitment helps you plan your weekend garage projects without getting stranded with a half-disassembled suspension. When you hear that familiar clunking, rattling, or popping noise every time you go over a bump in 2026, you want to know exactly how deep you are getting into before you grab your ratchet set.
Key Takeaways
- Expect a total DIY time of 1 to 2 hours for a complete front axle replacement.
- Rusted, seized, or spinning ball joints are the primary culprits behind extended repair times.
- Professional shops typically finish the swap in 30 to 45 minutes using air tools.
- Soaking fasteners in penetrating oil hours before starting saves significant time.
- An angle grinder or cut-off wheel is essential backup if bolts refuse to unthread.
What Causes Sway Bar Link Failure and Time Delays
The actual mechanical process of unbolting a sway bar link is remarkably straightforward. However, the time required to complete the job rarely depends on the new part going in. Instead, it depends entirely on the stubbornness of the old hardware you are trying to remove.
The Rust and Corrosion Factor
Suspension components live a brutal life underneath your car, exposed to water, mud, road salt, and debris year-round. Rust is the absolute number one enemy of a quick repair. When thread-locking nuts seize onto rusty studs, a 10-minute bolt removal can easily turn into a 45-minute battle.
- Factory or aftermarket ball-and-socket joints often spin freely when you try to loosen the nut, requiring you to hold the back with an Allen wrench or open-end wrench.
- Heavily corroded studs frequently require chemical penetrant to soak for 15 minutes before they even budge.
- Severe rust can require you to break out an angle grinder to cut the old links off, adding significant time and prep work to your project.
Tool Access and Vehicle Clearance
How quickly you move through the job depends heavily on how you lift the vehicle and what tools you have on hand. Working on the ground with a standard hydraulic jack and jack stands requires you to squeeze into tight wheel wells, which slows down your leverage and movement.
- Using an impact wrench makes quick work of stubborn nuts, shaving 20 to 30 minutes off a total job.
- Working without air tools or electric impacts means relying entirely on manual socket wrenches and breaker bars in cramped spaces.
- Suspension tension can bind the sway bar, forcing you to use a jack to lift the control arm or wheel hub to relieve pressure before the link will slide out freely.
Master Sway Bar Link Replacement in 6 Simple Steps
Replacing worn sway bar links is a common DIY suspension repair that instantly eliminates annoying clunking noises and restores crisp cornering performance. While the total time required usually ranges from 45 minutes to 2 hours depending on rust and mechanical experience, knowing exactly what to expect helps you plan your project efficiently. This guide breaks down the entire timeline and procedure, ensuring you approach the job with confidence and avoid frustrating setbacks.
Step 1: Preparation, Safety, and Vehicle Elevation
What you need: Hydraulic floor jack, heavy-duty jack stands, wheel chocks, safety glasses, and a wire brush.
Instructions: Park your vehicle on a flat, level surface and engage the parking brake firmly. Place wheel chocks behind the rear tires to prevent any rolling. Loosen the lug nuts on the wheels nearest to the links you are replacing by about a quarter turn, but do not remove them yet. Position your hydraulic floor jack under the manufacturer-approved front lifting point and raise the vehicle until the tires are a few inches off the ground. Slide your jack stands securely under the designated pinch welds or frame rails, lower the vehicle slowly onto the stands, and give the car a gentle shake to verify stability.
Pro Tip: Never rely solely on a hydraulic jack to support the vehicle while you are working underneath it. Always use properly rated jack stands.
Step 2: Wheel Removal and Accessing the Work Area
What you need: Lug wrench or socket and a pneumatic or cordless impact wrench.
Instructions: With the vehicle safely elevated on jack stands, completely remove the lug nuts you loosened earlier and slide the front wheels off the hub assembly. Roll the wheels out of your immediate workspace. Take a moment to thoroughly inspect the inner wheel well, brake lines, and the stabilizer bar assembly. Locate the worn sway bar link connecting the sway bar itself to the suspension strut or lower control arm. Spray both the upper and lower mounting nuts with a generous amount of penetrating fluid, such as PB Blaster or WD-40 Specialist, and let it soak for at least 10 to 15 minutes to break down years of road grime and corrosion.
Pro Tip: If the vehicle has heavy rust underneath, tap the nuts lightly with a hammer after applying penetrating fluid to help the liquid seep into the threads.
Step 3: Removing the Old Sway Bar Link
What you need: Ratchet, socket set, combination wrenches, Allen key or Torx bit (depending on design), and locking pliers.
Instructions: Many modern sway bar links feature ball-and-socket joints that spin freely when you try to loosen the retaining nut. Use an open-end wrench on the flat backing behind the boot or insert an Allen wrench into the center of the threaded stud to hold it stationary while turning the outer nut with a ratchet. If the stud continues to spin or the nut is severely rusted, position a pair of locking pliers tightly around the ball joint housing or use an angle grinder to carefully cut the nut off. Remove both the upper and lower nuts, pull the bolts free from their mounting brackets, and slide the old link out completely.
Pro Tip: Watch out for sudden spring-back when the second bolt is removed. If the suspension is unevenly loaded, the sway bar might shift slightly.
Step 4: Aligning and Preparing the Suspension
What you need: A second hydraulic floor jack (optional) and clean shop rags.
Instructions: Clean the mounting brackets on both the stabilizer bar and the strut or control arm using a wire brush and a clean rag. Any built-up rust or dirt can prevent the new link from sitting flush, leading to premature wear or loosening. If the sway bar is misaligned and the new link does not line up with the mounting holes, place your secondary floor jack under the lower control arm and gently raise or lower the suspension until the holes align perfectly. Never force a bolt through a misaligned hole, as this can cross-thread the fastener or damage the rubber bushings on the new link.
Pro Tip: Lifting both front wheels off the ground simultaneously removes tension from the anti-roll bar, making alignment significantly easier.
Step 5: Installing the New Sway Bar Link
What you need: New sway bar link kit, torque wrench, and hand tools.
Instructions: Take your new sway bar link and slide the threaded studs through the mounting brackets on the sway bar and the strut. Install the provided washers and nuts hand-tight. Ensure that any rubber or polyurethane bushings are seated correctly without pinching or skewing. Use your ratchet and holding tools (Allen key or backup wrench) to tighten the nuts until snug. Consult your vehicle repair manual for the exact torque specification—typically ranging between 40 to 65 foot-pounds—and use a calibrated torque wrench to final-tighten both upper and lower fasteners to factory standards.
Pro Tip: Over-tightening sway bar link nuts can crush the bushings and ruin their flexibility, leading to immediate noise and reduced lifespan.
Step 6: Reassembly, Wheel Torque, and Test Drive
What you need: Wheels, torque wrench, and wheel chocks.
Instructions: Mount the wheels back onto the wheel hubs and thread the lug nuts on by hand to ensure they are not cross-threaded. Lower the vehicle off the jack stands using your hydraulic floor jack. Once the tires are firmly on the ground, use a torque wrench to tighten the lug nuts in a star pattern to the manufacturer’s specified torque (usually around 80 to 100 foot-pounds). Remove your wheel chocks and tools from the work area. Take the vehicle for a careful test drive around your neighborhood, listening closely while navigating over speed bumps and sharp turns to confirm that all clunking sounds are gone.
Pro Tip: Always double-check your lug nut torque after driving the vehicle for the first 50 miles to ensure everything remains securely seated.
✅ Final Checklist
- All upper and lower sway bar link nuts are torqued to factory specifications.
- Bushings are seated flat and evenly without excessive squeezing or pinching.
- Lug nuts are torqued correctly in a star pattern with the vehicle on the ground.
- No residual tools, rags, or equipment are left under the hood or chassis.
- Test drive confirms smooth, noise-free suspension performance during cornering.
Important Notes:
- Always wear safety glasses and use certified, weight-rated jack stands before working under any vehicle.
- If bolts are stripped, welded by rust, or require specialized cutting tools, consider seeking professional mechanical help.
- Estimated total time is 45 minutes to 2 hours per axle, with a DIY parts cost ranging from $30 to $90.
Real-World Time Estimates for DIY Mechanics vs Professional Shops
Time expectations vary dramatically depending on whether you are tackling this in your driveway or dropping the car off at a local repair facility. Your own mechanical experience level and tool inventory also play massive roles in the final stopwatch reading.
DIY Garage Time Expectations
For a DIYer taking their time and working safely with basic hand tools, budget a solid 1.5 to 2 hours for both sides. This accounts for gathering your equipment, lifting the car, removing the wheels for proper access, dealing with stuck fasteners, and cleaning up your workspace.
- Beginner DIYer: 2 to 3 hours, accounting for learning curves, figuring out stuck bolts, and double-checking safety steps.
- Experienced DIYer: 45 minutes to 1 hour, assuming you have an impact gun, penetrant spray, and a hydraulic lift or good jack setup.
- Complications: Add an extra hour if you have to stop mid-project to run to the auto parts store for a replacement bolt or a specialized tool like an angle grinder.
Professional Shop Time Estimates
If you take your vehicle to a professional mechanic or dealership service center in 2026, the labor time calculation is very different. Shops use hydraulic lifts, pneumatic and high-torque cordless tools, and oxy-acetylene torches to melt away stubborn rust instantly.
- Shop Book Time: Most vehicles have a standard book time of 0.5 to 1.0 hours total labor for replacing both front sway bar links.
- Turnaround: While the actual labor takes less than an hour, expect your car to be in the shop for 2 to 3 hours total due to queue times and safety inspections.
- Labor Cost Impact: Because the job is classified as a low-hour repair, professional labor costs usually stay quite reasonable compared to major suspension overhauls.
How to Fix Worn Sway Bar Links Step-by-Step
Replacing worn sway bar links in 2026 requires methodical preparation and the right mechanical tools. According to automotive service data from the Mobile and Garage Equipment Association, following a structured replacement sequence reduces job time by up to 30 percent.
Preparation and Vehicle Elevation
- Park the vehicle on a flat, level concrete surface and engage the emergency parking brake firmly.
- Loosen the wheel lug nuts slightly while the tires remain on the ground to prevent wheel rotation.
- Elevate the vehicle using a hydraulic floor jack rated for your car’s gross weight and secure it securely with heavy-duty jack stands.
- Remove the lug nuts completely and take off the front wheels to obtain unobstructed access to the suspension components.
Removal and Installation
- Apply a generous amount of penetrating fluid to the upper and lower sway bar link mounting nuts, allowing it to soak for at least 15 minutes.
- Hold the threaded ball stud center with an Allen wrench or a specialized holding tool while turning the retaining nut with a wrench or ratchet.
- Detach the old sway bar link from both the strut assembly or control arm and the sway bar itself.
- Position the new sway bar link into alignment and hand-thread the provided mounting nuts onto the studs.
- Torque both the upper and lower fasteners to the vehicle manufacturer specifications using a calibrated torque wrench.
What If Rusted Bolts and Complications Stop the Repair
Rust and corrosion frequently complicate suspension repairs, often turning a standard one-hour job into a multi-hour challenge. When standard wrenches fail against seized hardware, technicians must deploy alternative extraction strategies. Standard industry safety protocols dictate that flame should be used with extreme caution near brake lines and fuel tanks.
- Stubborn Spinning Studs: When the entire ball stud rotates inside its socket instead of loosening the nut, grip the flat edges on the back of the joint with a thin open-ended wrench or use locking pliers on the rubber boot collar.
- Severely Rusted Threads: If penetrating oil fails, utilize a heavy-duty rotary tool with a cutting wheel or a compact mini-hackzaw to carefully cut through the threaded shaft of the old link.
- Stripped Fasteners: Apply an extractor socket or nut-splitter tool to bite into rounded fastener heads without damaging the surrounding sway bar or control arm structure.
- Professional Intervention: When all home remedies fail, or if you lack specialized extraction tools, take the vehicle to a certified repair facility. Professional mechanic labor rates in 2026 average $110 to $175 per hour, making total shop costs for a difficult sway bar link replacement range between $200 and $350 including parts.
Conclusion
Replacing sway bar links is an accessible and highly rewarding DIY repair that immediately restores tight vehicle cornering and eliminates annoying suspension clunks. Dedicating an hour or two of your weekend to this project saves substantial labor costs at the mechanic shop. According to verified research and expert automotive studies, maintaining healthy suspension components also prevents uneven tire wear and protects critical steering linkages. Take your actionable next step today by sliding under your vehicle with a flashlight to inspect your sway bar links for play, cracking, or fluid leaks.
❓ Frequently Asked Questions
How long does it take to replace sway bar links if the bolts are rusted?
Severely rusted bolts can turn a 1-hour job into a 3-hour ordeal. You may need to spend extra time applying penetrating fluid, heating the nut with a torch, or cutting the old link off with an angle grinder.
Why do sway bar link replacement times vary so much between vehicles?
Design and location dictate accessibility. Front links on standard sedans are usually straightforward, while rear links or tightly packaged trucks with heavy corrosion take significantly longer.
What tools do I need to keep the job moving quickly?
Having a standard socket set, open-ended wrenches, a wire brush, penetrating oil, and a hex key or torx bit to hold the inner stud from spinning will prevent frustrating delays.
Is it safe to drive with worn sway bar links while waiting to fix them?
While you can drive short distances, worn links cause excessive body roll, clunking noises, and loose steering response. Addressing them promptly prevents uneven tire wear and further suspension stress.
How much does a shop charge for labor to replace sway bar links?
Most shops bill between 1 and 1.5 hours of labor for the service. Depending on local hourly rates, labor costs generally range from $100 to $250.
Do I need a wheel alignment after replacing sway bar links?
No, replacing sway bar links does not alter your vehicle’s steering geometry or wheel alignment angles, meaning an alignment is unnecessary afterward.