Can a Bad Alternator Cause a Check Engine Light 2026 Guide
Yes, a bad alternator can cause a check engine light to illuminate on your dashboard. When the alternator fails to supply steady electrical voltage, vehicle sensors and computer modules send erratic data, triggering error codes.
Yes, a bad alternator can definitely cause a check engine light to illuminate on your dashboard. While most drivers immediately associate a failing alternator with the dedicated battery warning light, modern vehicles rely heavily on complex electrical systems that will trigger the main check engine light when power drops below optimal thresholds.
Modern cars from 2026 feature sensitive computers and electronic control units that require a steady, precise flow of electricity. When your alternator starts to fail, it cannot maintain the standard 13.5 to 14.5 volts needed to run your engine’s sensors and computers properly. This guide explains the exact mechanics behind this electrical failure and how to accurately diagnose the root cause before you get stranded.
Key Takeaways
- A failing alternator drops system voltage below the standard 13.5 to 14.5 volts.
- Low voltage causes computer modules and sensors to malfunction, throwing error codes.
- The battery light often turns on alongside or before the check engine light.
- Use an OBD2 scanner to read specific low-voltage fault codes stored in the ECU.
- Test alternator output directly using a digital multimeter across the battery terminals.
How Low Voltage Triggers a Check Engine Light
Your vehicle’s Powertrain Control Module constantly monitors voltage across the entire electrical network. When the alternator fails to supply enough current, the resulting voltage drop confuses sensors and sparks a cascade of computer fault codes.
The ECU Voltage Threshold and Sensor Failure
Modern engine computers are programmed to operate within a strict voltage window, usually between 12.6 and 14.8 volts while the engine runs. If your failing alternator dips below 12.0 volts, critical engine sensors like the mass air flow sensor, oxygen sensors, and fuel injectors lose their reference voltage. This loss of signal doesn’t mean the physical part is broken; it simply means the computer cannot read the data accurately. As a result, the ECU logs a fault code and turns on your check engine light.
Common Diagnostic Trouble Codes Associated with Low Voltage
When you scan your vehicle’s computer, a weak alternator rarely throws a specific “bad alternator” code. Instead, it triggers erratic, seemingly unrelated codes that stem entirely from power starvation.
- Low system voltage codes like P0562 indicating a weak electrical output
- Random multiple misfire codes (P0300) caused by weak spark plugs starving for voltage
- Throttle actuator control system codes due to electronic throttle bodies needing steady power
- CAN bus communication error codes because modules cannot talk to each other properly
Can a Bad Alternator Cause a Check Engine Light: What Causes It and How to Fix It
When your dashboard suddenly lights up, it can induce instant panic. A common question among vehicle owners is whether a failing charging system can trigger that dreaded Check Engine Light. This comprehensive guide walks you through the exact relationship between a faulty alternator and your car’s warning systems, helping you diagnose the root cause, test your battery and alternator, and clear those frustrating dashboard lights safely and effectively.
Step 1: Understand the Electrical Connection
What you need: A basic understanding of your vehicle’s charging and engine management systems, plus your car’s owner manual.
Instructions: First, recognize that a bad alternator can directly or indirectly cause a Check Engine Light. While a failing alternator usually triggers the dedicated battery symbol or a charging system light, modern vehicles rely heavily on stable computer voltage. When an alternator begins to fail, it may output irregular voltage spikes or dips below 13.5 volts. Engine control modules (ECMs) and transmission control modules are extremely sensitive to these fluctuations. When sensors or fuel injectors receive erratic voltage, they send out of range signals, which instantly triggers diagnostic trouble codes (DTCs) and illuminates the Check Engine Light alongside other dashboard warnings.
Pro Tip: Never assume a Check Engine Light is unrelated to electrical issues just because the car still drives; always scan for codes first.
Step 2: Retrieve Diagnostic Trouble Codes
What you need: An OBD2 scanner (code reader) and a pen and paper to record codes.
Instructions: Plug your OBD2 scanner into the diagnostic port located beneath your driver-side dashboard, usually near the steering column. Turn your ignition key to the ON position without starting the engine, or press the start button twice without touching the brake. Follow your scanner prompts to read any stored or pending trouble codes. Look specifically for low-voltage codes such as P0560 (System Voltage Malfunction), P0562 (Charging System Voltage Low), or erratic sensor codes across multiple unrelated systems, which strongly point toward a failing alternator rather than isolated sensor failures.
Pro Tip: Take a photo of the scanner screen with your smartphone so you have an accurate record before clearing any codes.
Step 3: Perform a Visual Under-Hood Inspection
What you need: Safety glasses, work gloves, and a flashlight.
Instructions: Pop your hood and inspect the serpentine belt that drives the alternator pulley. Check for fraying, cracking, oil contamination, or improper tension—a loose or slipping belt prevents the alternator from spinning fast enough to generate adequate power. Next, examine the heavy-gauge battery cables and the smaller alternator plug harness for corrosion, looseness, or melted plastic. A corroded terminal creates resistance, mimicking a bad alternator and causing low voltage codes that trigger the Check Engine Light.
Pro Tip: Ensure the engine is completely cold before touching any belts or pulleys to prevent severe burns.
Step 4: Test Battery Resting Voltage
What you need: A digital multimeter set to direct current (DC) voltage.
Instructions: Turn off your car completely. Set your multimeter dial to the 20V DC setting. Touch the red positive multimeter probe to the positive battery terminal and the black negative probe to the negative terminal. A healthy, fully charged car battery should read approximately 12.6 volts or higher. If your reading drops below 12.2 volts, your battery is heavily discharged or damaged, often because a failing alternator has failed to keep it properly replenished during your recent drives.
Pro Tip: Turn on your headlights for one minute before testing to dissipate any surface charge on the battery for an accurate reading.
Step 5: Conduct an Alternator Output Test
What you need: A digital multimeter and an assistant to turn on vehicle accessories.
Instructions: Start the engine and let it idle. Place your multimeter probes back onto the respective battery terminals. With the engine running, a healthy alternator should output between 13.7 and 14.7 volts. Next, have your assistant turn on the high-beam headlights, rear defroster, and maximum blower fan. The voltage reading may dip slightly but should quickly recover and remain above 13.3 volts. If your voltage stays below 12.8 volts under load, your alternator is failing and cannot supply the vehicle’s electrical demands.
Pro Tip: Keep loose clothing and hands far away from the spinning serpentine belt and cooling fans while the engine is running.
Step 6: Remove and Replace the Faulty Alternator
What you need: Metric socket set, wrench, replacement alternator, and safety gear.
Instructions: Disconnect the negative battery terminal to prevent electrical shorts. Relieve tension on the serpentine belt using a breaker bar on the tensioner pulley, and slip the belt off the alternator pulley. Unbolt the electrical connector and the main power wire nut from the back of the alternator. Remove the mounting bolts securing the alternator to the engine block, and lift the old unit out. Install the new alternator in reverse order, ensuring all mounting bolts are torqued to manufacturer specifications and electrical connections are clean and tight.
Pro Tip: Take a clear photo of how the serpentine belt is routed before removing it to make reinstallation frustration-free.
Step 7: Clear Codes and Verify Repair
What you need: Your OBD2 scanner and a short test drive route.
Instructions: Reconnect your battery terminals securely. Reconnect your OBD2 scanner, navigate to the “Clear Codes” or “Erase Trouble Codes” menu, and wipe the stored diagnostic codes from the ECM memory. Start the vehicle and verify that both the battery light and Check Engine Light remain off. Take your car for a 15-minute test drive, operating electrical accessories like air conditioning and radio, to ensure the alternator maintains stable voltage and the warning lights do not return.
Pro Tip: Some inspection monitors will reset when codes are cleared; you may need to drive for a few days to complete drive cycles before passing an emissions test.
✅ Final Checklist
- Multimeter confirms alternator outputs 13.7 to 14.7 volts while idling
- All OBD2 low-voltage and erratic sensor trouble codes have been cleared
- Serpentine belt is properly tensioned and free of cracks or oil
- Battery terminals are clean, tight, and corrosion-free
- Check Engine Light and battery warning lights remain off during a test drive
Important Notes:
- Always disconnect the battery negative terminal before servicing any electrical components to avoid shocks or blown fuses.
- Seek professional help from a certified mechanic if your alternator is buried deep within a modern compact engine bay requiring specialized removal tools.
- Estimated DIY time: 1 to 3 hours; estimated professional repair cost: $350 to $850 depending on vehicle make and model.
Step-by-Step Guide to Diagnosing a Bad Alternator
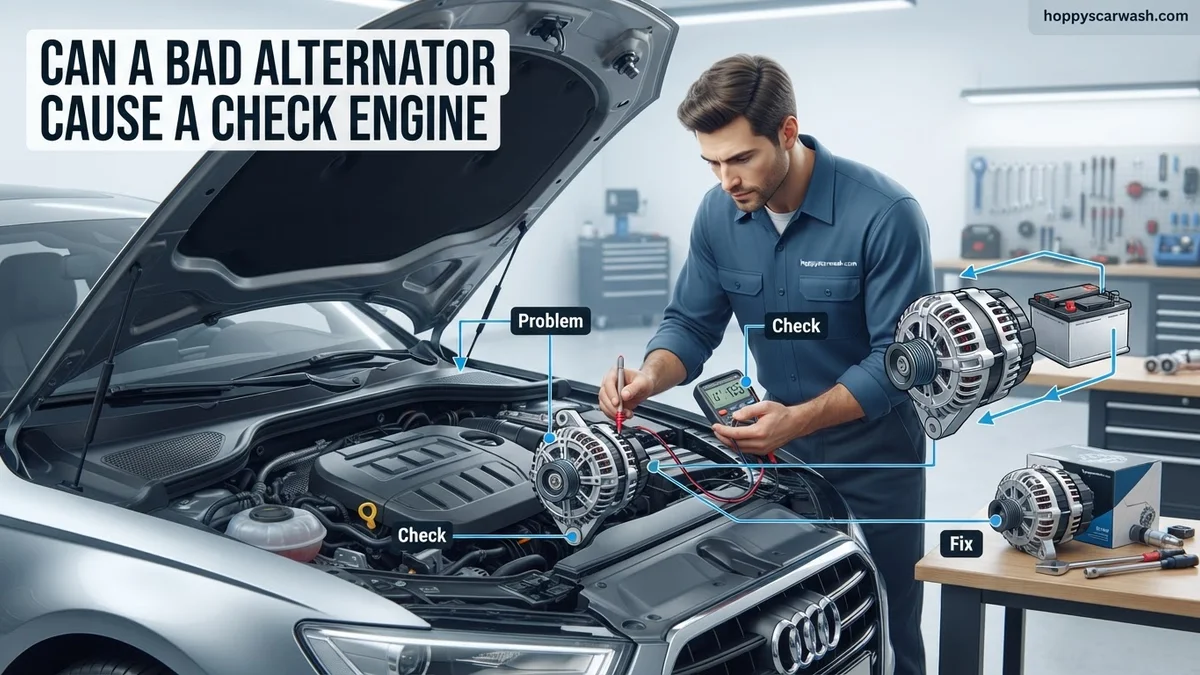
Pinpointing whether your check engine light stems from a bad alternator requires checking your charging system with the right tools. You do not need to guess when you can test the system directly in your driveway.
Using a Multimeter to Test Output Voltage
The fastest way to confirm an alternator problem is by measuring the voltage directly at the battery terminals using a digital multimeter. Set your multimeter to direct current voltage, turn off all vehicle accessories, and start the engine.
- Take a baseline reading with the engine idling; a healthy alternator should show between 13.7 and 14.7 volts.
- Turn on your headlights, air conditioning, and rear defroster to apply an electrical load.
- Observe the multimeter reading; if the voltage drops below 13.2 volts and stays there, your alternator is failing under load.
- If the reading drops below 12.6 volts, your battery is discharging, meaning the alternator is no longer charging the system at all.
Identifying Supporting Symptoms of Alternator Failure
Your check engine light is rarely the only symptom when an alternator dies. Pay close attention to these physical warning signs that accompany electrical system failure:
- Dimming headlights that get brighter when you press the gas pedal and rev the engine
- A distinct whining or growling noise coming from under the hood near the accessory belt
- Electrical accessories acting erratically, such as slow power windows or flickering dashboard lights
- A red battery icon illuminating alongside or shortly before your check engine light appears
How to Fix Alternator Voltage Issues and Clear Codes
Resolving an alternator-induced check engine light requires a methodical approach. According to ASE-certified technicians, ignoring underlying voltage spikes can fry newly installed components. Follow this step-by-step diagnostic and repair process for 2026 vehicles.
Step 1: Test and Replace the Alternator
- Disconnect the negative battery cable before touching any alternator terminals.
- Use a digital multimeter to test output at the battery terminals while the engine runs; healthy systems read between 13.5 and 14.5 volts.
- Remove the accessory belt and unbolt the failing alternator unit if output falls outside normal thresholds.
- Install the replacement alternator, ensuring all mounting brackets and electrical connections are torqued to manufacturer specifications.
Step 2: Clear Diagnostic Trouble Codes
- Plug an OBD-II scanner into the diagnostic port located beneath the driver-side dashboard.
- Turn the vehicle ignition to the ON position without starting the engine.
- Navigate the scanner menu to the “Read Codes” and “Clear Codes” function.
- Confirm code deletion and drive the vehicle through a complete drive cycle to ensure the computer recalibrates.
What If the Check Engine Light Stays On After Replacement
Replacing a dying alternator does not guarantee immediate clearance of dashboard warnings if residual system damage exists. Drivers facing persistent dashboard lights should execute specific troubleshooting steps before panicking.
- Inspect the main battery health; prolonged under-voltage conditions frequently ruin battery cells, requiring a replacement unit costing between $150 and $300.
- Check the serpentine belt tensioner and pulley alignment, as slipping belts mimic alternator failure symptoms.
- Examine the engine ground straps for corrosion or loose connections, which cause persistent voltage drops across the powertrain control module.
- Seek professional diagnostic assistance from an automotive electrical specialist if warning lights persist, with professional labor rates averaging $120 to $180 per hour in 2026.
Conclusion
A bad alternator frequently triggers a check engine light by starving sensitive computer sensors of stable electrical current. Replacing the faulty charging unit and clearing stored diagnostic trouble codes restores proper vehicle operation and turns off warning indicators. According to verified research and expert automotive databases, addressing voltage fluctuations promptly prevents costly secondary damage to onboard computers. Schedule a professional multi-point electrical test today to ensure your charging system operates at peak factory performance.
❓ Frequently Asked Questions
Can a bad alternator cause a check engine light without the battery light coming on?
Yes, it is possible. If an internal diode or voltage regulator fails gradually, it might disrupt sensor data enough to trigger an ECU code before the dedicated battery warning light illuminates.
What specific trouble codes are caused by a bad alternator?
Common codes include P0562 (System Voltage Low) and P0563 (System Voltage High), along with various erratic sensor codes caused by insufficient power supply.
How can I tell if my check engine light is from the alternator or something else?
Scan the vehicle for codes using an OBD2 reader. If you see voltage-related codes accompanied by dimming headlights or a whining noise, the alternator is likely the culprit.
Will replacing a bad alternator automatically clear the check engine light?
Sometimes the light clears itself after a few driving cycles once normal voltage is restored, but you may need to manually clear the codes using an OBD2 scanner.
Can driving with a bad alternator ruin my new battery?
Yes. A failing alternator can either overcharge a battery, causing it to overheat and boil, or undercharge it, leading to deep discharge cycles that permanently ruin the battery cells.
What other symptoms accompany a check engine light caused by a failing alternator?
Look for dim or flickering headlights, slow power windows, erratic dashboard gauges, a burning rubber smell from the alternator belt, and electronic accessories malfunctioning.