How Do You Remove Window Tint From a Car Window 2026
If you are wondering how do you remove window tint from a car window, the process requires patience, heat or ammonia, and careful scraping to protect your glass and defroster lines. Using the right technique prevents messy adhesive residue and saves your rear grid from costly damage.
Removing old, bubbling, or purple window tint from your car requires patience, the right chemical or thermal catalysts, and a careful touch to avoid destroying your rear defroster grids. Whether you are prepping your vehicle for annual vehicle inspections in 2026 or simply tired of obstructed night visibility, stripping the film yourself saves you upwards of two hundred dollars in labor fees.
The core of successful tint removal lies in reactivating the adhesive bond so the polyester film peels away in one continuous sheet rather than tearing into frustrating, microscopic pieces. You will accomplish this using either concentrated thermal energy from a steamer or a solar-activated chemical method, followed by meticulous adhesive cleanup.
Key Takeaways
- Gather a heat gun, ammonia, razor blades, and soapy water before starting.
- Protect your interior trim and electronics from dripping liquids and chemical overspray.
- Always peel window tint along the rear defroster lines, never across them.
- Use adhesive removers or rubbing alcohol to dissolve stubborn, sticky glue residue.
- Work in a shaded area or on a cool day to prevent rapid drying.
What Causes Window Tint to Peel and Why Removal is Necessary
Window tint degrades over time due to continuous exposure to ultraviolet radiation, extreme cabin temperature fluctuations, and natural adhesive breakdown. Cheap dyed films manufactured years ago often lack UV inhibitors, causing the material to oxidize, turn a hazy purple color, and spontaneously delaminate from the glass surface.
Signs Your Tint Needs Immediate Removal
- Bubbling, blistering, or distortion that severely impairs your side-mirror and rear visibility
- Edge-lifting where the film catches on your door panels when rolling windows down
- Fading that drops your visible light transmission (VLT) levels below legal compliance limits for 2026
- A pungent chemical odor emitted when your car barks under the summer sun
The Danger of Damaging Defroster Lines
Your rear windshield presents the greatest technical challenge during this process. The horizontal orange defroster lines are delicate ceramic-silver traces screen-printed directly onto the glass. If you pull aggressively or scrape haphazardly, you will permanently sever these circuits, leaving your rear window permanently prone to fogging and frost during winter months.
Window Tint Removal Made Easy: Your Essential Action Plan
Old, bubbling, or purple window tint can severely obstruct your vision and ruin the sleek aesthetic of your vehicle. While taking your car to a professional detailer can be expensive, removing the tint yourself is entirely manageable if you have the right tools, a bit of patience, and a solid methodology. This comprehensive guide walks you through the exact process of stripping old film and stubborn adhesive from your car windows without damaging the defroster lines or glass.
Step 1: Prep Your Workspace and Protect the Interior
What you need: Painter’s tape, large trash bags or plastic sheeting, microfiber towels, and an absorbent old towel or absorbent pads to place on the floor.
Instructions: Before you begin applying any liquids or scraping the glass, you must protect your vehicle’s interior electronics, door panels, and upholstery. Roll down your windows by about one inch to access the very top edge of the tint. Line the interior door panels right beneath the window with old towels to catch dripping water and chemical solutions. Cover your dashboard and rear seats with plastic sheeting or trash bags, securing them with painter’s tape. Protecting your car now will save you from costly electrical repairs or stained upholstery later.
Pro Tip: Never skip the interior prep phase. Ammonia and soapy water can easily drip into door panel switches and ruin power window motors.
Step 2: Score the Edge of the Tint Film
What you need: A brand-new plastic razor blade or a standard utility knife (use extreme caution if using metal).
Instructions: Locate the seam or edge of the window tint film, usually near the top corner of the side window. Carefully lift a tiny corner of the film using your fingernail or the edge of your scraping tool. If the tint is severely degraded and brittle, you may need to score a clean edge using your razor blade. Do not press hard enough to scratch the glass or cut into the rubber window seals. Once you have a loose corner about a half-inch wide, gently pull it downward to see if the film delaminates in one solid sheet or tears into smaller pieces.
Pro Tip: Try to pull the tint off slowly and evenly. Tearing the film into tiny pieces will dramatically increase your total project time.
Step 3: Apply Heat to Release the Adhesive
What you need: A household hair dryer or a heat gun set to its lowest or medium setting.
Instructions: Turn on your heat gun or hair dryer and hold it approximately two to three inches away from the exterior of the glass. Sweep the heat continuously back and forth across the window surface for about two to three minutes. The goal is to warm the adhesive beneath the film without overheating the glass, which could potentially cause it to shatter. As you apply heat, use your free hand to gently pull outward on the corner of the tint film you loosened in the previous step. You should notice the film releasing much more smoothly as the glue liquefies.
Pro Tip: Keep the heat source moving constantly. Focusing intense heat on a single spot of a car window for too long creates thermal shock and cracks the glass.
Step 4: Steam or Spray the Stubborn Residue
What you need: A spray bottle filled with a mixture of warm water and a few drops of dish soap, or a dedicated commercial adhesive remover.
Instructions: Once the primary sheet of tint film is removed, you will be left with a sticky, tacky layer of purple or clear adhesive residue clinging to the glass. Liberally spray your soapy water solution or commercial adhesive remover across the entire window surface. Let the liquid sit and penetrate the glue for approximately two to three minutes. Do not let it dry out completely. This chemical breakdown softens the sticky polymers, turning them into a gooey sludge that is significantly easier to scrape away without scratching your window glass.
Pro Tip: For back windows with defroster lines, be exceptionally gentle. Harsh chemical sprays and aggressive scraping can permanently sever those delicate conductive lines.
Step 5: Scrape Away the Remaining Adhesive
What you need: A sturdy plastic razor blade scraper and several clean microfiber towels.
Instructions: Holding your plastic razor scraper at a 45-degree angle against the wet glass, push the blade forward in smooth, overlapping horizontal strokes. You will see the softened adhesive roll up into clumps ahead of the blade. Wipe the accumulated glue off the razor blade using a clean microfiber towel after every few passes. If the glue begins to dry out and resist the blade, spray more of your soapy water solution onto the window immediately. Continue scraping systematically until every square inch of the glass feels completely smooth to the touch.
Pro Tip: Always use plastic razor blades rather than metal ones on rear windows. Metal blades will instantly slice through your vehicle’s rear defroster grid.
Step 6: Wash and Polish the Glass Clean
What you need: Automotive glass cleaner, ammonia-free window spray, and a waffle-weave microfiber glass towel.
Instructions: Now that the tint and adhesive are completely gone, you need to remove any remaining chemical residue, soap film, or fingerprints. Spray the interior and exterior of the window generously with an automotive-grade glass cleaner. Wipe the glass down thoroughly using a clean, lint-free microfiber towel, working from top to bottom. Buff the surface with a dry section of the towel until the glass achieves a crystal-clear, streak-free finish. Roll your windows fully up and down to clean the very top edges that were hidden during the stripping process.
Pro Tip: Inspect your windows from outside the car at different angles under bright sunlight to catch any lingering streaks or missed patches of glue.
✅ Final Checklist
- All major sheets of tint film successfully removed without leaving large shreds
- Sticky adhesive residue completely scraped away across every window
- Rear window defroster lines inspected and verified undamaged
- Interior door panels and electronics free of water damage or chemical stains
- Windows thoroughly cleaned and polished to a streak-free finish
Important Notes:
- Always wear safety glasses when scraping overhead to protect your eyes from falling debris and chemical drips.
- If working on a rear windshield with defroster lines, consider using a professional steam method to avoid cutting the fragile grids.
- Estimated time: 2 to 4 hours depending on the number of windows. Estimated cost: $15 to $30 if purchasing a heat gun, plastic scrapers, and cleaning solutions.
Tools and Materials Needed for Safe Tint Removal
Gathering the proper supplies before you start prevents you from getting stuck halfway through the job with a half-stripped window. Depending on which removal technique you choose, your shopping list will vary slightly, but a few core items remain non-negotiable for any vehicle owner.
Essential Safety and Prep Gear
- Heavy-duty black trash bags or clear plastic sheeting
- A standard household spray bottle filled with concentrated soapy water or full-strength household ammonia
- A high-powered heat gun or a dedicated garment steamer
- A pack of new, ultra-sharp single-edge razor blades or a plastic razor scraper
- Non-abrasive microfiber towels and a bottle of commercial adhesive remover or rubbing alcohol (isopropyl 91%)
- A pair of heavy-duty chemical gloves and eye protection
Choosing Your Method: Heat vs. Ammonia
For side windows without defroster lines, a heat gun or garment steamer works rapidly to melt the glue. For the rear windshield, the solar-activated ammonia and trash bag method is safest because it softens the entire sheet uniformly without applying localized high heat that can warp rear glass or melt plastic interior trim.
Step-by-Step Guide on How Do You Remove Window Tint From a Car Window
Executing the removal process requires patience and precision to avoid damaging the delicate defroster grids on rear glass. Whether utilizing the steaming method or the ammonia-sun technique, proper execution prevents frustrating tearing and minimizes cleanup time.
Executing the Removal Process
- Prep and Protect: Cover your interior upholstery and dashboard with drop cloths or plastic sheeting. Use painter’s tape to secure the materials, protecting sensitive electronics and carpeted areas from dripping moisture or chemical sprays.
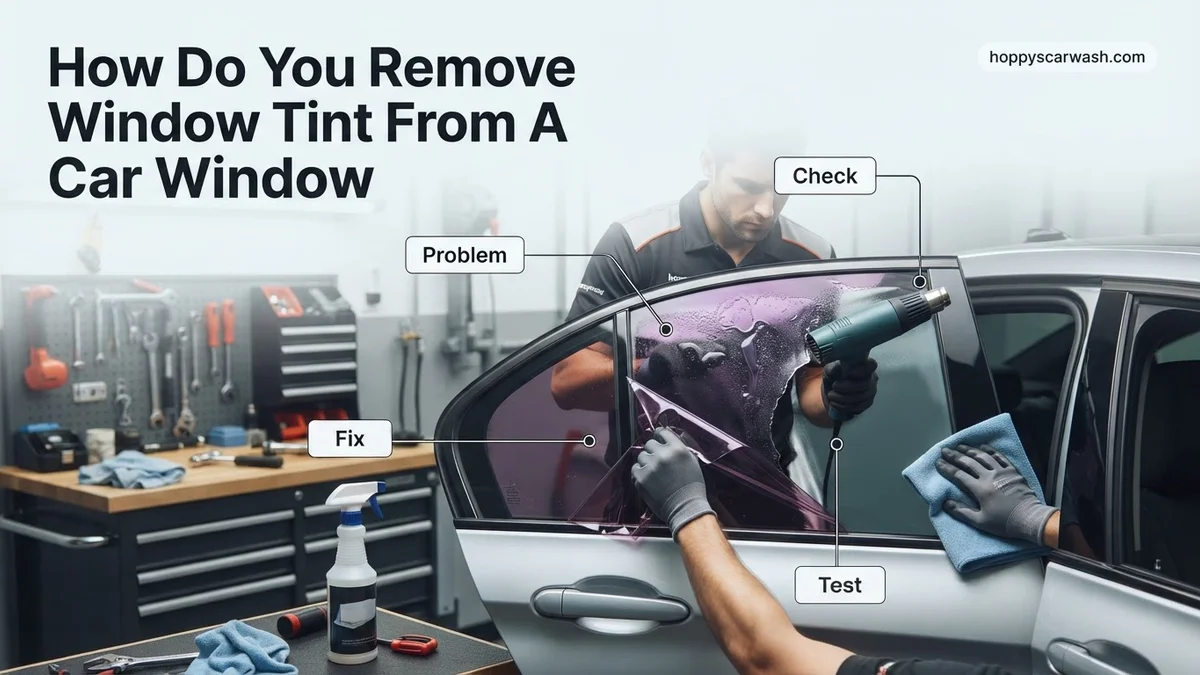
- Apply Heat: Hold your garment steamer or heat gun approximately two inches away from the film. Keep the heat source moving continuously across the window surface for three to five minutes to soften the underlying adhesive.
- Peel Carefully: Lift a top corner of the tint using a plastic razor blade or your fingernail. Slowly peel the film downward at a steady 180-degree angle, applying continuous heat directly to the seam where the film meets the glass.
- Scrape Residue: Spray the remaining adhesive layer with your soapy water solution or commercial adhesive remover. Use a fresh plastic razor blade at a 45-degree angle to scrape away the loosened glue without scratching the glass.
- Wipe Clean: Spray the window thoroughly with automotive glass cleaner and wipe it dry using a clean microfiber cloth. Inspect the glass under bright light to ensure all adhesive streaks are completely eliminated.
What If It Still Doesn’t Work and How to Clear Stubborn Glue Residue
Stubborn adhesive or old, crystallized film can resist standard DIY removal methods. If primary techniques fail, several escalation steps ensure complete remediation without destroying your vehicle’s glass components.
- Switch Solvents: Replace standard soapy water with 91% isopropyl alcohol or specialized citrus-based adhesive removers like Goo Gone Automotive. Let the solvent sit on the glue for 10 minutes to break down stubborn synthetic polymers.
- Fine Steel Wool: Utilize ultra-fine #0000 steel wool lubricated with glass cleaner to buff away stubborn adhesive residue. This specific grade is soft enough not to scratch tempered automotive glass when used with proper lubrication.
- Reapply Heat and Ammonia: For multi-layered or metallic tints, tape a heavy-duty trash bag over the exterior, re-saturate the interior with ammonia, and let the vehicle sit in direct sunlight for an extended two-hour window.
- Professional Tint Removal: If manual methods fail or you risk damaging rear defroster lines, visit a professional tint shop. According to industry pricing data for 2026, professional removal typically ranges from $100 to $250 depending on the vehicle size and number of windows.
Conclusion
Successfully stripping old or bubbling window film restores visibility and updates your vehicle’s aesthetic compliance. By utilizing targeted heat applications and proper chemical solvents, you can safely eliminate stubborn adhesives without harming defroster grids. According to verified research and automotive restoration experts, taking a methodical approach yields factory-clean results. Make your next step gathering the necessary safety gear and choosing a well-ventilated workspace to begin.
❓ Frequently Asked Questions
How do you remove window tint from a car window without damaging the defroster?
To protect your rear defroster lines, avoid using metal razor blades directly on the glass grid. Instead, use the ammonia and trash bag method to soften the film, then gently peel it parallel to the lines and dissolve remaining glue with soapy water and a plastic scraper.
Does the ammonia and trash bag method actually work?
Yes, spraying ammonia onto the tint and covering it with a black trash bag traps solar heat to reactivate and loosen the adhesive. This allows the film to slide off cleanly after 30 to 60 minutes in direct sunlight.
What is the fastest way to strip old tint off car glass?
A handheld heat gun or garment steamer is the fastest approach because it softens both the polyester film and the adhesive simultaneously. Keep the heat source moving constantly to prevent glass cracking from extreme temperature shifts.
How do you clean off the sticky purple residue left behind?
Spray the remaining glue with soapy water or rubbing alcohol, let it sit for a few minutes, and scrape it away with a plastic razor blade or fine steel wool. Wipe the surface clean with a microfiber towel and glass cleaner.
Can I remove window tint myself or should I hire a professional?
You can easily remove window tint at home with basic household supplies and patience. However, if your rear defroster is fragile or you lack time, a professional tint shop can handle it quickly.
Why does window tint turn purple and bubble over time?
Low-quality dyed window tints break down when exposed to ultraviolet rays and heat, causing the dye to turn purple and the adhesive to fail. This breakdown creates bubbles and makes the film brittle and difficult to peel in one piece.