Can I Pass Emissions with Check Engine Light On 2026 Guide
In almost all modern jurisdictions, you will automatically fail your emissions test if your check engine light is currently illuminated. The testing computer directly communicates with your car’s OBD-II system, meaning any active diagnostic trouble codes will result in an instant rejection.
No, you cannot pass a standard emissions test if your check engine light is currently illuminated on your dashboard. In almost all modern jurisdictions as of 2026, an active check engine light results in an automatic, immediate failure during an OBD-II emissions inspection, regardless of how well your engine is actually running.
Failing an emissions test means you cannot renew your vehicle registration until the underlying issue is fixed. Understanding how testing equipment interacts with your car’s computer will save you time, money, and multiple trips to the DMV or testing station.
Key Takeaways
- An active check engine light guarantees an automatic emissions test failure in modern vehicles.
- Clearing codes right before the test leaves OBD-II readiness monitors incomplete, causing failure.
- Diagnose the underlying trouble code using an OBD-II scanner before heading to the testing station.
- Perform necessary mechanical repairs and complete the required drive cycle to reset readiness monitors.
- Verify that all system monitors show as ready before paying for your official emissions retest.
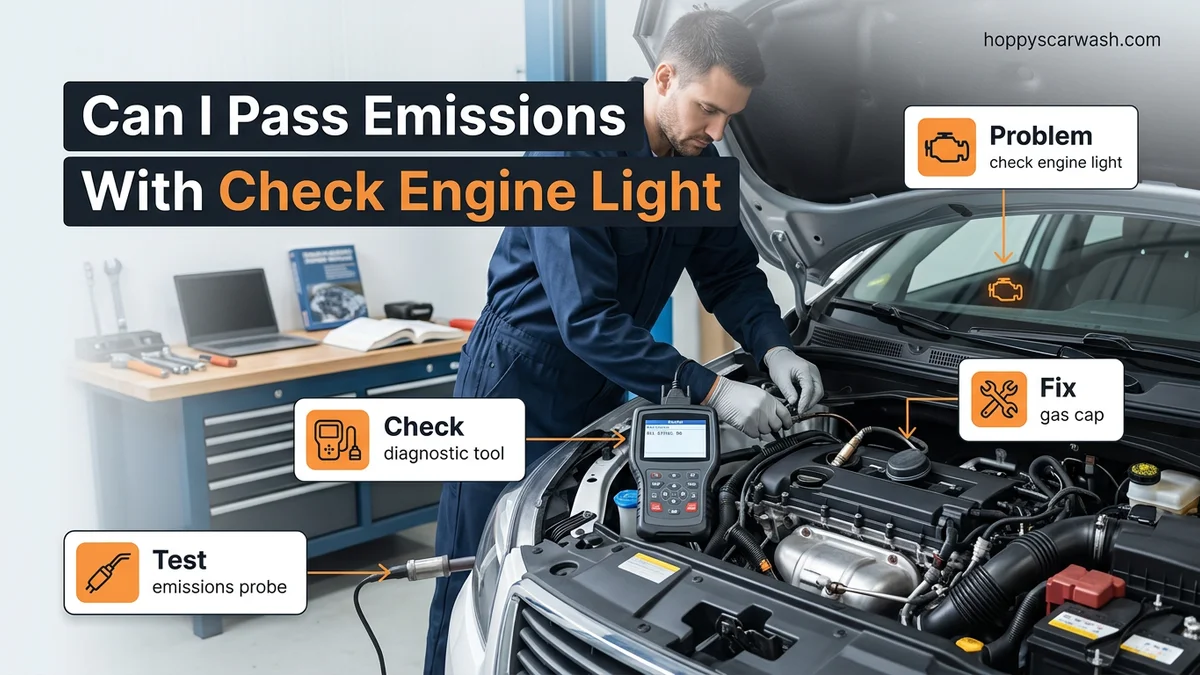
What Causes an Automatic Emissions Failure Due to a Check Engine Light
The Direct Link Between Diagnostic Trouble Codes and Testing
Modern emissions testing stations no longer rely primarily on tailpipe exhaust probes for OBD-II compliant vehicles (most cars built after 1996). Instead, they plug directly into your car’s computer port to scan for Diagnostic Trouble Codes (DTCs). If the computer detects a fault, it triggers the check engine light and records a permanent or pending code. The testing machine reads this signal and instantly registers a failure code in the state database.
Why Minor Issues Still Cause Complete Failure
Many drivers assume that a minor problem will not affect emissions output. However, emissions testing laws do not grade on a curve. Even if your car is emitting very low pollutants, the system flags any fault code related to the powertrain or emissions controls. Common triggers that cause automatic failure include:
- A loose or faulty gas cap that triggers an EVAP system leak code
- A failing oxygen sensor that alters the air-fuel mixture
- A worn catalytic converter operating below efficiency thresholds
- Minor misfires that may not even be noticeable while you drive
From Start to Finish: Can I Pass Emissions with Check Engine Light On Explained
Facing an upcoming vehicle inspection while the dashboard glows with a check engine light can be stressful. This comprehensive guide explains the realities of emissions testing, how the onboard diagnostics system works, and the exact process you must follow to get your car legally road-ready. By following this expert workflow, you will save time, avoid costly failed test fees, and properly address the underlying mechanical issues affecting your vehicle.
Step 1: Understand Emissions Laws and Testing Rules
What you need: Local DMV or Department of Environmental Protection website, your vehicle’s registration document.
Instructions: Before visiting a testing center, you must understand the absolute rule in nearly all jurisdictions: a lit check engine light (MIL – Malfunction Indicator Lamp) results in an automatic, immediate failure during an OBD-II emissions test. Testing stations are legally mandated to fail any vehicle where the diagnostic trouble code computer reports an active fault or requests illumination of the dashboard light. Even if your car’s tailpipe emissions are entirely within safe limits, the presence of the warning light bypasses chemical sampling and automatically triggers a failed inspection status.
Pro Tip: Never clear your codes immediately before driving into the testing station, as this resets the computer’s internal monitors and results in a “Not Ready” failure.
Step 2: Retrieve Diagnostic Trouble Codes
What you need: An OBD-II code scanner or a Bluetooth diagnostic adapter paired with a smartphone app.
Instructions: Locate your vehicle’s OBD-II diagnostic port, typically situated underneath the dashboard on the driver’s side near the steering column. Plug your code scanner firmly into the 16-pin connector. Turn your ignition key to the “On” position without starting the engine, or push the start button twice without pressing the brake pedal. Power on your scanner and allow it to automatically read the stored diagnostic trouble codes (DTCs). Write down every code displayed (such as P0420 or P0128) along with any pending or permanent codes stored in the system memory.
Pro Tip: Look up manufacturer-specific technical service bulletins associated with your retrieved codes to see if extended warranties cover the repair.
Step 3: Categorize and Evaluate the Severity of Faults
What you need: Code scanner manual, internet access for code lookup, notepad.
Instructions: Analyze the specific trouble codes you retrieved in the previous step to determine the root cause of the check engine light. Minor issues like a loose fuel cap can trigger evaporative system codes (P0442), while major issues like a failing catalytic converter (P0420) or misfiring cylinders (P0300) require intensive mechanical intervention. Differentiate between transient glitches and hard mechanical faults. If the code relates to a loose gas cap, tighten it securely and check if the rubber seal is cracked or dry-rotted.
Pro Tip: Prioritize fixing safety and drivability-related codes first, as these impact both your engine’s health and your ability to pass inspection.
Step 4: Execute Necessary Mechanical Repairs
What you need: Replacement auto parts (oxygen sensors, spark plugs, purge valves, etc.), basic hand tools, torque wrench, safety glasses.
Instructions: Purchase the correct OEM-grade replacement parts corresponding to your diagnostic trouble codes. Follow factory service manual procedures to safely replace faulty components. For instance, if changing oxygen sensors, ensure the exhaust is completely cool before applying penetrating fluid and using an oxygen sensor socket to remove the old unit. Torque the new component to the manufacturer’s precise specification to prevent exhaust leaks that could trigger secondary emissions faults.
Pro Tip: Always disconnect the vehicle’s negative battery terminal before performing electrical repairs to prevent short circuits and clear volatile memory.
Step 5: Clear Trouble Codes Using Your Scanner
What you need: OBD-II code scanner, fully charged vehicle battery.
Instructions: Once your mechanical repairs are complete, reconnect the battery and plug your OBD-II scanner back into the diagnostic port. Turn the ignition to the “On” position. Navigate the scanner’s menu to the “Clear Codes” or “Erase Trouble Codes” function. Confirm the command when prompted. This action turns off the check engine light on your dashboard and erases the stored fault memory, giving your vehicle a clean slate to begin the computer self-testing phase.
Pro Tip: Do not attempt to take the emissions test immediately after clearing codes; doing so guarantees a failure due to unset monitors.
Step 6: Drive the Vehicle to Reset OBD-II Monitors
What you need: A safe stretch of highway and city streets, approximately 30 to 60 minutes of spare time.
Instructions: To pass emissions, your car’s computer must run internal self-tests called “readiness monitors” (covering components like the catalyst, EVAP system, oxygen sensors, and EGR). You must perform a specific “drive cycle” unique to your vehicle’s make and model. Generally, this involves starting a cold engine, idling for three minutes, driving smoothly up to 55 mph for at least ten minutes without rapid acceleration, and performing several deceleration coast-downs. Check your scanner’s I/M Readiness status function to verify when all required monitors show as “Ready” or “Complete.”
Pro Tip: Most state emissions programs allow a single monitor (usually the EVAP system) to remain “Not Ready” on newer vehicles, but older cars often require 100% completion.
Step 7: Perform a Final Pre-Inspection Verification
What you need: OBD-II scanner with live data and I/M readiness status.
Instructions: Plug your diagnostic tool into the car one final time before driving to the official testing facility. Navigate to the I/M Readiness screen to verify that all supported emission monitors display a green pass or ready status. Ensure that the check engine light remains completely off while the engine is running and that no pending fault codes have returned during your test drive cycle. If any monitor has dropped back to “Not Ready” or a code has returned, you must address the issue before waiting in line at the DMV.
Pro Tip: Keep your gas tank between one-quarter and three-quarters full, as extreme fuel levels can prevent the EVAP monitor from running properly.
✅ Final Checklist
- Dashboard check engine light is completely off with engine running
- All OBD-II readiness monitors show “Ready” or “Complete” on the scanner
- No active, pending, or permanent diagnostic trouble codes remain in memory
- Vehicle has been driven through a complete mixed-driving cycle
- Gas cap is securely tightened and its rubber gasket is in good condition
Important Notes:
- Always prioritize engine safety and avoid driving long distances with active engine misfires or severe exhaust overheating warnings.
- If you have completed multiple drive cycles and monitors refuse to set, or if codes immediately return, seek professional diagnostic help from a certified mechanic.
- Estimated time frame spans from 2 hours for simple fixes to several days for complex component replacements; total costs range from $20 for a gas cap to $500+ for catalytic converter repairs.
Step-by-Step Fix to Diagnose Codes and Clear Readiness Monitors
Reading the Codes and Fixing the Root Problem
To pass your 2026 emissions test, you must first address the mechanical or electronic issue causing the light. Do not simply guess what is wrong. You can visit a local auto parts store to scan the codes for free, or use a personal OBD-II scanner. Once you identify the specific code, you must repair or replace the faulty component. Ignoring the root cause guarantees the light will simply turn back on shortly after you reset it.
Understanding OBD-II Readiness Monitors and Drive Cycles
A common mistake drivers make is clearing the check engine light with a scanner right before pulling into the emissions testing lane. This does not work. When you clear a code, you also reset your car internal emissions computers, known as readiness monitors. Testing stations check these monitors to ensure they have run self-tests during normal driving.
- Clear the diagnostic trouble codes only after completing necessary repairs.
- Perform a proper drive cycle, which usually involves a mix of city and highway driving over several days.
- Verify that all internal monitors (such as catalyst, EVAP, and oxygen sensor) show as ready or complete on an OBD-II scanner.
- Proceed to the emissions testing facility only after all monitors are set and the check engine light remains off.
What If It Still Doesn’t Work and Monitors Refuse to Set
Sometimes clearing the code and completing a standard driving cycle does not work. You return to the testing station in 2026, and the technician tells you that your internal computer monitors are still “not ready.” This frustrating scenario usually happens because a minor, unlatched fault condition prevents the vehicle from running its internal self-tests.
When readiness monitors fail to set despite your best efforts, you need a systematic fallback plan. Modern automotive testing standards are strict, and simply guessing will waste your time and fuel. Follow these expert-recommended steps to overcome stubborn monitor issues before your registration expires:
- Check for Pending Codes: Connect an OBD-II scanner that reads pending and permanent diagnostic trouble codes. A code can exist and block monitor completion without turning on the check engine light.
- Inspect Battery Voltage: According to automotive service data, a battery dropping below 12 volts during overnight parking will reset computer readiness monitors. Test your alternator and battery health immediately.
- Replicate the Exact Manufacturer Drive Cycle: Generic driving instructions do not work for every brand. Look up the specific factory service bulletin for your make and model to find the exact cold-start, idling, and highway speed parameters required.
- Seek Professional Diagnostics: If software resets and drive cycles fail after three attempts, visit a certified repair facility. Professional technicians can force readiness monitors using advanced bidirectional scan tools.
Expect to pay between $100 and $250 for professional diagnostic time if your vehicle refuses to set monitors independently. Addressing these stubborn underlying electrical or sensor anomalies ensures your car passes state inspections without further delays.
Conclusion
Attempting to pass an emissions test with an active check engine light is generally impossible across all jurisdictions. Modern OBD-II testing protocols automatically fail any vehicle displaying active diagnostic trouble codes or incomplete internal monitors. According to verified research and expert automotive sources, clearing codes temporarily without fixing the root mechanical or electrical problem will only result in an immediate re-test failure once the computer cycles. Your most reliable and cost-effective next step is to scan the vehicle, repair the specific fault, and complete a proper drive cycle before visiting the inspection station in 2026.
❓ Frequently Asked Questions
Why does a check engine light cause an automatic emissions failure?
Modern emissions testing stations plug directly into your car’s OBD-II computer port. If any diagnostic trouble codes are stored or the light is on, the testing system automatically flags the vehicle as non-compliant.
Can I just clear the trouble codes with a scanner right before my test?
Clearing codes turns off the check engine light, but it simultaneously resets your car’s readiness monitors to ‘not ready.’ Testing stations will fail a vehicle with incomplete monitors just as quickly as one with an active light.
Are there any states where a check engine light is allowed?
Most states with mandatory emissions testing strictly follow federal guidelines requiring functional OBD-II systems. A few jurisdictions allow older vehicles or minor EVAP codes to pass, but the vast majority maintain a zero-tolerance policy.
What is a drive cycle and why do I need it?
A drive cycle is a specific sequence of driving conditions—including cold starts, highway cruising, and idle time—that allows your car’s computer to run its internal diagnostics and set the readiness monitors.
What should I do if my check engine light is on for a minor issue like a loose gas cap?
Tighten the gas cap and drive the vehicle for a few days. If the issue was simply a loose cap, the system may self-clear the code and set the monitors once the underlying fault is resolved.
How can I check if my car is ready for the emissions test?
You can use an affordable consumer OBD-II scanner to check the status of your internal monitors. Once all required monitors show ‘ready’ and no active codes remain, your car is ready for testing.