How to Remove State Farm Beacon From Windshield 2026
Removing a State Farm Drive Safe & Save beacon requires breaking the strong adhesive bond safely without cracking your glass. Using items like dental floss, a hairdryer, and safe adhesive removers ensures clean removal.
Removing your State Farm Drive Safe & Save beacon from your windshield requires patience and the right technique to avoid cracking the glass or snapping the plastic housing. Because these telematics devices use industrial-grade automotive adhesive pads to withstand extreme 2026 summer heat and winter freezes, pulling them off by hand will usually leave the mounting bracket behind or stress the windshield.
You can safely detach the beacon in under ten minutes using common household items like dental floss, a plastic trim removal tool, and a mild solvent. This step-by-step guide walks you through breaking that stubborn bond and cleaning up the sticky residue without leaving a single scratch on your car’s glass.
Key Takeaways
- Use dental floss or fishing line in a sawing motion to slice behind the adhesive pad.
- Apply gentle heat with a hairdryer to soften the sticky backing before pulling.
- Avoid using metal razor blades directly on the glass to prevent permanent scratching.
- Remove leftover residue using rubbing alcohol or a specialized adhesive cleaner.
- Contact State Farm customer support to understand protocol for old or replaced beacons.
Why State Farm Beacons Are Difficult to Remove From Glass
The Science Behind Automotive Acrylic Foam Tape
State Farm uses high-strength acrylic foam tape, often comparable to 3M VHB (Very High Bond) tape, to secure the Bluetooth beacon to your windshield. This specific adhesive relies on viscoelastic properties, meaning it absorbs shock and distributes weight across the entire mounting surface. By 2026, automotive manufacturers and insurance providers utilize these adhesives because they prevent the device from falling off when your vehicle experiences heavy vibrations, potholes, or temperature fluctuations ranging from negative 20 degrees to over 120 degrees Fahrenheit.
- Acrylic foam bonds chemically and mechanically to microscopic pores in the glass surface.
- The tape is engineered to resist direct pulling forces, often holding up to 10 pounds of pressure per square inch.
- Pulling straight back on the beacon creates high tension that can easily chip laminated windshield glass.
Temperature Effects on the Adhesive Bond
The weather outside plays a massive role in how easily your beacon will detach. If the adhesive is freezing cold, the foam becomes brittle and snaps easily, leaving a thick layer of stubborn square tape behind. If it is too hot, the adhesive turns into a gooey, stretchy nightmare that smears across your driver-side view.
- Cold weather makes the foam rigid, increasing the risk of leaving the entire mounting pad stuck flat against the glass.
- Direct midday sun softens the outer perimeter of the adhesive while the center remains firmly locked down.
- Aiming for an ambient glass temperature of around 70 degrees Fahrenheit yields the best removal results.
State Farm Beacon Removal Made Easy: Your Essential Action Plan
Removing a State Farm Drive Safe & Save beacon (often referred to as a Bluetooth telemetry device or beacon) from your vehicle windshield requires care to prevent damage to your glass or leaving an unsightly adhesive mess. Whether you are returning a leased vehicle, switching insurance providers, or simply upgrading your car, following this structured, damage-free removal process ensures your windshield remains pristine and the device stays intact.
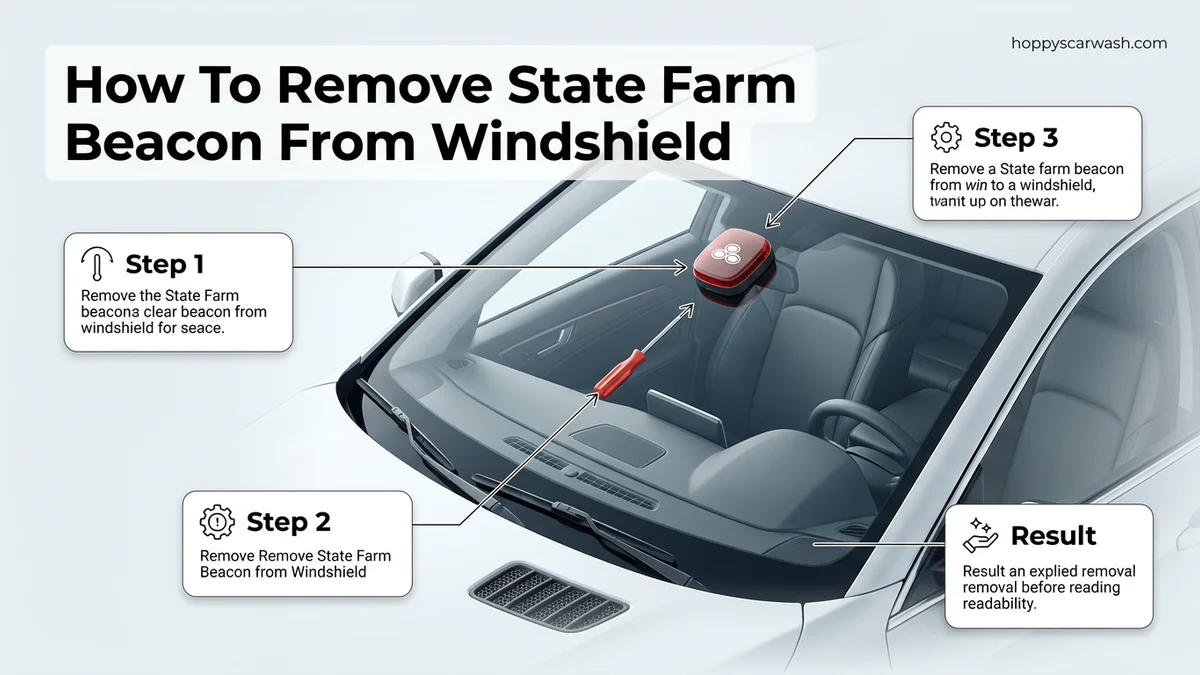
Step 1: Gather Your Removal Supplies
What you need: A standard hair dryer or heat gun, fishing line or un-waxed dental floss (about 12 inches long), 91% isopropyl alcohol or Goo Gone, clean micro-fiber towels, and a pair of sturdy work gloves.
Instructions: Before touching the device, assemble all your tools within arm’s reach inside the vehicle. Having everything ready prevents you from having to pause mid-removal while adhesives cool down or dry out. Make sure your vehicle is parked in a well-lit area, preferably out of direct, blazing sunlight so you can control the temperature applied to the windshield safely without causing thermal shock to the glass.
Pro Tip: Never use metal razor blades directly against the glass surface without lubrication, as they can easily scratch tinted windows or the windshield itself.
Step 2: Apply Controlled Heat to Soften the Adhesive
What you need: Hair dryer (set to medium-high heat) or a heat gun (set to its lowest setting).
Instructions: Hold the hair dryer approximately 4 to 6 inches away from the State Farm beacon. Continuously sweep the heat back and forth across the front and sides of the plastic housing for 60 to 90 seconds. The goal is to warm up the heavy-duty automotive acrylic foam tape holding the device to the windshield, making it pliable. Do not hold the heat source in one spot for too long, especially on freezing cold days, as extreme localized temperature changes can crack a windshield.
Pro Tip: Test the temperature of the plastic housing with your gloved hand; it should feel very warm to the touch, but not so hot that it melts the plastic casing of the beacon.
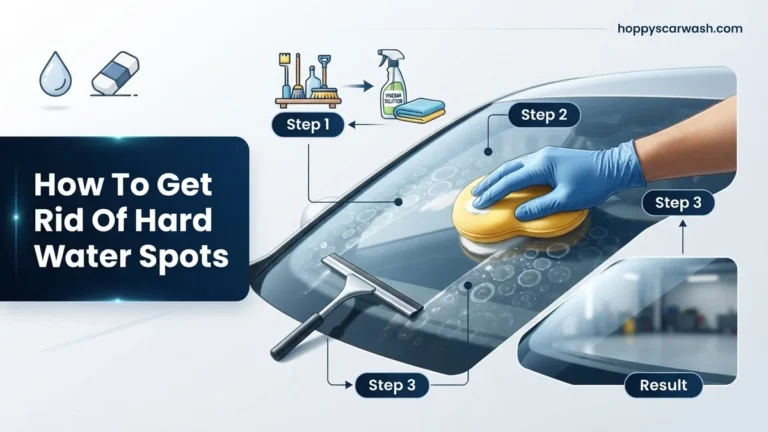
Step 3: Saw Through the Mounting Tape Using Dental Floss
What you need: 12-inch length of un-waxed dental floss or high-tensile fishing line, and your work gloves.
Instructions: Wrap the ends of the dental floss around your index fingers to get a secure grip. Position the middle of the string directly behind the top edge of the State Farm beacon, wedging it between the back of the device and the sticky foam pad. Using a gentle sawing motion—moving the string from side to side—pull downward slowly. Slice your way through the softened foam tape until you reach the bottom and the beacon detaches completely from the windshield.
Pro Tip: Keep the string pulled as flat and flush against the glass as humanly possible to ensure you cut through the adhesive layer rather than snapping your floss.
Step 4: Peel Away Residual Foam Mounting Tape
What you need: Your fingers, gloves, and patience.
Instructions: Once the beacon is off, a chunk of grey or black double-sided foam tape will likely remain stuck to your windshield. Pinch a corner of the remaining foam between your thumb and forefinger and pull slowly at a shallow 45-degree angle away from the glass. Often, the foam will stretch and release in one large piece. If it resists, apply another 15 seconds of heat from your hair dryer to re-soften the remaining adhesive residue.
Pro Tip: Avoid digging at the foam with your fingernails or plastic cards aggressively, as this can tire your hands out unnecessarily when chemical solvents can do the heavy lifting.
Step 5: Dissolve Sticky Adhesive Residue
What you need: 91% isopropyl alcohol or commercial adhesive remover (such as Goo Gone) and a clean microfiber towel.
Instructions: Pour a quarter-sized amount of isopropyl alcohol or adhesive remover directly onto your microfiber cloth. Press the wet cloth firmly against the remaining sticky residue on the windshield and hold it there for 30 to 45 seconds to let the chemical break down the adhesive bonds. Once saturated, rub the area in small circular motions until all tacky residue vanishes from the glass surface.
Pro Tip: If using Goo Gone, make sure to wash the area thoroughly afterwards with window cleaner, as it leaves an oily film that can impair your vision at night.
Step 6: Clean and Polish the Windshield
What you need: Automotive glass cleaner and a fresh, dry microfiber towel.
Instructions: Spray a generous amount of glass cleaner over the exact spot where the beacon was mounted, as well as the surrounding area. Wipe the glass clean using vertical strokes, then buff it dry using a separate clean, dry section of the microfiber cloth to eliminate streaks. Inspect the inside and outside of the windshield from the driver’s seat to ensure absolute clarity and zero remaining smudges or chemical residues.
Pro Tip: Buffing in circular motions often leaves microscopic streaks; always finish your window cleaning with straight up-and-down or side-to-side strokes for a streak-free finish.
✅ Final Checklist
- The State Farm beacon is completely detached without structural damage to its casing.
- All chunks of foam mounting tape have been successfully peeled off the windshield.
- No sticky adhesive residue or chemical film remains on the glass.
- The windshield is crystal clear, polished, and safe for unobstructed driving visibility.
- The removed device is ready for recycling or mailing back to State Farm per policy requirements.
Important Notes:
- Never use metal scrapers, razor blades, or abrasive scouring pads on glass with aftermarket window tint or integrated defroster lines.
- If your windshield has an existing chip or crack near the beacon mount, consult a professional auto glass technician to avoid shattering the glass during heat application.
- Estimated time for completion is 10 to 15 minutes, with a total cost of $0 to $5 if you already own basic household cleaning supplies.
What Causes Stubborn Windshield Adhesive Residue
The Breakdown of Foam vs. Glue Layers
When you successfully pop the State Farm beacon housing off the glass, you rarely escape with a clean windshield. The mounting system consists of a plastic base, a layer of acrylic foam, and a double-sided pressure-sensitive adhesive. As you slide a tool behind the device, the foam layer often shears right down the middle.
- Half of the foam stays bonded to the plastic base, while the other half remains glued to your windshield.
- Leaving the vehicle parked in the sun for months bakes the adhesive, causing it to cure harder and grip the glass more aggressively.
- Aggressive scraping with metal razor blades can slice into the soft polyvinyl butyral (PVB) interlayer of modern windshields.
Chemical Composition of Insurance Beacon Residue
The sticky residue left behind is formulated to resist moisture, window washer fluid, and UV radiation. Standard glass cleaner will simply bead up on top of it without breaking down the polymer chains. You need a solvent that can dissolve the synthetic rubber or acrylic base of the glue without damaging your dashboard materials or interior trim pieces if it drips downward.
- Petroleum-based solvents dissolve the adhesive bonds by swelling the polymer matrix.
- Citrus-based cleaners provide a safer alternative, though they require more dwell time to penetrate tough 2026-grade tapes.
- Isopropyl alcohol (91% or higher) works well to weaken the final microscopic residue layer after the bulk foam is removed.
Step-by-Step Guide to Safely Removing Your Beacon
Safely detaching your State Farm telematics device requires patience and the right technique to protect your car glass. Automotive safety engineers emphasize that applying uneven pressure can crack tempered or laminated windshields. Follow this structured process for a damage-free removal in 2026.
Preparation and Warming
- Park your vehicle in direct sunlight for 30 to 45 minutes to naturally soften the acrylic adhesive pad.
- Alternatively, use a hair dryer on a medium setting held 6 inches away from the exterior glass for 3 minutes.
- Gather your materials: a spool of high-strength dental floss, plastic trim removal tools, and an adhesive remover such as 3M Adhesive Eraser or Goo Gone Automotive.
Detaching and Cleaning
- Slide the strand of dental floss behind the top edge of the device mount.
- Use a gentle sawing motion from side to side while pulling the floss downward through the foam tape.
- Pry the plastic housing away by hand once the foam yields, avoiding metal screwdrivers that scratch glass.
- Apply a citrus-based adhesive remover to the remaining foam residue and let it sit for 60 seconds.
- Scrape away softened adhesive using a plastic razor blade at a 45-degree angle.
- Wipe the windshield clean with automotive glass cleaner and a microfiber towel.
What If It Still Doesn’t Work?
Stubborn adhesive residue or a device that refuses to budge can complicate the removal process. If standard household solutions fail, follow these advanced steps to resolve the issue without damaging your vehicle:
- Switch to a dedicated industrial solvent like isopropyl alcohol (91% concentration) or specialized automotive tar and glue remover.
- Use a mechanical plastic razor blade kit specifically designed for automotive glass, ensuring you maintain a shallow angle to prevent gouging.
- Contact an auto glass repair specialist if the mounting bracket is fused directly to tinted or heated windshield elements. Professional removal typically costs between $20 and $50.
- Notify State Farm customer support if the device breaks during extraction so they can issue a replacement unit for your drive-tracking program without penalty.
Conclusion
Removing a State Farm beacon from your windshield requires careful preparation, gentle thermal softening, and the right chemical solvents to protect your glass. By utilizing dental floss and citrus-based removers, drivers can safely eliminate stubborn adhesive without scratching modern vehicle safety sensors. According to verified research and expert sources from automotive glass associations, taking your time prevents costly windshield replacements that far outweigh any insurance discount. Take your next step today by gathering your supplies and completing the removal process in a shaded, well-ventilated garage.
❓ Frequently Asked Questions
Will removing the State Farm beacon cancel my insurance discount?
Removing the beacon without a replacement or switching to the mobile app version may affect your Drive Safe & Save discount. Always verify your policy status with State Farm before tossing the device.
Can I reuse the adhesive pad if I need to move the beacon?
No, the factory foam adhesive is a one-time-use product that loses its holding strength once peeled off. You will need to apply a fresh piece of automotive-grade double-sided tape if repositioning.
What is the safest tool to scrape off dried glue?
A plastic razor blade or credit card is safest for windshields. Avoid standard metal utility blades unless held at a very shallow angle to prevent deep scratches.
Does cold weather make beacon removal harder?
Yes, cold temperatures make the adhesive brittle and stubborn, while also increasing the risk of windshield cracking. Warm up the car interior and use a hairdryer to counteract the cold.
How long does the entire removal process take?
The physical removal and cleanup typically take between 10 to 15 minutes depending on how stubborn the adhesive is.
What should I do if my windshield cracks during removal?
Stop pulling immediately. If a crack forms, you will need to contact an auto glass repair specialist to inspect or replace the damaged windshield.