How Much Does It Cost to Get Brake Lights Fixed 2026 Guide
Fixing a broken brake light usually costs between $10 and $150 depending on the underlying issue. A simple DIY bulb replacement costs under $20, while professional repairs involving wiring, fuses, or the brake light switch generally range from $50 to $150 including mechanic labor.
Getting your brake lights fixed typically costs between $10 and $300, depending entirely on the root cause of the failure. A simple burnt-out bulb might only cost a few dollars if you do it yourself, while a complete wiring harness repair or a shattered LED housing assembly at a professional shop in 2026 can push toward the higher end of that spectrum.
Ignoring a broken brake light is an easy way to pull a police officer’s attention and invite a costly ticket. More importantly, it creates a dangerous blind spot for drivers behind you, dramatically increasing your risk of a rear-end collision. Knowing what to expect financially helps you make the right call between a quick DIY fix and a trip to the mechanic.
Key Takeaways
- Simple bulb replacements cost under $20 if done at home.
- Mechanic labor typically adds $50 to $100 for professional diagnostics.
- Faulty fuses cost less than $5 to replace.
- Brake light switches usually run between $50 and $150 total.
- Complete tail light assembly replacements can exceed $300.
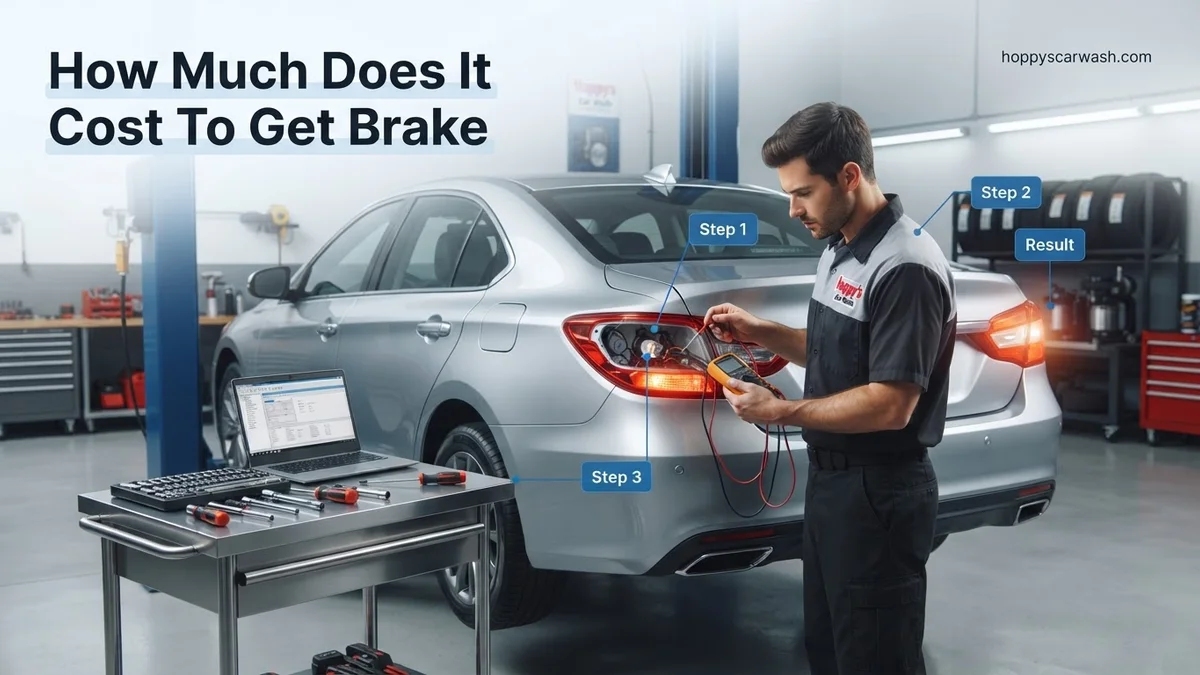
What Causes Brake Light Failure and How to Diagnose the Issue
Before you can figure out your repair costs, you need to know why your brake lights stopped working. Brake light systems rely on a few distinct components. If any single part fails, the whole system goes dark.
Common Points of Failure
- Bulb Burnout: The most frequent and simplest issue. The filament inside the incandescent bulb simply wears out over time.
- Blown Fuse: A power surge or short circuit can blow the fuse, cutting electricity to all brake lights simultaneously.
- Brake Light Switch: Located near the brake pedal, this switch tells the lights to turn on when you step down. If it fails, no lights illuminate.
- Wiring and Sockets: Corrosion, moisture, or frayed wires can disrupt the electrical connection between the car and the light socket.
Quick Diagnostic Steps
You can easily pinpoint the issue at home before visiting a professional. Ask a friend to step on the brake pedal while you inspect the rear of the car. If only one side is dark, you are likely dealing with a bad bulb or a localized socket issue. If both sides and your high-mount center light are out, the problem is likely a blown fuse or a faulty brake pedal switch.
Brake Light Repair Costs: What Causes It and How to Fix It
Dealing with broken brake lights is not just frustrating; it is a major safety hazard that can quickly result in a costly traffic ticket. Understanding the true cost of getting your brake lights fixed requires breaking down the problem into manageable pieces, from diagnosing the root cause to evaluating DIY versus professional repair costs. This comprehensive walkthrough guides you through estimating expenses, identifying the exact issue, and budgeting appropriately to get your vehicle safely back on the road without breaking the bank.
Step 1: Identify the Exact Symptom and Location
What you need: A smartphone camera, a friend or family member to press the brake pedal, and a safe parking spot.
Instructions: Before you can estimate costs, you must pinpoint which lights are failing. Have a helper press the brake pedal while you walk around the rear of the vehicle. Check the left brake light, the right brake light, and the center high-mounted stop light (often called the third brake light). Note whether only one bulb is out, both side bulbs are dead, or all three are unresponsive. If only one side is out, the problem is likely localized to that specific bulb or socket. If all lights fail simultaneously, the issue points toward a shared component like a fuse or a brake pedal switch.
Pro Tip: Take a photo with your phone while your helper presses the pedal so you can review the exact behavior of the lights without rushing.
Step 2: Inspect and Replace Blown Bulbs
What you need: A screwdriver (if required to remove the light housing), replacement bulbs (typically types 3157 or 1157, costing $5 to $15 per pair), and clean work gloves.
Instructions: Open your trunk or tailgate and locate the access panel behind the taillight assembly. Remove any plastic retaining clips or screws holding the housing in place. Gently twist the bulb socket counterclockwise to pull it out from the housing. Examine the bulb; if the internal filament is broken or the glass has a dark, cloudy discoloration, it is blown. Pull the old bulb straight out of the socket and push the new one in firmly. Before reassembling everything, test the new bulb by having your helper press the brake pedal.
Pro Tip: Never touch the glass of a new halogen bulb with your bare fingers. The natural oils from your skin create hot spots on the glass, causing premature bulb failure.
Step 3: Check and Test the Brake Light Fuse
What you need: Your vehicle owner’s manual, a flashlight, and a fuse puller tool or needle-nose pliers (replacement fuses cost less than $2 for a pack).
Instructions: If multiple brake lights are out at the same time, a blown fuse is the most likely and cheapest culprit. Locate the interior fuse box (usually under the dashboard or steering column) or the under-hood fuse box using your owner’s manual. Find the specific fuse associated with the stop lamps or brake lights. Use the fuse puller to carefully extract the fuse. Hold it up to the light and look at the thin metal strip inside the plastic casing. If that strip is broken or melted, the fuse has blown. Replace it with a new fuse matching the exact same amperage rating (e.g., 10A or 15A).
Pro Tip: If you replace a fuse and it blows again immediately, do not keep putting new ones in. This indicates a short circuit in the wiring that requires professional diagnosis.
Step 4: Test and Adjust the Brake Light Switch
What you need: A flashlight, a digital multimeter (optional), and basic hand tools if replacement is needed (switches cost $15 to $40).
Instructions: Crawl into the driver’s footwell and look up near the top of the brake pedal arm. You will see a small electrical switch with wires attached to it—this is the brake light switch, which activates the lights whenever the pedal is depressed. Verify that the switch is securely mounted and that the brake pedal arm makes physical contact with the switch plunger when released. If the switch is stuck, misaligned, or internally failed, your brake lights will stay permanently on or never turn on at all. Disconnect the wiring harness, unbolt or twist out the old switch, and install the new unit.
Pro Tip: Adjusting a misaligned switch can sometimes save you the cost of buying a replacement part entirely.
Step 5: Inspect Wiring Harnesses and Sockets
What you need: Contact cleaner spray, a wire brush, and electrical tape (total cost around $10 if supplies are needed).
Instructions: If bulbs, fuses, and switches are all functioning properly, examine the plastic bulb sockets and the visible wiring harness leading to the taillight assembly. Look for signs of green or white corrosion inside the socket terminals, which prevents electrical current from reaching the bulb. Also check for melted plastic, frayed wires, or loose ground connections. Spray electronic contact cleaner into the sockets, scrub away any corrosion with a small brush, and ensure the wiring is securely routed away from moving parts and sharp metal edges.
Step 6: Evaluate Professional Mechanic Costs
What you need: A smartphone or phone book to call local repair shops, and a budget of $75 to $250 depending on the complexity.
Instructions: If you have diagnosed the issue and determined it is too complex—such as tracing an intermittent wiring short hidden behind interior panels—it is time to visit a professional mechanic or auto electrician. Request a diagnostic fee estimate before dropping off your car. Simple bulb or switch replacements at a shop typically cost between $75 and $150 including labor, while complex electrical troubleshooting can range from $150 to $300. Always ask for an itemized quote detailing parts versus labor costs before authorizing any work.
Pro Tip: Dealership service centers generally charge higher hourly labor rates ($150-$250/hr) compared to independent repair shops ($90-$140/hr) for electrical diagnostics.
✅ Final Checklist
- Verify all three brake lights (left, right, and center) illuminate brightly when the brake pedal is pressed.
- Ensure brake lights turn off completely when the pedal is released to prevent draining the battery.
- Check that all taillight housing covers, screws, and weather seals are securely reinstalled to prevent water leaks.
- Confirm no new dashboard warning lights or electrical issues have been triggered during the repair process.
Important Notes:
- Always disconnect the vehicle’s negative battery terminal before performing any complex electrical wiring repairs to prevent accidental short circuits or shocks.
- Seek professional help immediately if you smell burning plastic near the fuse box or taillights, as this indicates a dangerous electrical short.
- Estimated DIY repair cost ranges from $5 for a single bulb up to $40 for a switch; professional repairs range from $75 to $300, with a total timeframe of 15 minutes to 2 hours.
How Much Do Different Brake Light Repairs Cost Parts vs Labor
Repair costs vary wildly depending on whether you are replacing a ten-minute bulb or tracking down an elusive electrical short. Labor rates at professional shops in 2026 generally average between $100 and $150 per hour, which heavily impacts smaller fixes.
Cost Breakdown by Repair Type
- Bulb Replacement: Parts cost $5 to $20 for a twin pack. If you pay a mechanic, expect a total bill of $40 to $70 to cover the minimum labor charge.
- Fuse Replacement: A pack of automotive fuses costs less than $10. Doing this yourself takes two minutes. A shop might charge a minimum diagnostic fee of $50 to $100.
- Brake Light Switch: The switch part costs $15 to $50. Professional replacement usually totals $90 to $180 including labor.
- Complete Light Assembly: Modern sealed LED units can cost $150 to $400 for the part alone, with total professional replacement ranging from $200 to $500+.
DIY Versus Professional Service
Choosing the do-it-yourself route for basic bulb or fuse changes saves you standard shop labor fees. You only pay for the raw materials. However, if you have complex modern luxury vehicles with intricate wiring harnesses or computer-integrated LED clusters, paying a professional ensures the job is done safely without damaging your vehicle’s sensitive electrical network.
Step-by-Step Guide to Fixing Brake Lights DIY Style
Fixing your brake lights independently can save you significant labor costs in 2026. Automotive repair data indicates that basic light assembly maintenance requires minimal technical background.
Replacing a Standard Bulb
If your diagnostic check points to a simple burned-out bulb, you can complete the replacement in under twenty minutes with basic tools.
- Disconnect the negative battery terminal to prevent electrical shorts during the repair process.
- Open the trunk or hatch and remove any interior trim panels or access covers blocking the rear of the light housing.
- Unplug the electrical wiring harness connector from the back of the bulb socket.
- Twist the bulb socket counter-clockwise to unlock it from the assembly, then pull the old bulb straight out.
- Insert the new replacement bulb, twist the socket back into the housing, reconnect the harness, and test the system before reassembling the interior trim.
Replacing the Brake Light Switch
When all rear bulbs fail simultaneously, the brake light switch located near the top of the brake pedal arm is usually the culprit.
- Locate the switch underneath the dashboard directly above the brake pedal arm.
- Disconnect the wiring harness plug from the rear of the switch housing.
- Rotate the switch body counter-clockwise or depress the locking tabs to release it from its mounting bracket.
- Install the new switch by pushing it firmly into the bracket and twisting it until it locks into position.
- Plug the wiring harness back into the switch and verify proper operation by pressing the brake pedal.
What If It Still Doesn’t Work?
If you have replaced both bulbs and the brake light switch, but the lights still refuse to illuminate, a deeper electrical issue is present. Automotive electrical diagnostics require systematic troubleshooting to isolate the root cause.
- Inspect the cabin and under-hood fuse boxes for a blown fuse using a continuity tester or visual inspection, replacing any damaged fuse with one matching the exact amperage rating.
- Examine the visible wiring harness sections near the trunk hinges and rear bumper for signs of corrosion, fraying, or rodent damage.
- Test for voltage at the bulb socket using a digital multimeter while an assistant depresses the brake pedal to confirm whether electrical current is reaching the rear assembly.
- If power reaches the socket but the new bulb fails to light, clean the metal contact points inside the socket with fine-grit sandpaper to remove insulating corrosion.
- Seek professional diagnostic assistance from a certified mechanic if the fault lies within the body control module (BCM) or hidden wiring harnesses, with professional diagnostic fees typically ranging from $100 to $200.
Conclusion
Addressing malfunctioning brake lights quickly prevents safety hazards and avoids potential law enforcement citations. Whether you choose a simple DIY bulb replacement or require professional electrical diagnosis, fixing the issue typically costs between $10 and $250. According to verified research and expert automotive safety sources, maintaining fully functional exterior lighting remains one of the most critical aspects of preventative vehicle ownership. Schedule your repair or gather your replacement components today to ensure your vehicle stays safe and road-legal in 2026.
❓ Frequently Asked Questions
How much does a mechanic charge just to look at a brake light?
Most auto repair shops charge a standard diagnostic fee ranging from $50 to $150, though some waive this if you authorize them to perform the repair.
How long does it take a shop to fix a brake light?
A basic bulb replacement takes about 10 to 15 minutes. More complex electrical troubleshooting or switch replacements can take anywhere from 30 minutes to an hour.
What is the average cost of a brake light switch replacement?
The switch part itself usually costs $15 to $50, and professional labor adds another $50 to $100, bringing the total to $65-$150.
Can a blown fuse cause only one brake light to fail?
Usually, a blown fuse causes all brake lights to fail at once. If only one side is out, the issue is almost always a burned-out bulb or a bad socket connection.
Are LED brake lights more expensive to fix?
Yes. While traditional bulbs cost a few dollars, factory LED brake lights often require replacing the entire light assembly, which can cost between $150 and $400.
Do auto parts stores change brake light bulbs for free?
Many national auto parts chains will install a simple exterior bulb for free if you purchase the replacement bulb at their store, though this depends on the vehicle’s design.