Does Changing Transmission Fluid Cause Problems? 2026
Changing transmission fluid does not inherently ruin a healthy transmission, but it can expose pre-existing internal wear that was previously masked by thick, degraded fluid. High-mileage transmissions with neglected maintenance face the highest risk of slipping after a fluid swap.
The short answer is no, changing your transmission fluid does not inherently cause transmission failure in a healthy system. However, the widespread myth persists because many vehicle owners only service their transmissions after crossing the 150,000-mile mark with zero previous maintenance, leading to immediate failure shortly after a fresh fluid change.
When you replace old fluid in a severely neglected transmission, you are not breaking the mechanism. Instead, you are revealing internal component wear, chemical degradation, and friction material loss that the heavy, contaminated fluid was previously masking to keep your car moving forward in 2026.
Key Takeaways
- Fresh fluid exposes internal wear rather than causing new mechanical damage.
- High-mileage neglected transmissions risk slipping due to lost suspended friction material.
- Always use the exact OEM-specified fluid type to prevent severe hydraulic pressure issues.
- Prioritize a gentle drain-and-fill over high-pressure flushes on older vehicles.
- Check complete vehicle service history before altering long-neglected transmission fluids.
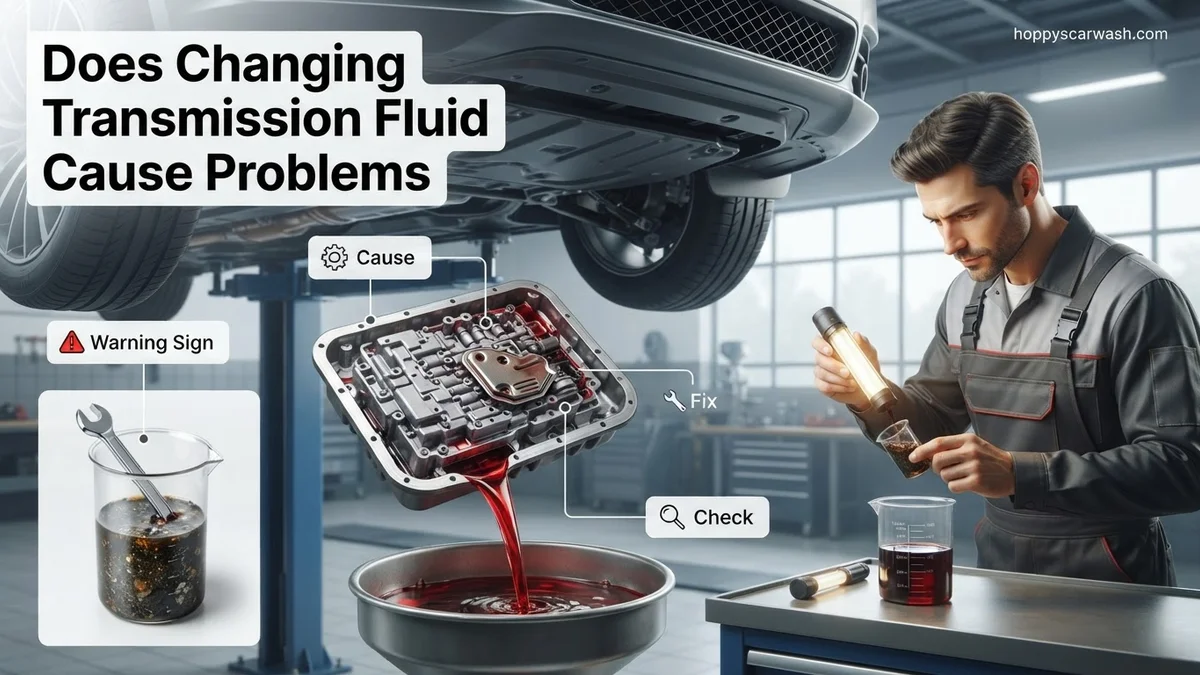
What Causes Transmission Problems After Changing Fluid
To understand why a routine maintenance procedure sometimes leads to catastrophic slipping or total failure, you need to look at the physics inside your transmission housing. Fresh fluid has high detergent properties and lower viscosity than burnt, friction-laden fluid, which drastically changes the hydraulic behavior of the entire system.
The Friction Material and Clutch Pack Myth
Over hundreds of thousands of miles of driving, the microscopic friction material from your clutch discs wears away and suspends itself within the old transmission fluid.
- Old, degraded fluid acts almost like a thick slurry, providing extra grip that compensates for heavily worn clutch discs.
- When you flush out this debris and add clean, high-detergent fluid, that supplemental friction disappears overnight.
- If your clutch packs are already worn down to bare metal, fresh fluid will cause immediate, undeniable slipping.
- The fluid did not cause the wear; it simply stopped hiding the fact that your transmission was already near the end of its life.
Hydraulic Pressure and Valve Body Shifts
Another major trigger for post-service issues involves the intricate valve body and microscopic passages that control fluid pressure.
- Sludge and varnish naturally build up inside these narrow channels in high-mileage vehicles that have missed fluid intervals.
- Fresh transmission fluid contains powerful cleaning agents designed to strip away this varnish.
- If a large chunk of loosened debris breaks free and plugs a tiny solenoid or shift valve, it disrupts hydraulic pressure.
- This sudden pressure drop leads to harsh shifting, delayed engagement, or complete gear loss that mechanics often mistakenly blame entirely on the new fluid.
Transmission Fluid Change Myths: What Causes Problems and How to Avoid Them
Changing your transmission fluid is a vital maintenance task, yet many vehicle owners fear it will destroy their transmission. This comprehensive manual breaks down the mechanical realities behind why fluid changes sometimes lead to failure, guiding you through the exact diagnostic, preparation, and execution steps required to service your transmission safely without causing catastrophic slippage or component damage.
Step 1: Evaluate Your Current Transmission Health
What you need: Clean white paper towel, flashlight, and your vehicle’s owner manual.
Instructions: Before touching a single bolt, you must diagnose the current state of your transmission fluid. Pull the transmission dipstick, wipe it onto a white paper towel, and examine both the color and the smell. Healthy fluid is translucent pink or cherry red. Dark brown fluid indicates old age, while jet-black fluid combined with a pungent, burnt odor means your clutches are already slipping and burning. If you see metallic flakes or heavy dark sludge, stop immediately; performing a routine fluid swap on an already failing, high-mileage transmission will often cause total failure because the fresh, high-detergent fluid strips away the friction material holding worn clutch packs together.
Pro Tip: Never change the fluid on a high-mileage vehicle with zero record of previous maintenance if it is already exhibiting delayed shifting or slipping.
Step 2: Gather the Correct Fluid and Replacement Components
What you need: Vehicle-specific transmission fluid (check owner manual for exact specification), new pan gasket, fresh filter, and torque wrench.
Instructions: Using the wrong transmission fluid is the single fastest way to destroy a transmission. Do not assume universal fluid works for your specific make and model. Check your owner’s manual to determine whether your vehicle requires Dexron, Mercon, ATF+4, or a specific OEM synthetic formulation. Purchase slightly more fluid than the total capacity to allow for flushing and spill adjustments. Additionally, procure a high-quality replacement pan gasket (cork, rubber, or reusable steel-core) and a fresh internal fluid filter. Having these exact replacement components ready prevents leaks and ensures optimal hydraulic pressure.
Pro Tip: Always buy one extra quart of transmission fluid than the specified dry capacity to account for any accidental spills during the refill process.
Step 3: Safely Elevate and Secure the Vehicle
What you need: Hydraulic floor jack, heavy-duty jack stands, wheel chocks, and safety glasses.
Instructions: Transmission service requires you to crawl underneath the vehicle while it is elevated. Park on a completely flat, level concrete surface. Engage the emergency parking brake firmly and place heavy wheel chocks behind and in front of the rear tires. Position your hydraulic floor jack under the manufacturer-approved front lift points, raise the vehicle securely, and lower it down onto heavy-duty jack stands rated for your vehicle weight. Give the vehicle a firm push from the side to verify absolute stability before sliding underneath with your tools and drain pan.
Pro Tip: Never rely on a hydraulic jack alone; always support the vehicle with sturdy steel jack stands and leave the floor jack in place as an extra safety backup.
Step 4: Drain the Old Fluid Correctly
What you need: Large capacity drain pan, socket set, latex gloves, and shop rags.
Instructions: Locate the transmission oil pan underneath the vehicle. Position your large drain pan directly underneath the drain plug or pan perimeter. If your transmission has a drain plug, loosen it slowly with your socket wrench and let the fluid stream out into the pan. If there is no drain plug, you will need to loosen the bolts around the perimeter of the pan, starting at one corner, and gently pry the pan loose to let the fluid spill out in a controlled manner. Allow at least 15 to 30 minutes for all the old, spent fluid to completely drain out of the valve body and internal passages.
Pro Tip: Loosen the transmission pan bolts on one side first while leaving a few bolts loosely threaded on the opposite side to tilt the pan and prevent a massive fluid avalanche.
Step 5: Inspect and Clean the Pan and Magnets
What you need: Brake parts cleaner, lint-free shop rags, and a flathead screwdriver.
Instructions: Once the pan is removed, look inside at the bottom. Manufacturers place flat ceramic or rare-earth magnets inside the pan to capture microscopic metallic wear debris circulating through the hydraulic system. Remove these magnets, wipe them clean, and inspect the trapped material. A fine, velvety metallic paste is normal wear and tear. However, if you find hard metal shavings, gear teeth fragments, or clutch material chunks, your transmission has internal mechanical damage. Thoroughly spray the entire inside and outside of the transmission pan with brake cleaner and wipe it until it is pristine and dry.
Pro Tip: Do not use standard paper towels that leave lint behind inside the pan; always use lint-free shop rags to prevent clogging your fresh transmission filter.
Step 6: Replace the Filter and Clean the Mating Surface
What you need: New filter, gasket scraper, or plastic razor blade.
Instructions: Unbolt the old transmission filter, which is typically held in place by two or three small bolts. Pay close attention to the rubber O-ring seal on the neck of the old filter; ensure it comes out with the filter, as leaving the old seal stuck inside the transmission housing will prevent the new filter from sealing properly. Push the new filter firmly into place and torque its mounting screws to factory specifications. Next, use a plastic razor blade or gasket scraper to meticulously clean the old gasket material off the transmission housing mating surface. Any old gasket residue will cause persistent leaks.
Pro Tip: Dip your clean finger into fresh transmission fluid and lightly lubricate the rubber O-ring on the new filter neck before pushing it into the transmission port.
Step 7: Reinstall the Pan and Torque to Specification
What you need: Torque wrench, new pan gasket, and correct sockets.
Instructions: Position your new gasket onto the clean transmission pan, aligning all bolt holes accurately. Raise the pan up against the bottom of the transmission housing and hand-thread all the mounting bolts to keep it secure. Using a calibrated torque wrench, tighten the bolts in a crisscross, star pattern to ensure even clamping pressure across the gasket surface. Over-tightening transmission pan bolts will crush the gasket, warp the metal pan lips, and cause severe leaks. Consult your repair manual for the exact foot-pound or inch-pound torque specification, which is usually quite low, ranging from 10 to 13 foot-pounds.
Pro Tip: Never use power impact tools or standard ratchets without a torque wrench when tightening transmission pan bolts, as it is exceptionally easy to strip the aluminum threads.
Step 8: Refill with Fresh Fluid and Check Levels
What you need: Long-neck transmission funnel and fresh fluid.
Instructions: Move to the engine bay, remove the transmission dipstick, and insert your clean, long-neck funnel into the fill tube. Pour in the exact amount of fresh, manufacturer-specified transmission fluid that you drained out, plus a small amount to account for filter replacement. Start the engine and let it idle in Park with the parking brake fully engaged. While the engine is running, cycle the gear selector slowly through every gear (P-R-N-D and back), pausing for five seconds at each position to circulate the new fluid through the torque converter and valve body. Finally, pull the dipstick while the engine idles at operating temperature to confirm the fluid level sits squarely in the hot zone.
Pro Tip: Always check your transmission fluid level with the engine running and the vehicle on level ground unless your specific manufacturer manual states otherwise.
✅ Final Checklist
- Fluid color verified as bright pink/red and correct fluid type utilized
- Transmission pan magnets cleaned and inspected for abnormal metal debris
- Old filter O-ring completely removed and new filter securely installed
- Pan bolts torqued in a crisscross pattern to exact manufacturer specifications
- Transmission fluid level verified on the dipstick with the engine running at operating temperature
Important Notes:
- Always wear safety glasses and gloves, as transmission fluid is a petroleum product and hot fluid can cause severe skin burns.
- Seek professional mechanic assistance immediately if you notice metal chunks in the pan, persistent slipping after a fluid change, or unresolvable fluid leaks.
- Estimated time for completion is 2 to 4 hours, with a total cost ranging from $60 to $150 for DIY fluids and filters.
How to Fix and Prevent Post-Fluid Change Slippage
If you are currently facing transmission slippage or erratic shifting right after a fluid service, you need to diagnose the root cause immediately before calling a tow truck. Prevention is entirely about understanding your vehicle’s maintenance history and using precise engineering standards.
Verifying Fluid Level and Specification Errors
Human error during the service process remains the number one culprit behind sudden transmission failure in 2026 modern vehicles, completely independent of fluid wear.
- Using a generic multi-vehicle fluid instead of the exact OEM-specified specification can destroy modern multi-speed clutch friction properties in days.
- An incorrect fluid level—either underfilled or severely overfilled—creates foaming, pump cavitation, and catastrophic hydraulic pressure loss.
- Always double-check your dipstick or level check plug while the transmission is at proper operating temperature.
- If wrong fluid was added, a complete flush and refill with the certified manufacturer fluid is your only path to recovery.
Managing High-Mileage Transmission Maintenance
If you drive an older vehicle with an unknown service history, you must approach fluid changes strategically to avoid shocking the system.
- If your transmission fluid is dark black, smells heavily burnt, and the vehicle has over 150,000 miles with no record of changes, a complete high-pressure flush is extremely risky.
- Instead of a flush, opt for a simple drain-and-fill procedure, which replaces only a third of the fluid and avoids shocking the clutch packs with 100 percent fresh detergents.
- If the transmission already slips before the service, a fluid change will not fix it—you are already looking at a rebuild or replacement.
- Regular, moderate fluid changes every 45,000 to 60,000 miles from day one ensure you never encounter the dreaded post-service failure myth.
What If It Still Doesn’t Work After a Fluid Change
If you changed your transmission fluid and the vehicle still hesitates, slips, or hesitates to engage gears, the fluid swap was likely a preventative measure for a component that was already heavily worn. Advanced internal mechanical failure cannot be reversed by fresh chemicals. Drivers must systematically evaluate the remaining options before committing to major financial investments.
Advanced Diagnostic and Repair Steps
- Verify Fluid Level and Condition: Recheck the transmission dipstick while the engine runs at operating temperature. An incorrect fluid level—either underfilled or overfilled—frequently mimics severe internal slippage.
- Scan for Diagnostic Trouble Codes: Connect an advanced OBD-II scanner capable of reading transmission control module (TCM) codes. Specific manufacturer codes pinpoint failing solenoids, pressure switches, or internal speed sensors rather than general fluid issues.
- Inspect Electronic Control Components: Test external wiring harnesses and valve body solenoids for continuity and resistance. A faulty electronic component can restrict hydraulic pressure just as effectively as a clogged fluid passage.
- Consult a Certified Drivetrain Specialist: Take the vehicle to a dedicated transmission shop for a professional line-pressure test. Mechanical failures like burned friction clutches or stripped planetary gears require physical teardown or complete unit replacement.
When professional intervention becomes necessary, costs vary wildly depending on the root cause and vehicle architecture. Minor repairs such as replacing external solenoids or valve body components generally range from $350 to $900 including labor. Conversely, a complete transmission rebuild or factory remanufactured unit replacement typically spans $3,500 to $6,500 for standard passenger vehicles in 2026, scaling higher for heavy-duty trucks and modern luxury imports.
Conclusion
Changing transmission fluid rarely causes sudden mechanical failure on healthy systems, but it can unmask pre-existing wear by altering hydraulic pressures within a neglected unit. Timely maintenance aligned with factory mileage thresholds remains the best defense against catastrophic transmission breakdown. According to verified research from automotive service associations and powertrain engineers, proactive fluid exchanges double the operational lifespan of modern automatic transmissions. The next actionable step is to check your vehicle owner manual today and verify your exact transmission service interval to prevent premature component failure.
❓ Frequently Asked Questions
Does changing transmission fluid cause problems in high-mileage vehicles?
It can trigger issues if the transmission is already worn out. Old, degraded fluid contains friction material from wearing clutches; when fresh fluid is introduced, that friction is lost, resulting in slipping gears.
Is the slipping clutch after a fluid change a myth or a fact?
It is a fact based on mechanics, but the fluid change itself is not the root cause. The transmission was already failing internally; the fresh fluid simply removed the thick barrier masking the severe wear.
Should I change my transmission fluid if it has never been serviced?
If your vehicle has extreme mileage with zero previous fluid changes, many mechanics recommend leaving it alone or performing a cautious drain-and-fill rather than a full pressure flush to avoid shocking the system.
What are the signs that a fluid change went wrong?
Immediate signs include delayed engagement, harsh shifting, slipping between gears, whining noises from the pump, or a burning smell caused by incorrect fluid levels or types.
Can a transmission recover if it starts slipping after a fluid change?
Sometimes a minor adjustment like correcting an improper fluid level can resolve the issue. However, if clutch packs are genuinely worn down, mechanical repair or replacement is usually inevitable.
How often should transmission fluid actually be changed?
Under normal driving conditions, most manufacturers recommend changing transmission fluid every 30,000 to 60,000 miles, though you should always consult your specific owner’s manual.