How Thick Should Brake Pads Be Before Replacing 2026 Guide
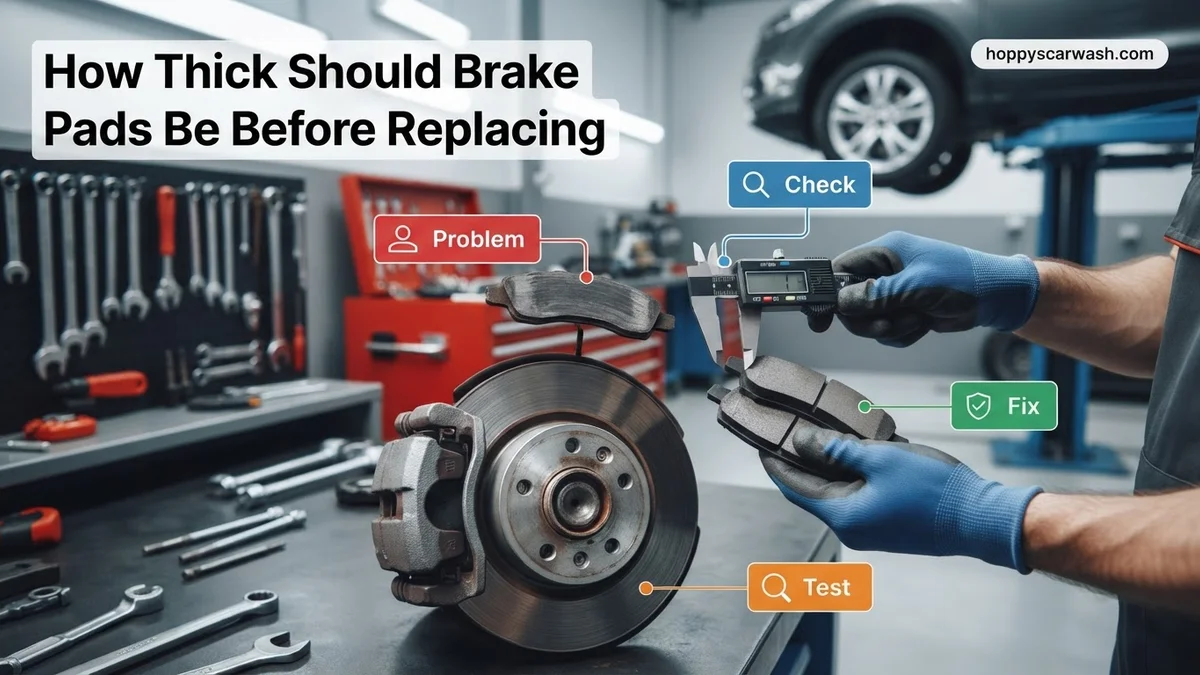
Brake pads should be replaced immediately when they wear down to 2mm to 3mm (roughly 1/8 of an inch) of remaining friction material. Brand new pads typically measure between 10mm and 12mm, meaning failure to replace thin pads risks rotor damage and braking failure.
Brand new brake pads typically measure between 10 millimeters and 12 millimeters in thickness. You must replace your brake pads immediately once they wear down to a dangerous minimum thickness of 2 millimeters to 3 millimeters, or roughly 25 percent of their original material.
Waiting past this critical 2026 maintenance threshold risks metal-on-metal contact, which destroys your rotors, compromises stopping power, and triggers expensive repair bills. Knowing exact measurement standards keeps your vehicle safe on the road.
Key Takeaways
- Replace brake pads immediately when friction material reaches 2mm to 3mm in thickness.
- Brand new brake pads measure between 10mm and 12mm thick.
- Inspect pads visually through wheel spokes or by removing the wheel entirely.
- Listen for high-pitched squealing or harsh grinding as primary warning signs.
- Driving on dangerously thin pads can warp rotors and double your repair costs.
What Causes Worn Brake Pads and How to Diagnose Thin Thickness
Common Causes of Rapid Pad Wear
Brake pads naturally wear down over time due to friction against the rotor every time you slow down. However, several factors accelerate this wear:
- Heavy stop-and-go city commuting versus smooth highway driving
- Hauling heavy loads or towing trailers with your vehicle
- Aggressive driving habits like hard, late braking
- A stuck brake caliper causing the pad to drag constantly
Identifying Thin Pads by Sight and Sound
Modern vehicles give you clear warning signs when your brake pads approach that critical 3mm minimum threshold. Listening and looking closely saves you from unexpected brake failure.
- The Built-In Wear Indicator: A small metal tab makes an annoying squealing sound against the rotor when pads drop below 3mm.
- The Grinding Noise: A harsh grinding sound means your pads are completely gone, and steel backing plates are destroying your rotors.
- Visual Inspection: Peering through your wheel spokes reveals the friction material pressed against the metal backing plate.
Master Brake Pad Thickness in 8 Simple Steps
Knowing exactly when to change your brake pads is essential for maintaining vehicle safety and avoiding costly rotor damage. This comprehensive guide walks you through the precise measurements, visual cues, and hands-on inspection techniques required to determine if your brake pads have reached the end of their lifespan, ensuring your stopping power remains uncompromised.
Step 1: Understand Factory Brake Pad Specifications
What you need: Your vehicle owner’s manual or a smartphone to search your specific make, model, and year.
Instructions: Before touching your car, you must know the baseline measurements. Brand new brake pads typically measure between 10mm and 12mm in thickness (roughly 3/8 to 1/2 inch). Manufacturers generally consider pads worn down to 3mm (about 1/8 of an inch) as the absolute critical threshold requiring immediate replacement. Some heavy-duty trucks or European performance cars might have slightly different specifications, so checking your manufacturer guidelines ensures you never guess when safety is on the line.
Pro Tip: Never rely on a single generic measurement for all vehicles, as performance cars often require thicker replacement margins than compact commuter vehicles.
Step 2: Gather Your Inspection Tools
What you need: A flashlight or headlamp, a reliable millimeter ruler or brake pad gauge, a hydraulic floor jack, jack stands, and a lug wrench.
Instructions: Proper inspection requires more than just a quick glance through your wheel spokes. Gather your tools in a clean workspace. A dedicated brake pad gauge—which costs less than ten dollars at any auto parts store—features color-coded metal blades (green for safe, yellow for caution, red for replacement) that let you measure pad thickness accurately without fully disassembling your wheel assembly, though removing the wheel gives you the best visibility.
Pro Tip: Invest in an angled flashlight or headlamp so you can keep both hands free while peering into the dark wheel wells.
Step 3: Secure Your Vehicle Safely
What you need: A flat, level concrete surface, wheel chocks, and rated jack stands.
Instructions: Park your car on solid, level ground, engage the emergency parking brake firmly, and place wheel chocks behind the tires that will remain on the ground. Loosen the lug nuts on the wheel you plan to inspect by a quarter-turn while the vehicle is still on the ground. Carefully position your hydraulic floor jack under the manufacturer’s designated pinch weld or frame lift point, raise the vehicle to a comfortable working height, and lower it securely onto sturdy jack stands.
Pro Tip: Always give the vehicle a gentle shake once it rests on the jack stands to ensure absolute stability before putting any part of your body near the wheel well.
Step 4: Remove the Wheel for Clear Access
What you need: A lug wrench or breaker bar with the correct socket size.
Instructions: Completely remove the loosened lug nuts by hand and set them aside in a clean container so they do not roll away or collect dirt. Firmly grasp the tire with both hands, pull it straight toward you off the wheel studs, and lay it flat on the ground nearby. Removing the wheel gives you unobstructed line-of-sight to the brake caliper, rotor, and the inner and outer brake pads, eliminating guesswork caused by awkward angles and deep shadows.
Pro Tip: Slide the removed wheel underneath the frame of the car near your jack stand as an extra safety backup in the unlikely event of a jack failure.
Step 5: Locate and Inspect the Brake Pads
What you need: Your flashlight and a clean rag to wipe away brake dust.
Instructions: Look inside the metal brake caliper assembly, where you will see the friction material (the pad) pressed against the shiny metal brake rotor. Use your rag to wipe away accumulated black brake dust so you can clearly distinguish the metal backing plate from the friction material. Visually inspect both the outer pad (easily visible) and the inner pad (tucked closer to the wheel hub), as inner pads often wear out faster due to uneven sliding pin pressure.
Pro Tip: If you cannot see the inner pad clearly through the caliper window, use your smartphone camera to snap a quick photo at an angle.
Step 6: Measure the Friction Material Thickness
What you need: A brake pad thickness gauge or a precise caliper tool.
Instructions: Insert your brake pad gauge or ruler directly against the friction material of the pad. Measure the thickest part of the remaining pad material, taking care not to measure the steel backing plate. If your measurement reads 4mm or higher, your pads are in acceptable condition. If the material measures 3mm or less—roughly the thickness of two stacked quarters—you must schedule a replacement immediately to prevent metal-on-metal grinding.
Pro Tip: Always measure the thinnest spot on the pad, as pads can sometimes wear down unevenly due to a stuck caliper slide pin.
Step 7: Listen for Auditory Warning Signals
What you need: Your ears and a short test drive in a safe, low-traffic area.
Instructions: While physical measurement is most accurate, your vehicle’s ears will often talk to you first. Listen closely for a high-pitched squealing or chirping noise when you apply the brakes. This sound comes from a small metal indicator tab deliberately embedded inside the pad material, designed to squeal when the pad drops below 3mm. If you hear a harsh, metallic grinding noise, the friction material is entirely gone, and your rotors are likely being damaged.
Pro Tip: A squeal that disappears the moment you press the brake pedal usually indicates a different issue, whereas a squeal that gets louder with braking signals worn pads.
Step 8: Reassemble and Document Your Findings
What you need: Your torque wrench and wheel lug socket.
Instructions: Once your inspection is complete, carefully lift the wheel back onto the lug studs. Thread the lug nuts on by hand in a star pattern to ensure the wheel sits flush against the hub. Lower the vehicle back to the ground using your floor jack, and use a torque wrench to tighten the lug nuts to your vehicle manufacturer’s exact torque specification (usually between 80 and 100 ft-lbs). Record your pad measurements in your vehicle maintenance log so you can track future wear rates.
Pro Tip: Never guess your wheel lug torque; an over-tightened lug can warp rotors, while an under-tightened lug can cause a wheel to loosen.
✅ Final Checklist
- Both inner and outer brake pad thicknesses measured accurately
- All measurements confirmed to be safely above the 3mm replacement threshold
- Wheels remounted and torqued to exact manufacturer specifications
- No abnormal squealing, grinding, or steering pull noticed during test drive
- Vehicle maintenance log updated with current mileage and pad measurements
Important Notes:
- Never compromise on safety; if your pads measure 3mm or less, replace them before taking your car on long or high-speed trips.
- Seek professional mechanic assistance immediately if you notice fluid leaks around the caliper, deeply scored brake rotors, or a spongy brake pedal feel.
- Inspecting your own brake pads takes roughly 30 to 45 minutes and costs nothing if you already own basic hand tools. Professional replacement (if needed) typically ranges from $150 to $300 per axle for parts and labor.
How to Measure Brake Pad Thickness Accurately Step-by-Step
Measuring Through Your Wheel Spokes
You do not always need to take your wheels off to check your brake health. Modern alloy wheels often provide enough open space for a quick visual check.
- Park your car on level ground and turn off the engine completely.
- Shine a bright flashlight directly through the gaps in your wheel spokes.
- Locate the brake caliper and look for the outer brake pad pressed against the shiny metal rotor.
- Compare the thickness of the friction material to a standard metric ruler or a dedicated brake pad gauge tool.
Using a Brake Pad Gauge for Exact Millimeters
For a precise reading in 2026, using a physical tool eliminates guesswork. This method requires removing the wheel for full access to both inner and outer pads.
- Safely jack up your vehicle and remove the wheel to expose the entire brake assembly.
- Place a specialized metal brake pad gauge flat against the friction material.
- Match the color-coded blade of the gauge to your pad thickness. Green means healthy above 6mm, yellow signals caution between 4mm and 5mm, and red demands immediate replacement at 3mm or below.
- Check both the inner and outer pads, as they often wear at slightly different rates due to caliper movement.
How to Fix Worn Brakes by Replacing Pads Before Rotor Damage Occurs
Proactive maintenance stops minor friction loss from escalating into expensive mechanical failures. When brake pad thickness drops below the critical 3mm threshold, you must act immediately. Delaying this service forces the steel backing plate to grind directly against the rotor surface.
Step-by-Step Replacement Procedure
- Park the vehicle on a level surface, engage the emergency brake, and loosen the lug nuts on the target wheels.
- Safely elevate the vehicle using a hydraulic jack and secure it with heavy-duty jack stands rated for your vehicle weight.
- Remove the wheel assembly to gain full visual and physical access to the brake caliper and rotor assembly.
- Locate and remove the caliper sliding bolts using a standard socket wrench, then carefully slide the caliper off the mounting bracket.
- Suspend the detached caliper securely using a bungee cord or zip tie to prevent putting dangerous tension on the rubber brake hose.
- Extract the old brake pads from the caliper bracket and inspect the metal abutment clips for corrosion or wear.
- Compress the internal caliper piston using a C-clamp or specialized wind-back tool to accommodate the thicker, brand-new brake pads.
- Install the new brake pads into the bracket, remount the caliper, and torque all fasteners to manufacturer specifications.
According to Automotive Service Excellence (ASE) data, replacing pads before metal-on-metal contact occurs saves the average driver upwards of $350 in premature rotor replacement costs.
What If Your Brakes Still Grind After Replacing the Pads?
If you recently installed fresh brake pads and notice persistent grinding or squealing noises, a deeper mechanical issue requires your attention. Ignoring post-replacement noise can ruin your new friction material within a few hundred miles.
Troubleshooting Steps for Persistent Brake Noise
- Check for a lodged foreign object, such as a small stone or piece of road debris, trapped between the rotor and the backing dust shield.
- Inspect the brake rotor surface for deep scoring, grooving, or severe warping that requires immediate machining or total replacement.
- Verify that the metal anti-rattle clips were installed correctly and are not making direct contact with the spinning outer edge of the rotor.
- Confirm that the caliper slide pins are properly lubricated and moving freely, as a seized pin causes uneven, aggressive pad drag.
- Consult a certified mechanic if the noise persists despite correct installation, as internal hydraulic pressure or ABS module failures may be at fault. Professional diagnostic labor typically ranges from $100 to $200.
Conclusion
Maintaining proper brake pad thickness above 3mm is essential for maintaining optimal stopping distance and protecting vital braking components. Neglecting this maintenance cycle leads to hazardous driving conditions and expensive secondary repairs. According to verified research and expert sources from the Car Care Council, routine brake inspections every 6,000 miles prevent premature component failure. Take action today by measuring your current pad depth or scheduling a professional inspection for your vehicle.
❓ Frequently Asked Questions
How thick should brake pads be before replacing?
You should replace your brake pads when the friction material wears down to 2mm to 3mm. Letting them drop below 2mm compromises your vehicle’s stopping distance and risks severe damage to the brake rotors.
How can I measure brake pad thickness at home?
You can use a specialized brake pad gauge, a small metric ruler, or even a digital caliper. For the most accurate measurement, remove the wheel to access the caliper assembly and check both the inner and outer pads.
Are inner and outer brake pads supposed to wear at the same rate?
Not always. Due to sliding caliper designs, the inner pad often wears out faster than the outer pad. Always inspect both pads during your maintenance check.
At what millimeter measurement is it safe to keep driving?
If your brake pads measure 6mm or higher, they are in good condition. Anything between 4mm and 5mm means you should plan for a replacement soon, while 2mm to 3mm requires immediate action.
What are the common visual signs of worn-out brake pads?
Aside from seeing a very thin sliver of friction material against the metal backing plate, you may notice excessive brake dust, deep scoring on the rotor surface, or a low brake fluid reservoir level.
Does driving style affect how fast brake pads wear down?
Yes, aggressive stop-and-go city driving, heavy towing, and frequent downhill braking cause friction material to wear out much faster than smooth highway driving.