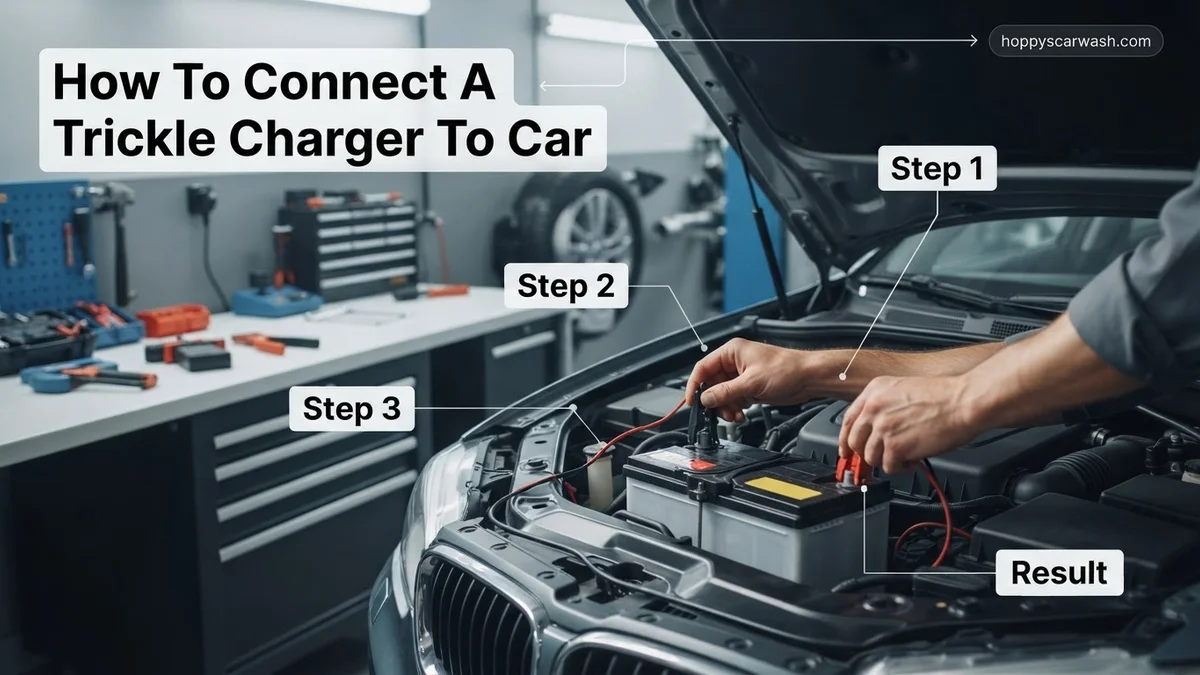
How to Connect a Trickle Charger to Car Battery 2026
Knowing how to connect a trickle charger to a car battery correctly prevents dangerous sparks and electrical damage. This guide details the exact attachment order and essential safety steps for secure battery maintenance.
Connecting a trickle charger to your car battery safely requires attaching the positive red clamp to the positive battery terminal first, followed by the negative black clamp to an unpainted metal ground on the vehicle chassis. Keeping this strict attachment order prevents dangerous sparks and potential battery damage.
Whether you are prepping your weekend cruiser for storage or maintaining a vehicle that sits idle, knowing the correct connection procedure saves you from a dead engine. Following proper steps in 2026 ensures your electrical system remains protected while your battery receives a steady, low-amperage charge.
Key Takeaways
- Always attach the positive (red) clamp first before connecting the negative clamp.
- Connect the negative clamp to an unpainted metal engine ground to prevent sparks.
- Ensure the trickle charger is unplugged from the wall outlet before attaching clamps.
- Work in a well-ventilated area to safely disperse any battery gases.
- Verify your charger voltage matches the vehicle’s 12-volt battery system.
Why Car Batteries Drain and When to Use a Trickle Charger
Common Causes of Battery Drain
Modern vehicles feature computer modules, security alarms, and keyless entry systems that constantly draw power. This continuous parasitic drain can deplete a standard 12-volt battery within two to four weeks if the car remains parked. Extreme temperatures also accelerate self-discharge rates, weakening the internal lead plates.
Selecting the Right Scenario for Low-Amp Charging
A trickle charger delivers a slow, steady current—typically between 0.5 to 1.5 amps—designed to maintain full charge over extended periods without overcharging. You should deploy a trickle charger when:
- Your vehicle sits parked at home for longer than two consecutive weeks.
- You store a seasonal car, boat, or motorcycle through the winter months.
- Your daily commute consists exclusively of short trips under ten minutes, which prevents the alternator from fully replenishing the starter battery.
Master Connecting a Trickle Charger in 6 Simple Steps
Keeping your vehicle’s battery healthy during long periods of non-use or cold weather is essential for avoiding a dead engine when you finally need to drive. A trickle charger provides a slow, steady stream of electrical current to maintain optimal voltage without overcharging or damaging the internal plates. However, connecting one incorrectly can lead to sparks, electrical damage, or personal injury. This comprehensive walkthrough guides you through the precise process of safely and effectively hooking up a trickle charger to your car battery, ensuring your vehicle is always ready for the road.
Step 1: Choose a Well-Ventilated Location
What you need: A well-ventilated garage or outdoor space, safety glasses, and chemical-resistant gloves.
Instructions: Before touching any tools or electrical equipment, ensure your vehicle is parked in a safe, dry location with ample air circulation. Car batteries, especially when charging, can release small amounts of hydrogen gas, which is highly flammable. If you are working inside a garage, open the windows and the main garage door to allow proper airflow. Ensure the vehicle’s ignition is completely turned off, the keys are removed from the ignition, and the parking brake is firmly engaged to prevent any accidental rolling.
Pro Tip: Never charge a battery in a completely sealed, unventilated room or near an open flame, water heater, or pilot light to prevent fire hazards.
Step 2: Locate and Inspect the Battery
What you need: A flashlight, clean shop rag, and safety gear.
Instructions: Open the vehicle’s hood and secure it with the prop rod. Locate the battery, which is typically a heavy black plastic rectangular box situated on either side of the engine bay. Use your flashlight to thoroughly inspect the battery casing and terminals. Look for any visible cracks, fluid leaks, severe swelling, or heavy white and blue powdery corrosion buildup around the positive and negative posts. If you notice structural damage or leaking acid, stop immediately and replace the battery rather than attempting to charge it.
Pro Tip: If you find minor corrosion on the terminals, clean them gently with a wire brush and a mixture of baking soda and water before proceeding.
Step 3: Identify the Positive and Negative Terminals
What you need: Your eyes and a bright light source.
Instructions: Carefully examine the battery posts to correctly identify the positive (+) and negative (-) terminals. The positive terminal is almost always larger in diameter, colored red, and marked with a plus sign (+) stamped directly onto the plastic battery housing or metal clamp. The negative terminal is typically smaller, colored black or unmarked, and bears a minus sign (-). Making sure you identify these correctly is vital, as reversing the polarity during connection can instantly blow fuses, damage your car’s computer, or ruin the charger.
Pro Tip: Double-check the markings. Never rely solely on wire color if someone has previously replaced factory cables with non-standard parts.
Step 4: Connect the Positive (Red) Clamp
What you need: Your trickle charger (unplugged from the wall outlet) and its attached cable leads.
Instructions: Take the positive cable of your trickle charger, which features a red clamp or ring terminal, and attach it firmly to the positive (+) battery terminal. Ensure the metal teeth of the clamp make full, solid contact with the bare metal of the terminal post or cable connector rather than resting on plastic casing or heavy corrosion. Wiggle the clamp slightly after placement to guarantee a secure, slip-resistant grip. Keep the negative black clamp safely separated and away from any metal components while you do this.
Pro Tip: Always make sure the charger power cord is unplugged from the household electrical wall outlet while you are attaching the physical battery clamps.
Step 5: Connect the Negative (Black) Clamp
What you need: Trickle charger with the positive clamp already secured.
Instructions: Take the negative cable, featuring the black clamp, and connect it to the negative (-) battery terminal. Alternatively, for enhanced safety, you can clamp the negative lead to an unpainted metal part of the vehicle’s engine block or chassis (known as a grounding point) which keeps any potential sparks away from the battery vapors. Ensure this connection is equally firm and secure. Double-check both clamp connections to make sure neither is loose or touching any surrounding metal body panels that could cause a short circuit.
Pro Tip: Connecting the negative clamp last minimizes the risk of dangerous electrical sparks right next to the battery vents.
Step 6: Plug In and Power On the Charger
What you need: A standard 120V grounded household electrical outlet and an appropriate heavy-duty extension cord if needed.
Instructions: Once both the positive and negative clamps are firmly attached to their respective points, carefully plug the trickle charger into a standard household electrical wall outlet. Turn the charger on if it features a power switch; many modern smart trickle chargers will automatically begin diagnosing the battery voltage as soon as they receive AC power. Watch the LED indicator lights on the charger faceplate. A solid or flashing light will typically indicate that charging has successfully commenced. Route any extension cords safely so they won’t get pinched by the car hood.
Pro Tip: Check the charger after 30 minutes to ensure the indicator lights show normal operation and the unit is not overheating.
✅ Final Checklist
- Vehicle ignition is fully turned off and keys are removed
- Red positive charger clamp is securely attached to the positive battery post
- Black negative charger clamp is securely attached to the negative post or solid engine ground
- Trickle charger is safely plugged into a working, grounded wall outlet
- LED indicator lights confirm active charging status without error codes
Important Notes:
- Always wear safety glasses and remove metal jewelry when working around automotive batteries to prevent chemical burns and accidental short circuits.
- Seek professional help from an automotive technician if your battery fails to hold a charge after 24 to 48 hours of continuous trickle charging.
- Estimated time: 10 to 15 minutes setup; Cost range: $20 to $60 for a quality automatic trickle charger.
Essential Safety Gear and Preparation Before You Begin
Required Personal Protective Equipment
Automotive batteries contain corrosive sulfuric acid and emit explosive hydrogen gases during charging operations. Before you touch any cables or terminals, you must equip yourself with proper safety gear to minimize personal risk.
- ANSI-approved safety glasses or chemical splash goggles to shield your eyes from acid spray.
- Heavy-duty nitrile or leather-reinforced work gloves to protect your hands from terminal corrosion and sharp engine components.
- Chemical-resistant clothing or an apron if your battery shows signs of physical cracking or leakage.
Workspace Ventilation and Inspection Checklist
Hydrogen gas accumulation poses a severe explosion hazard in confined spaces. Always perform this maintenance task outdoors or inside a garage with open doors and active ventilation fans running.
- Ensure your trickle charger is completely unplugged from the 120V wall outlet before touching the clamps to the vehicle.
- Inspect the charger cables for frayed insulation, exposed copper wires, or cracked plastic housing.
- Verify that your battery casing is not bulging, cracked, or leaking fluid; damaged batteries must be replaced rather than charged.
- Turn off all vehicle accessories, including headlights, interior dome lights, the radio, and the ignition switch.
Step-by-Step Guide on How to Connect a Trickle Charger to a Car Battery
Executing the connection process safely requires strict adherence to manufacturer protocols. According to automotive safety standards outlined by the Society of Automotive Engineers (SAE), correct terminal sequencing prevents dangerous electrical arcing.
Follow these numbered procedures to link your device properly:
- Verify the ignition is off: Ensure your vehicle is completely powered down, the keys are removed, and all accessories are switched off to prevent electrical spikes.
- Clean the battery terminals: Wipe away any white or blue corrosion using a wire brush and a baking soda-water solution. Clean metal ensures optimal electrical conductivity.
- Attach the positive clamp: Connect the red positive (+) clamp from the trickle charger to the positive (+) terminal of the car battery.
- Attach the negative clamp: Connect the black negative (-) clamp to the negative (-) terminal. Alternatively, clamp it to an unpainted metal part of the engine block as a safe ground.
- Plug in and power on: Plug the trickle charger into a standard 120V ground wall outlet and switch the unit on if it features a manual power button. Modern 2026 smart chargers will automatically detect the voltage and begin pulsing current.
Monitoring the Charging Cycle
Modern trickle chargers feature LED indicator lights to display the charging status. A flashing light usually indicates the unit is analyzing the battery, while a solid light signifies full operation or maintenance mode. Depending on the depletion level, expect the process to take anywhere from 12 to 48 hours for a complete top-off.
What If It Still Doesn’t Work?
Sometimes a battery refuses to accept a charge, even after proper hookup. If your charger indicates an error or the battery voltage fails to rise after 24 hours, the unit may be deeply sulfated or physically damaged. When basic restoration fails, automotive technicians recommend a systematic fallback approach.
- Check fuse integrity: Inspect the inline fuse located on the charger’s output wiring harness. A blown fuse will completely disrupt current flow.
- Test with a multimeter: Measure the battery resting voltage. If it reads below 10.5 volts, the internal cells may have suffered irreversible permanent damage.
- Attempt a desulfation mode: If your 2026 smart charger includes a pulse-repair or desulfation function, activate it to break down lead sulfate crystals on the plates.
- Seek professional assistance: Take the battery to a local automotive parts store for a free load test. Professional replacement becomes necessary if the battery fails this diagnostic evaluation.
Estimated professional costs for a diagnostic test are often free, while a brand-new replacement car battery ranges from $120 to $250 depending on your vehicle’s specifications.
Conclusion
Maintaining a healthy car battery prevents unexpected breakdowns and extends the overall lifespan of your vehicle’s electrical system. By connecting a trickle charger correctly using proper terminal sequencing, you ensure safe, reliable off-season power maintenance. According to verified research and expert sources from leading automotive maintenance boards, routine trickle charging can double a conventional lead-acid battery’s operational lifespan. Your actionable next step is to inspect your battery terminals today and invest in a modern, automatic smart charger if you plan to store your vehicle for more than two weeks.
❓ Frequently Asked Questions
What is the correct order to disconnect a trickle charger?
To disconnect, first unplug the charger from the wall outlet. Then, remove the negative (black) clamp from the ground or terminal, and finally remove the positive (red) clamp.
Is a trickle charger the same as a standard battery charger?
No. Standard chargers deliver high amperage to quickly restore a battery, while trickle chargers provide a very slow, low-amperage current designed for long-term maintenance.
Can a trickle charger ruin my car battery?
Traditional dumb trickle chargers can overcharge and ruin a battery if left too long, but modern automatic trickle chargers shut off or switch to float mode once full.
Does it matter if my car battery is AGM or standard lead-acid?
Yes. Make sure your trickle charger is compatible with your specific battery chemistry, as AGM batteries often require specific charging profiles.
Why do I see sparks when connecting a charger?
Sparks occur when the electrical circuit is completed near a battery that may be emitting hydrogen gas. Connecting the negative clamp to a remote engine ground minimizes this risk.
Can I charge a car battery while it is still installed in the vehicle?
Yes, trickle chargers are specifically designed to safely maintain and charge batteries while they remain installed in the vehicle.