How Do You Turn Off Maintenance Light on Toyota 2026
Wondering how do you turn off maintenance light on Toyota vehicles? The process requires using your steering wheel controls or trip odometer button depending on your model’s ignition type. Follow this simple guide to clear the reminder after your oil change.
Turning off the maintenance required light on your Toyota is a straightforward process you can easily complete in your driveway. Whether you drive a brand-new 2026 model or an older daily commuter, resetting this dashboard indicator takes less than two minutes using the steering wheel controls or the trip odometer button.
Ignoring this light after servicing your car can cause unnecessary confusion during your next commute. Resetting it ensures your service intervals stay accurately tracked so you never miss a future oil change or tire rotation.
Key Takeaways
- Use steering wheel directional pads for modern digital displays.
- Turn-key ignitions require using the trip meter reset button.
- Ensure the ignition is in the correct ‘ON’ position without starting the engine.
- Perform the sequence promptly to successfully clear the dashboard warning.
- Regular maintenance ensures the light only illuminates when service is due.
What Causes the Toyota Maintenance Required Light to Turn On
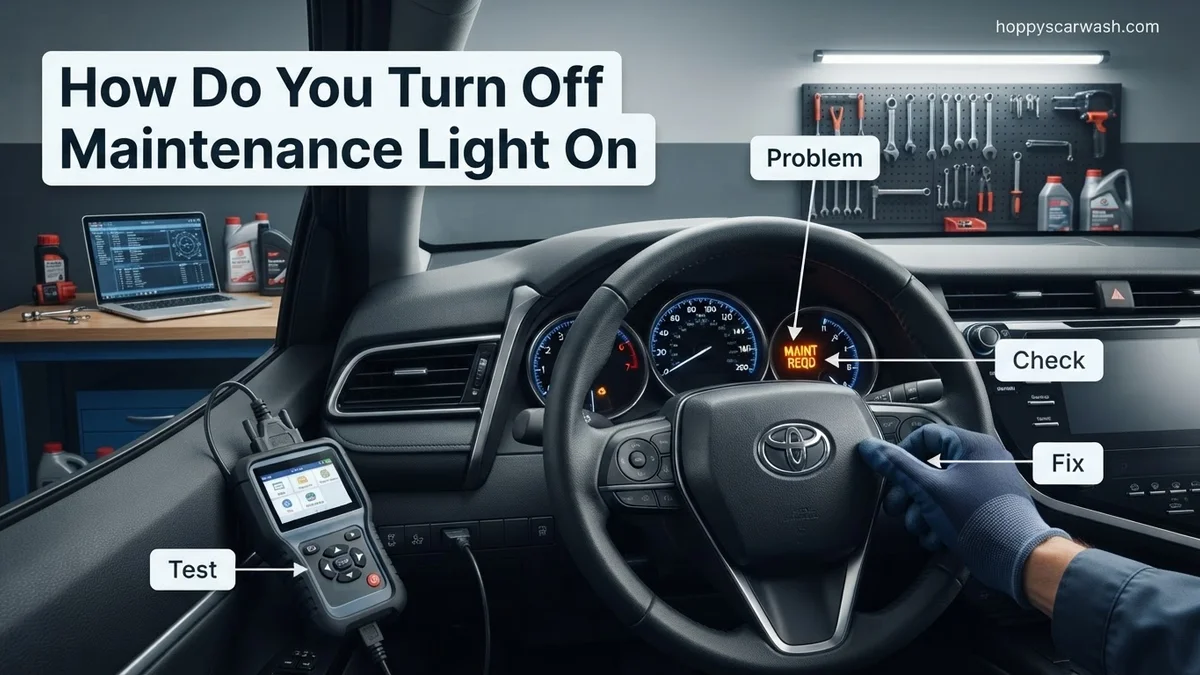
Your Toyota features an internal computer that tracks mileage and operating time since the last service reset. The maintenance required light is not a check engine light. It acts purely as a mileage-based reminder for routine upkeep.
The 5,000-Mile Oil Change Interval
The system triggers the maintenance reminder every 5,000 miles. This matches standard intervals for synthetic oil changes, tire rotations, and multi-point inspections. Even if your mechanic performed the service, they might forget to clear the digital odometer tracker before handing you the keys.
Scheduled Service Milestones
Certain mileage milestones trigger specific service warnings on modern Toyota displays:
- 5,000 Miles: Tire rotation and fluid check reminder.
- 10,000 Miles: Full synthetic oil change and filter replacement.
- 30,000 Miles: Major service including cabin and engine air filters.
Master Toyota Maintenance Reset in 6 Simple Steps
Seeing that stubborn maintenance light pop up on your Toyota dashboard can be annoying, especially if you have already completed your routine oil change and tire rotation. This indicator is simply a mileage-based reminder rather than an active engine diagnostic warning, meaning you can easily clear it yourself without a trip to the dealership. Whether you drive a dependable Camry, a rugged RAV4, or a versatile Highlander, this guide will walk you through the exact process to turn off your maintenance required light, saving you both time and money.
Step 1: Identify Your Toyota Dashboard and Ignition Type
What you need: Your Toyota vehicle, your physical key or smart key fob, and a working set of eyes to locate your steering wheel controls.
Instructions: Before pressing any buttons, take a moment to look at your specific dashboard layout and ignition setup. Toyotas manufactured between 2008 and the present generally fall into two categories: those with a traditional physical key turn-ignition and those with a modern push-button start system. Furthermore, you need to determine if your vehicle uses a basic monochrome center display or a larger multi-information display (MID) nestled between the speedometer and tachometer. Knowing this helps you anticipate which steering wheel directional pad or trip meter buttons you will need to engage.
Pro Tip: Do not start the engine fully yet; you only want the electrical systems powered on for the reset sequence to register correctly.
Step 2: Turn the Ignition to the “ON” Position
What you need: Your Toyota key or smart fob, and patience to avoid accidentally starting the engine.
Instructions: If your vehicle has a traditional key ignition, insert the key and turn it two clicks forward to the “ON” position (usually labeled as “II”). Do not twist it all the way to start the engine, as this will prevent the reset computer from recognizing your button commands. If your vehicle features a push-button start system, ensure your foot is completely off the brake pedal, and press the “START/STOP” button twice consecutively. You will see the dashboard cluster light up completely, warning lights illuminate briefly, and the odometer screen power on, signaling that the vehicle’s computer is ready for input.
Pro Tip: Accidentally pressing the brake pedal and starting the engine is the number one reason resets fail on the first try. Keep your feet firmly on the floorboards.
Step 3: Navigate to the Trip Meter Display Setting
What you need: Your steering wheel controls or the physical odometer stem protruding directly from the instrument cluster glass.
Instructions: Using the multi-information display buttons on the right side of your steering wheel, scroll horizontally or vertically until the screen displays your odometer or “Trip A” setting. On older Toyota models, you will need to physically press the small protruding plastic rod (the trip meter knob) located right on the instrument cluster lens. Press this knob repeatedly until the screen explicitly shows “Trip A” and not an average fuel economy or digital speed readout. The computer requires the screen to be locked onto this specific trip meter channel to accept the mileage reset command code.
Pro Tip: If your car shows “Trip B” or total mileage, the reset command will not register. It must be set strictly to “Trip A” on most older and mid-generation models.
Step 4: Turn Off the Ignition Completely
What you need: Your hands and the ignition switch or push-button.
Instructions: Once you have successfully verified that “Trip A” is actively displayed on your dashboard screen, it is time to power down the vehicle’s electrical systems. If you have a traditional key ignition, turn the key backward to the “LOCK” or “OFF” position and pull it out slightly if necessary. If you are operating a push-button start Toyota, press the “START/STOP” button once to completely shut down the ignition. The dashboard screen should go completely dark, ensuring that the computer memory is cleared and waiting for your specialized button-hold sequence in the next step.
Pro Tip: Do not skip this power-down step, as the Toyota maintenance reset protocol requires a specific sequence of waking the car up while holding a button.
Step 5: Execute the Button Hold and Power-On Sequence
What you need: Both hands—one to press the trip reset knob or steering wheel enter button, and one to turn the ignition.
Instructions: Press and hold down the trip meter reset button (or the steering wheel “Enter” button depending on your model year) and keep it depressed continuously. While holding that button down, turn the ignition key back to the “ON” position (or press the push-button start twice without touching the brake). Do not release the button! Watch the center digital display screen closely while you maintain this hold. You will notice the odometer screen begin to flash, display a series of decreasing dashed lines, or show a progress loading bar depending on your specific Toyota model.
Pro Tip: Maintain steady pressure on the button for a full 5 to 10 seconds. Releasing it even a split second too early will abort the reset sequence.
Step 6: Verify the Reset and Complete the Process
What you need: Your eyes to confirm the dashboard indicators have cleared.
Instructions: Continue holding the button until the dashed lines on the screen turn into a row of zeros (000000) or the display returns to the normal “Trip A” mileage readout. Once you see this confirmation, you can finally release the button. To double-check your work, turn the ignition completely off once more, and then start the vehicle fully by pressing the brake and starting the engine. The “Maintenance Required” or “MAINT REQD” message should now be completely gone from your instrument cluster. If the light remains on, turn off the car and carefully repeat the sequence starting from Step 1.
Pro Tip: If you performed a major service like an oil change, write down your current mileage so you know when to repeat this process in another 5,000 to 10,000 miles.
✅ Final Checklist
- Dashboard shows no active “Maintenance Required” or oil change warning lights upon startup.
- Vehicle ignition was turned completely off before initiating the final button-hold sequence.
- Display successfully transitioned through flashing dashes to zeros or normal trip mileage.
- Engine starts normally and all electronic dashboard gauges function as expected.
Important Notes:
- Never attempt to reset maintenance lights while the vehicle is currently moving or in motion on a roadway.
- If the light turns back on immediately or stays lit as a solid red oil pressure or check engine icon, stop driving and seek professional diagnostic help immediately.
- Estimated time to complete this entire DIY procedure is less than 3 minutes, with a cost of $0.
Step-by-Step Guide on How to Turn Off Maintenance Light on Toyota Push-Button Models
Most modern Toyotas utilize a smart key system and a push-button ignition. Resetting the light on these vehicles requires interacting with the multi-information display screen located directly on your instrument cluster.
Resetting via Steering Wheel Controls (2020–2026 Models)
If your Toyota features directional arrows and an “OK” button on the right side of the steering wheel, follow these steps:
- Press the Start/Stop button twice without pressing the brake pedal. This turns the ignition to the On position without starting the engine.
- Use the left or right arrows on your steering wheel to navigate to the Gear icon (Settings) on the dashboard screen.
- Scroll up or down using the arrows to select Vehicle Settings and press OK.
- Locate and select Scheduled Maintenance or Oil Maintenance.
- The screen will ask if you want to reset the data. Select Yes and press OK.
Resetting Older Push-Button Start Models
For slightly older push-button Toyota models, the process relies on the trip meter button:
- Place the ignition in the On position without starting the engine.
- Switch your multi-information display to show Trip A on the odometer screen.
- Turn the ignition off completely.
- Press and hold the Trip Meter button while pushing the Start/Stop button twice into the ignition-on mode.
- Keep holding the trip button for about five seconds until the dashboard display shows dashes flashing and eventually resets to zero.
How to Reset the Maintenance Light on Standard Key Ignition Toyotas
Older or base-model Toyota vehicles utilizing a physical key ignition require a slightly different physical button-push sequence to clear the maintenance reminder. According to official Toyota service guidelines for mechanical key systems, the process relies on the vehicle’s trip meter display knob rather than steering wheel controls.
Step-by-Step Mechanical Key Reset Sequence
- Insert your physical key into the ignition switch and turn it to the “ON” position without cranking or starting the engine. If your Toyota features a push-button start without a smart key dock, press the start button twice without touching the brake pedal.
- Locate the trip odometer stem or button protruding from the clear plastic instrument cluster. Press this button repeatedly until the multi-information display shows “Trip A”. Do not select Trip B or the total odometer reading.
- Turn the ignition switch completely off. For push-button vehicles, press the engine start-stop button once to cut all power.
- Press and hold down the trip meter reset button firmly with your finger. Keep holding this button down continuously.
- While holding the trip button, turn the ignition key back to the “ON” position, or press the push-button start twice without depressing the brake pedal.
- Continue holding the trip button down for approximately 5 to 10 seconds. Watch the display screen closely. You will see the odometer display show a series of flashing dashes, followed by a sequence of zeroes (000000).
- Once the display stops flashing and reverts to showing your standard Trip A mileage, release the trip button. Turn the ignition off, then start the engine normally to verify the maintenance required light has successfully extinguished.
What If It Still Doesn’t Work?
If you have accurately followed the multi-step reset procedure for your specific model year and the maintenance reminder refuses to turn off, underlying electrical or mechanical issues are usually to blame. Automotive diagnostic technicians note that persistent warning lights often indicate a missed service interval, a glitch in the body control module, or an unaddressed diagnostic trouble code (DTC).
Try these verified troubleshooting steps if your reset attempt fails:
- Double-check your ignition timing: The window for releasing and pressing buttons during reset sequences is strict. Timing errors often prevent the computer from registering the reset command. Repeat the entire process while timing yourself with a stopwatch.
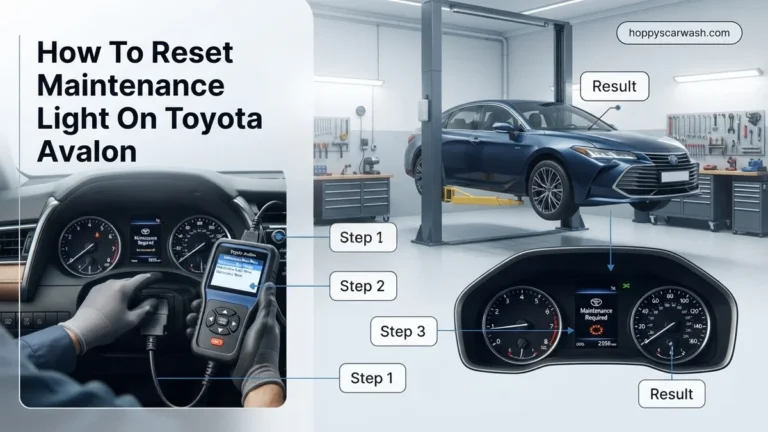
- Check for active diagnostic trouble codes: If a mechanical fault exists—such as a loose gas cap triggering an EVAP code or an overdue oil change logged in the ECU—the maintenance system may re-trigger immediately. Connect an OBD2 scanner to check for hidden codes. Local auto parts stores typically perform this diagnostic scan at no charge.
- Disconnect the 12-volt battery: Perform a hard system reboot by disconnecting the negative battery terminal for 15 minutes. This clears temporary cache memory in the vehicle’s computer modules. Reconnect the terminal and attempt the reset sequence once more.
- Consult a professional technician: If software corruption or a faulty instrument cluster panel prevents the reset, professional intervention is required. Independent service shops typically charge between $75 and $150 (roughly one hour of labor) to diagnose and manually clear stubborn dashboard warning indicators using factory-level scan tools.
Conclusion
Clearing the maintenance required light on your Toyota is a straightforward routine maintenance task that takes less than two minutes once you master the correct button sequence for your specific ignition type. Whether you drive a modern digital display model or a traditional key-start vehicle, resetting this indicator ensures your dashboard remains clear and ready for the next service milestone. According to verified research and expert automotive technician standards, performing routine resets promptly helps vehicle owners maintain accurate oil change schedules and protects long-term engine health. Take your next actionable step today by consulting your owner’s manual to confirm your exact model’s service intervals and performing the reset procedure.
❓ Frequently Asked Questions
How do you turn off maintenance light on Toyota Camry models?
For newer Camry models with push-button start, turn the ignition to ON, use the right-side steering wheel controls to navigate to Settings, select Vehicle Settings, and choose Scheduled Maintenance to reset it.
What is the difference between the Check Engine light and the Maintenance Required light?
The Maintenance Required light is a mileage-based reminder for routine service like oil changes, whereas the Check Engine light indicates an active mechanical or electronic fault.
Why won’t my Toyota maintenance light reset?
If the reset fails, you may not have held the trip button long enough or the ignition might not have been in the correct auxiliary position. Double-check your specific model’s exact sequence.
How do you clear the maintenance light on an older Toyota Corolla?
On older turn-key Corollas, turn the ignition off, press and hold the trip meter button, turn the ignition to the ON position while holding the button, and wait for the display to clear.
Does the maintenance light turn off automatically after service?
No, mechanics or DIYers must manually reset the system after performing the required oil change or service interval.
Can a standard OBD2 scanner turn off the maintenance light?
While OBD2 scanners clear diagnostic trouble codes, resetting a maintenance required reminder is typically handled through the dashboard interface rather than an external scanner.