How Long Does It Take to Replace Ignition Coils 2026 Guide
Replacing ignition coils typically takes anywhere from 30 minutes to 2 hours depending heavily on your vehicle’s make and model. While straightforward front-row coils require minimal time, those hidden beneath the intake manifold demand extra disassembly steps. Knowing the layout of your engine bay prevents unexpected delays during the job.
Replacing ignition coils typically takes anywhere from 20 minutes to 3 hours, depending entirely on your vehicle’s engine layout and your own mechanical experience. If your car features easily accessible coils on top of the valve covers, a complete set can be swapped in less than half an hour using basic hand tools. However, modern 2026 vehicle architectures—especially V6 and transverse-mounted engines—often require removing the intake plenum just to reach the rear cylinders, drastically extending the job.
Knowing the exact timeframe helps you decide whether to tackle this project in your driveway on a Saturday morning or schedule it with a professional shop. A straightforward swap requires minimal downtime, while a buried manifold job demands patience, gasket replacements, and a wider array of metric sockets. Let us break down what actually dictates that clock time and walk through the mechanical steps involved.
Key Takeaways
- Standard front-accessible ignition coils usually take 30 to 45 minutes to replace.
- Engine layouts with coils hidden under the intake manifold can take up to 2 hours.
- Professional mechanics generally complete the job faster due to specialized tools and routine practice.
- Allowing the engine to cool completely before starting prevents burns and warped components.
- Replacing all coils simultaneously is often recommended if they have high, equal mileage.
What Causes Difficult Access During Ignition Coil Replacement
The single biggest factor dictating how long your ignition coil job will take is engine bay packaging. In standard inline-4 configurations, you simply pop the plastic engine cover, and every coil sits right in front of you. By 2026, tighter engine bays and complex emissions routing mean that many modern daily drivers hide half the ignition system out of sight.
Engine Layout and Cylinder Placement
Transverse V6 engines, common in modern crossovers and sedans, present a distinct mechanical challenge. The front bank of three cylinders takes minutes to service, but the rear bank sits buried directly underneath the intake manifold. To reach coils six, five, and four, you must systematically detach throttle bodies, vacuum lines, and the upper plenum.
- Inline-4 and Boxer Engines: Coils sit directly on top, allowing for a swift 20-to-30-minute replacement time.
- V6 and V8 Engines: Rear cylinder banks often require moving structural components or intake hardware, pushing total labor past the 2-hour mark.
- Under-Manifold Obstructions: Wiring harnesses, fuel rail lines, and coolant crossovers frequently block direct access on modern platforms.
Seized Components and Age Factors
Beyond layout, the physical condition of your engine bay dictates speed. Heat cycling over the years bakes rubber boots onto spark plugs and welds plastic electrical connectors in place. If you spend twenty minutes fighting a single brittle locking tab on a wiring harness, your quick 30-minute job easily stretches into an hour. Applying dielectric grease during reassembly prevents this issue for future maintenance cycles.
Ignition Coil Replacement Made Easy: Your Essential Action Plan
Dealing with a sluggish engine, sudden stalling, or an illuminated check engine light can be frustrating. Often, these symptoms point directly to a failing ignition coil. Replacing ignition coils is a fundamental automotive maintenance task that can save you hundreds of dollars in labor costs if done correctly. This guide will walk you through the entire replacement timeline, helping you budget your time, gather the right equipment, and execute the swap safely from the comfort of your driveway.
Step 1: Preparation and Engine Cooling
What you need: Safety glasses, mechanic gloves, and a shaded workspace.
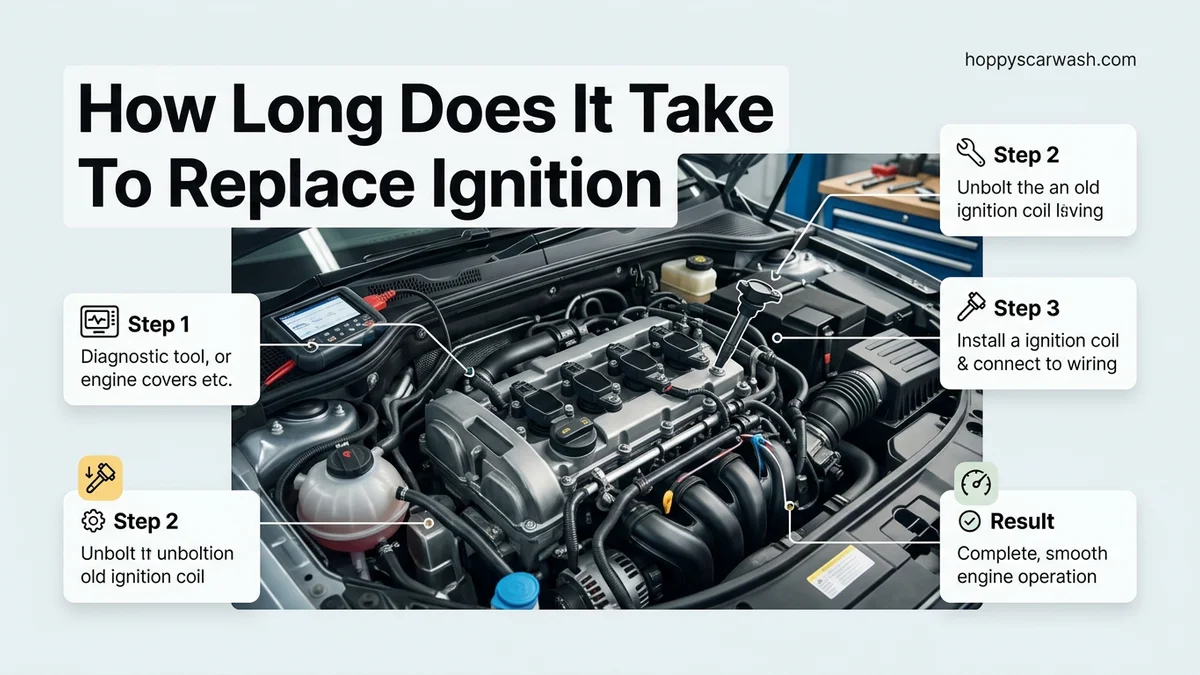
Instructions: Before touching any engine components, you must allow the engine to cool completely. Working on a hot engine increases the risk of severe burns, particularly around the exhaust manifold and the engine block. Pop your vehicle’s hood and prop it securely. Gather all your replacement ignition coils, hand tools, and a clean rag. Take a few minutes to visually inspect the layout of your engine bay, locating where the ignition coils sit either directly above the spark plugs on modern coil-on-plug setups or beneath a plastic engine cover. This crucial first phase typically takes between 15 to 30 minutes, depending entirely on how recently the vehicle was driven.
Pro Tip: Never rush this cooling period. Touching hot engine components can lead to instant blistering, ruining your DIY schedule.
Step 2: Removing the Engine Cover and Accessories
What you need: Basic socket set (usually 8mm or 10mm), socket wrench, and flathead screwdriver.
Instructions: Many modern vehicles feature a cosmetic plastic engine cover that hides the ignition coils and wiring harness. Unclip or unscrew the fasteners holding this cover in place, usually requiring just a quarter-turn or a quick twist with a socket. Once removed, place the cover safely out of the way. You may also need to unbolt or reposition small vacuum lines, brackets, or wiring harnesses that block direct access to the specific ignition coil you need to replace. Dedicate 10 to 15 minutes to this step, ensuring you keep track of all small bolts so they do not fall down into the deep recesses of the engine bay.
Pro Tip: Place removed screws and plastic clips into a magnetic tray or a small cup to prevent them from rolling off the fender and getting lost.
Step 3: Disconnecting the Electrical Connectors
What you need: Small pick tool or flathead screwdriver for stubborn locking tabs.
Instructions: Each ignition coil is attached to the vehicle’s main computer via a plastic wiring harness connector. To disconnect it, locate the locking tab on the plug. Push down or pull out gently on this locking tab, then firmly pull the connector straight back. Be extremely gentle here; plastic connectors become brittle over time due to intense engine heat cycles. If a connector refuses to budge, use a small pick tool to lift the locking tab carefully rather than yanking on the fragile wires. This step generally takes about 5 to 10 minutes for a single coil, or up to 20 minutes if you are replacing a full set of eight.
Pro Tip: Spray a tiny mist of electrical contact cleaner on stubborn connectors to help loosen accumulated dirt and grime before pulling them apart.
Step 4: Unbolting and Extracting the Old Ignition Coil
What you need: Ratchet, extension bar, and the correct metric socket (typically 8mm, 10mm, or a Torx bit).
Instructions: With the electrical plug safely out of the way, locate the single retaining bolt securing the ignition coil to the valve cover or cylinder head. Use your ratchet with an appropriate extension bar to remove this bolt completely. Once unbolted, grasp the body of the ignition coil firmly and pull it straight up with a slight twisting motion to break the vacuum seal of the rubber boot surrounding the spark plug. Pull it all the way out. This extraction process takes approximately 5 minutes per coil. Inspect the rubber boot for any signs of oil fouling, white chalky deposits, or melting, which can indicate deeper engine issues.
Pro Tip: If the rubber boot tears and stays stuck inside the spark plug well, do not panic. Use a pair of long-nosed pliers to reach down and extract the remaining rubber piece.
Step 5: Preparing the New Ignition Coil and Spark Plug Well
What you need: Dielectric grease, clean microfiber towel, and a flashlight.
Instructions: Before installing your brand new ignition coil, shine your flashlight down into the empty spark plug well to ensure it is completely clean and dry. If you notice engine oil pooled inside the well, you likely have a failing valve cover gasket that must be addressed. Take a tiny dab of dielectric grease and smear a thin layer inside the rubber boot of the new ignition coil. This crucial step prevents moisture intrusion, creates a superior electrical seal, and ensures the boot will not permanently stick to the spark plug ceramic over the next several years. Spend 5 to 10 minutes on this preparation phase to guarantee long-term reliability.
Pro Tip: A common amateur mistake is globbing too much dielectric grease inside the boot, which can actually block electrical contact and cause a misfire.
Step 6: Installing and Securing the New Coil
What you need: Replacement ignition coil and ratchet with socket.
Instructions: Carefully align the tip of the new ignition coil directly over the spark plug well and push it straight down until you feel and hear it seat securely onto the top of the spark plug. Reinstall the retaining bolt by hand first to avoid cross-threading the delicate aluminum threads in the cylinder head. Once hand-tight, snug it down gently with your ratchet. Do not overtighten this bolt, as it can easily snap off inside the engine block. Reconnect the electrical harness plug, pushing it firmly forward until you hear the plastic locking tab snap into its locked position. This installation step takes roughly 5 to 10 minutes per coil.
Pro Tip: Double-check that the electrical connector is fully latched by giving it a very gentle, cautious tug backward.
Step 7: Reassembly and Engine Testing
What you need: Engine cover, fasteners, and an OBD2 diagnostic scanner.
Instructions: Once all target ignition coils have been successfully replaced, reverse your initial disassembly steps. Reinstall any wiring brackets, vacuum hoses, and the cosmetic plastic engine cover, securing all fasteners properly. Before starting the vehicle, grab your OBD2 scanner and clear any stored misfire fault codes from the engine computer. Turn the ignition key or press the push-to-start button. The engine should fire up smoothly and idle evenly without hesitation, sputtering, or shaking. Monitor the dashboard to ensure the check engine light remains off. This final testing and clean-up phase takes about 10 to 15 minutes.
Pro Tip: Take the vehicle for a brief 10-minute test drive encompassing both stop-and-go city streets and highway speeds to ensure the misfire does not return under load.
✅ Final Checklist
- All ignition coil retaining bolts are torqued down securely without being overtightened.
- Electrical wiring harness connectors are fully plugged in with their locking tabs engaged.
- Dielectric grease was applied correctly inside each rubber boot to prevent moisture damage.
- Old diagnostic trouble codes have been completely cleared using an OBD2 scanner.
- The engine idles smoothly and accelerates without any hesitation during a test drive.
Important Notes:
- Always disconnect the negative battery terminal if you are working on a European vehicle or uncomfortable around live circuits, though it is often optional for standard coil-on-plug swaps.
- Seek professional mechanic assistance if a retaining bolt snaps off in the cylinder head or if replacing the coils does not resolve your engine misfire.
- Total time investment ranges from 45 minutes for a single easily accessible coil to 2 hours for replacing a full set under a complex intake manifold. Total cost typically spans between $50 and $300 for parts depending on vehicle make and model.
How to Replace Ignition Coils Step-by-Step
Executing the replacement efficiently requires a structured approach to avoid dropped fasteners and broken plastic clips. Whether you are replacing a single failing coil or doing a preventative refresh on all cylinders, following a strict sequence saves valuable time.
Preparation and Disassembly Phase
Always start by disconnecting the negative battery terminal to protect sensitive engine computers from electrical shorts. Remove any cosmetic engine covers using a basic socket set or trim removal tool.
- Disconnect the Battery: Safety first to avoid triggering a check engine light or shorting out the ignition circuit.
- Remove Obstructions: If your vehicle requires intake manifold removal, carefully label every vacuum line and electrical connector with masking tape before unbolting the plenum.
- Unplug the Electrical Harness: Press down firmly on the release tab of the coil connector and pull straight back. Do not yank on the wires.
Extraction and Installation Phase
Once the coil is completely isolated from the vehicle harness, you can focus on removing the fastener securing it to the cylinder head.
- Remove Retaining Bolts: Use a quarter-inch ratchet with a small extension to take out the single bolt holding each coil in place.
- Pull the Coil Free: Twist the coil slightly to break the suction of the rubber boot against the spark plug tube, then pull straight up.
- Install the New Unit: Push the new ignition coil firmly downward until you feel it snap onto the top of the spark plug, then reinstall the bolt and electrical connector.
What If It Still Doesn’t Work After Changing the Coils
Replacing ignition coils does not always resolve engine misfires or rough idling immediately. If the vehicle continues to exhibit performance issues after a 2026 diagnostic and repair session, secondary ignition and fuel delivery components likely require inspection. Automotive repair data indicates that ignition coil failure often co-occurs with related engine component wear. Drivers should systematically address persistent symptoms through targeted troubleshooting steps.
Diagnostic and Repair Troubleshooting Steps
- Inspect and replace spark plugs: Faulty spark plugs frequently damage new ignition coils. Mechanics recommend replacing spark plugs simultaneously with coil packs to prevent recurring electrical strain.
- Test fuel injectors: A clogged or failing fuel injector mimics ignition coil symptoms. Conduct a voltage drop test or listen for the clicking sound of active injectors.
- Check for vacuum leaks: Unmetered air entering the intake manifold disrupts the air-fuel ratio. Inspect all rubber vacuum lines and intake gaskets for cracking or disconnection.
- Verify compression levels: Low cylinder compression due to worn piston rings or burnt valves causes permanent misfires. Perform a dry and wet compression test on the affected cylinder.
- Seek professional mechanic assistance: Persistent electronic issues require advanced diagnostic tools such as an oscilloscope or bidirectional scanner. Professional diagnostic fees typically range from $100 to $250, while advanced repairs can add $200 to $800 depending on the underlying root cause.
Conclusion
Replacing ignition coils is a manageable maintenance task that typically takes between 30 minutes and two hours depending on engine configuration. Addressing this component promptly restores fuel efficiency and prevents catastrophic catalytic converter damage. According to verified research and automotive service data from leading industry experts, proactive ignition maintenance extends overall engine longevity significantly. As an immediate next step, connect an OBD-II scanner to clear existing diagnostic trouble codes and confirm whether the misfire has been successfully resolved.
❓ Frequently Asked Questions
How long does it take to replace ignition coils on a 4-cylinder engine?
On a typical 4-cylinder engine, ignition coils are easily accessible right on top of the valve cover. This makes the replacement process very fast, usually taking between 20 and 40 minutes for a beginner.
Why do some ignition coils take longer to replace than others?
Engine configuration is the primary factor affecting time. Transversely mounted V6 or V8 engines often place the rear bank of cylinders directly beneath the intake plenum, requiring manifold removal.
Should I disconnect the battery before replacing ignition coils?
Yes, disconnecting the negative battery terminal is a vital safety precaution. It prevents accidental electrical shorts and protects sensitive onboard computer modules while you disconnect electrical harnesses.
How can I tell if my ignition coil actually needs replacement?
Common signs include a severe engine misfire, rough idling, sudden drops in fuel economy, and the check engine light flashing. A diagnostic OBD-II scanner can pinpoint the exact misfiring cylinder.
Should spark plugs be replaced at the same time as ignition coils?
It is frequently recommended to change your spark plugs alongside the coils if they have high mileage. Old or fouled spark plugs can put excessive electrical load on new coils and cause premature failure.
How much do mechanics typically charge for labor to change coils?
Mechanic labor usually ranges from one to two hours of billed time. Depending on local shop rates and vehicle complexity, labor costs generally fall between $100 and $300.