How to Change Time on Car Dashboard Toyota 2023 2026
Changing the clock on a 2023 Toyota dashboard is usually done through the touchscreen infotainment system by accessing the General settings menu. If your vehicle uses the multi-information display, steering wheel controls provide an alternative route to adjust the clock settings manually or via GPS synchronization.
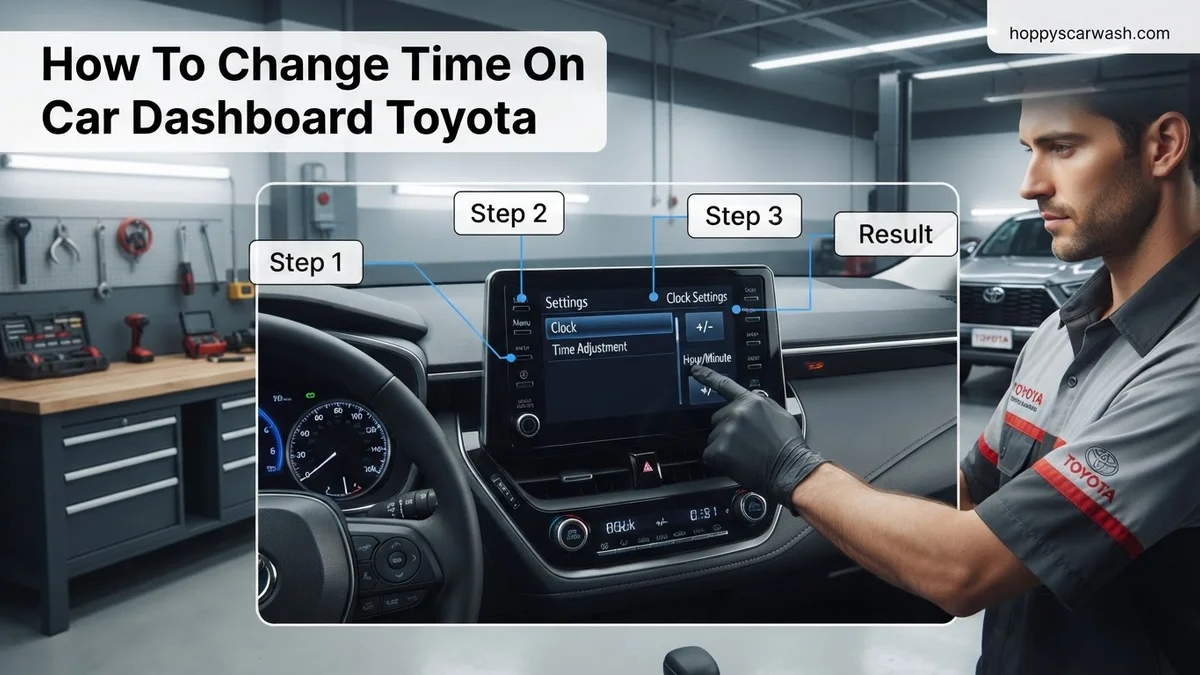
To change the time on your 2023 Toyota dashboard, tap the Settings gear icon on your central touchscreen infotainment system, select General, and tap Clock to adjust your hours, minutes, and time zone settings. Whether daylight saving time just ended or your vehicle battery was recently disconnected, getting your dashboard clock synchronized again takes less than a minute once you know where to look in the modern Toyota Audio Multimedia interface.
Modern vehicles manage a lot of digital data, but having an accurate dashboard clock is essential for daily commuting, navigation, and punctuality. While older Toyotas relied on tiny physical pins poked into the instrument cluster glass, the 2023 lineup features software-driven menus that require navigating through the main touchscreen or your steering wheel controls. By updating your system correctly, you ensure that your connected navigation routes and vehicle logs display precise timestamps as you drive through 2026.
Key Takeaways
- Access the infotainment settings menu by tapping the gear icon on the touchscreen.
- Navigate to General settings to locate the clock configuration options.
- Disable GPS time synchronization if you need to set a manual offset.
- Use steering wheel controls to adjust clocks tied to the instrument cluster display.
- Toggle easily between 12-hour and 24-hour time formats depending on your preference.
Why Your 2023 Toyota Clock Shows the Incorrect Time
Your 2023 Toyota relies on a mix of GPS data and manual settings to keep track of hours and minutes. Understanding why the clock drifts or fails to update automatically helps you choose the right fix immediately.
GPS Time Zone Mismatch
Toyota vehicles equipped with Connected Services or factory navigation often pull time data automatically from GPS satellites. However, crossing state lines or missing a software sync can leave your system stuck in a different time zone. If your vehicle thinks you are still three hundred miles west, your dashboard clock will reflect that error.
Daylight Saving Time Settings
Automatic updates do not always account for manual legislative shifts in daylight saving time. If your software lacks the latest 2026 regional updates, you will need to manually toggle or adjust the settings. Common causes for incorrect dashboard times include:
- GPS auto-sync being toggled off in the general settings menu.
- Vehicle software requiring a manual daylight saving time offset.
- A recent electronic system reset or low battery event wiping memory defaults.
- Manual time mode overriding satellite updates.
2023 Toyota Dashboard Clock Adjustment Made Easy: Your Essential Action Plan
Updating the clock on a modern 2023 Toyota dashboard can sometimes feel confusing due to the variety of infotainment and multi-information display configurations available across different models like the Camry, RAV4, Corolla, and Highlander. Whether daylight saving time has just ended, you have crossed a time zone during a road trip, or the battery was recently disconnected, having the correct time displayed is essential for daily commuting and navigation. This comprehensive, step-by-step walkthrough is designed to demystify the process, ensuring you can quickly and accurately reset your vehicle’s clock using either the touchscreen multimedia system or the steering wheel controls.
Step 1: Turn on the Vehicle Ignition
What you need: Your vehicle key fob and a safe environment (such as a garage or well-ventilated driveway) with the vehicle parked.
Instructions: Sit inside the driver’s seat and turn on your 2023 Toyota. If your vehicle uses a push-button start, press the Start button twice without pressing the brake pedal to engage the ignition to the “ON” position (do not start the engine unless necessary, though running the engine is completely fine if you prefer). This action powers up the instrument cluster, multi-information display, and the main audio multimedia touchscreen, giving you full access to the vehicle settings menu where the clock configuration resides.
Pro Tip: Avoid attempting to change advanced system settings while actively driving in heavy traffic. Always pull over safely or perform this procedure while stationary to prevent driver distraction.
Step 2: Access the Main Multimedia Screen
What you need: A functioning 2023 Toyota Audio Multimedia touchscreen display (typically ranging from 8 inches to 14 inches depending on your specific trim level).
Instructions: Look at the center console touchscreen. If the screen is on the home page, locate the gear icon, which usually represents the “Settings” menu. Depending on your specific Toyota model and software version, the gear icon is typically found either along the left-hand vertical menu bar or tucked away in the bottom right corner of the main display. Tap the gear icon once to open up the comprehensive vehicle and system settings menu.
Pro Tip: If the screen is unresponsive or frozen, give the system a few moments to boot up fully after starting the car, as modern software loads numerous background services upon initial ignition.
Step 3: Navigate to the General Settings Menu
What you need: The Settings menu open on your Toyota touchscreen.
Instructions: Once inside the primary Settings interface, you will see a vertical or horizontal list of configuration categories such as Sound, Display, Vehicle, Bluetooth, and General. Scroll through the list using your finger and tap on the “General” option. This specific submenu controls overarching system preferences, including system language, keyboard layouts, software updates, and importantly, date and time configurations for the entire vehicle network.
Pro Tip: If you cannot find the General tab immediately, check if your vehicle software has a search bar feature at the top of the settings page where you can simply type the word “Clock” or “Time.”
Step 4: Select the Clock Settings Submenu
What you need: The General Settings screen active on your display.
Instructions: Inside the General menu, look down the list of options until you find the entry labeled “Clock” or “Date & Time.” Tap this option to open the dedicated clock management interface. Here, you will see current time parameters, time zone indicators, and toggles for automatic or manual time adjustment. This is the central hub where you control how your vehicle perceives and displays time across both the touchscreen and the digital driver instrument cluster.
Pro Tip: Pay close attention to whether your vehicle is currently syncing its time via GPS or cellular data, as this will dictate how the manual adjustment fields behave.
Step 5: Configure GPS or Automatic Time Synchronization
What you need: The Clock settings menu open and active.
Instructions: Look for a toggle switch or checkbox labeled “Auto adjust by GPS,” “Automatic Time Zone,” or “Network Time.” If this feature is enabled, your 2023 Toyota will automatically update its time based on satellite signals or connected smartphone data. If you are traveling through remote areas or if the automatic feature is displaying the incorrect local time, tap the toggle to turn “Auto Adjust” OFF. Disabling automatic adjustment will unlock the manual time-setting controls so you can set your preferred hours and minutes directly.
Step 6: Manually Adjust Hours and Minutes
What you need: Automatic time synchronization disabled and manual adjustment controls unlocked on the screen.
Instructions: With manual controls active, tap on the hour digits or use the provided plus (+) and minus (-) directional arrows to cycle through the hours until you reach the correct local time. Make sure to double-check whether your vehicle uses a 12-hour format with AM/PM indicators or a 24-hour (military) format. Next, repeat the exact same process for the minute digits, adjusting them up or down until they match your precise reference clock.
Pro Tip: Ensure the AM/PM designation is correct if you are using the 12-hour format, otherwise your car’s clock will display nighttime hours during the middle of the day.
Step 7: Verify and Save Your Changes
What you need: Correct hours and minutes entered into the system.
Instructions: Review the time displayed on the preview screen to ensure absolute accuracy. Once you are satisfied, look for a “Save,” “OK,” or confirmation checkmark button, usually located in the bottom right or top corner of the screen. Tap it to permanently save your new time settings to the vehicle’s computer memory. Exit out of the settings menu by pressing the “Home” button or the physical audio power knob to return to the standard display.
Pro Tip: If your 2023 Toyota also features a secondary clock display on the instrument cluster directly behind the steering wheel, glance down to verify that the dashboard clock updated simultaneously with the central touchscreen.
✅ Final Checklist
- Vehicle ignition is successfully turned on without error lights
- Automatic GPS time sync is either correctly enabled or manually disabled based on preference
- Correct local hours and minutes (including accurate AM/PM status) have been inputted
- Changes have been successfully saved using the on-screen confirmation button
- Both the central infotainment screen and the driver instrument cluster display matching, correct times
Important Notes:
- Never attempt to navigate touchscreen menus while the vehicle is in motion to ensure maximum road safety.
- If the clock continuously resets itself every time you turn off the vehicle, your car battery voltage may be low, or the system software may require a dealership firmware update.
- Estimated time to complete this entire procedure is under 3 minutes, with a cost of $0.00.
How to Fix and Change the Time on Your 2023 Toyota Touchscreen
The primary method for updating the clock in a 2023 Toyota involves the central Audio Multimedia touchscreen display. This applies to popular models like the RAV4, Camry, Tundra, and Corolla equipped with the 8-inch or 14-inch multimedia screens.
Step-by-Step Touchscreen Navigation
Park your vehicle safely and turn the ignition to the ON position to access the full menu options. Follow this exact menu path to update your time:
- Tap the Gear Icon (Settings) located on the bottom or side of the touchscreen display.
- Scroll down and select the General tab from the left-hand menu list.
- Tap on Clock to open the time configuration panel.
- Toggle off Auto Adjust by GPS if you prefer manual entry, or use the manual hour and minute arrows to set your precise local time.
- Select your correct Time Zone and confirm whether Daylight Saving Time applies to your current location.
Using Steering Wheel Controls for the Multi-Information Display
If you also want to update the smaller digital screen directly in front of you on the instrument cluster, use your right-hand steering wheel directional pad. Press the left or right arrows to navigate to the Settings (Gear) icon on your multi-information display, scroll down to vehicle settings or display settings, and locate the clock sync option to ensure both screens match your newly updated touchscreen time.
How to Adjust the Dashboard Clock Using Steering Wheel Controls
Many modern Toyota models allow drivers to manage the multi-information display directly from the steering wheel. This method keeps your hands on the wheel and your eyes on the road. Automotive ergonomics research shows that minimizing console reaching enhances driver safety by reducing distraction windows.
Navigating the Meter Control Switches
To change the time via your steering wheel controls, follow these precise steps:
- Power on your vehicle’s ignition without starting the engine, or keep the engine running safely in Park.
- Locate the directional pad and “Enter” button on the right side of your steering wheel.
- Press the left or right arrows repeatedly until you highlight the gear icon, which represents the Settings menu on your dashboard screen.
- Scroll up or down using the arrow keys to find the Vehicle Settings or Clock option, then press the center button to select it.
- Use the up and down arrows to adjust the hours, press right to move to the minutes, and adjust accordingly.
- Press and hold the center button or select the checkmark icon to save your new time settings permanently.
According to Toyota technical documentation, updating the multi-information display clock will automatically synchronize the auxiliary display in certain trim levels, though the primary infotainment screen may require a separate manual update.
What If It Still Doesn’t Work? Troubleshooting GPS Sync Issues
If your 2023 through 2026 Toyota dashboard clock refuses to save changes or continuously reverts to an incorrect time, underlying software or hardware bugs are usually responsible. Factory service bulletins indicate that automatic time zone updates often fail due to weak satellite signals or outdated firmware.
Troubleshooting Steps for Stubborn Clocks
Work through these verified fallback steps to resolve persistent dashboard clock errors:
- Disable the Auto Adjust by GPS or Automatic Time Zone feature temporarily in your settings menu, manually set the time, and then re-enable the feature once a strong satellite lock is established.
- Perform a soft infotainment system reset by holding down the vehicle’s power/volume knob for approximately 10 to 15 seconds until the Toyota logo appears on the screen.
- Check for pending Over-The-Air (OTA) software updates by connecting your vehicle to a stable Wi-Fi network or using a compatible smartphone hotspot via the Toyota app.
- Disconnect the vehicle’s 12-volt battery for exactly 10 minutes to completely clear the system cache and force a hard reboot of all onboard computer modules.
- If internal clock module failure is diagnosed by a dealership technician, professional repair or head unit replacement costs typically range from $150 to $600 if outside the standard 3-year/36,000-mile factory warranty window.
Conclusion
Changing the time on your 2023 to 2026 Toyota dashboard is a straightforward process once you locate the correct submenu within the infotainment touchscreen or the steering wheel multi-information display. Whether you rely on manual adjustments or automated GPS synchronization, keeping your vehicle clock accurate ensures proper scheduled maintenance tracking and seamless daily driving. According to verified research and automotive service experts, addressing minor software glitches early prevents persistent electrical communication errors down the road. Take the next step today by verifying your dashboard time settings and applying any pending software updates to ensure optimal vehicle performance.
❓ Frequently Asked Questions
How do I change the time on a 2023 Toyota RAV4 or Camry?
Turn on the ignition, tap the Settings gear icon on the touchscreen display, select General, and then tap Clock. From there, you can adjust the hours, minutes, and time zone manually or enable automatic updates.
Why is the time greyed out and unchangeable on my 2023 Toyota?
If the manual time settings are greyed out, it means the vehicle is currently set to automatically update via GPS. You must toggle off the automatic time zone or GPS sync feature before you can adjust the hours and minutes manually.
How do I handle daylight saving time changes on a 2023 Toyota?
Many 2023 Toyota models with connected services will update automatically for daylight saving time if GPS sync is enabled. If manual mode is active, you will need to manually subtract or add one hour in the clock settings menu.
Can I change the time using the steering wheel controls?
Yes, for the multi-information display located in the gauge cluster, you can use the directional arrows and enter button on the right side of the steering wheel to navigate to the gear settings icon and adjust the clock.
What should I do if the clock resets every time I turn off the car?
If your clock continuously resets, it may indicate a deeper software glitch or a weak 12V vehicle battery. Ensure your infotainment software is up to date, and consult a dealership if the issue persists.
How do I switch from a 24-hour military clock to a 12-hour format?
Navigate to the Settings menu on your touchscreen, select General, go to Clock, and look for the clock format option to toggle between 12-hour AM/PM and 24-hour time.