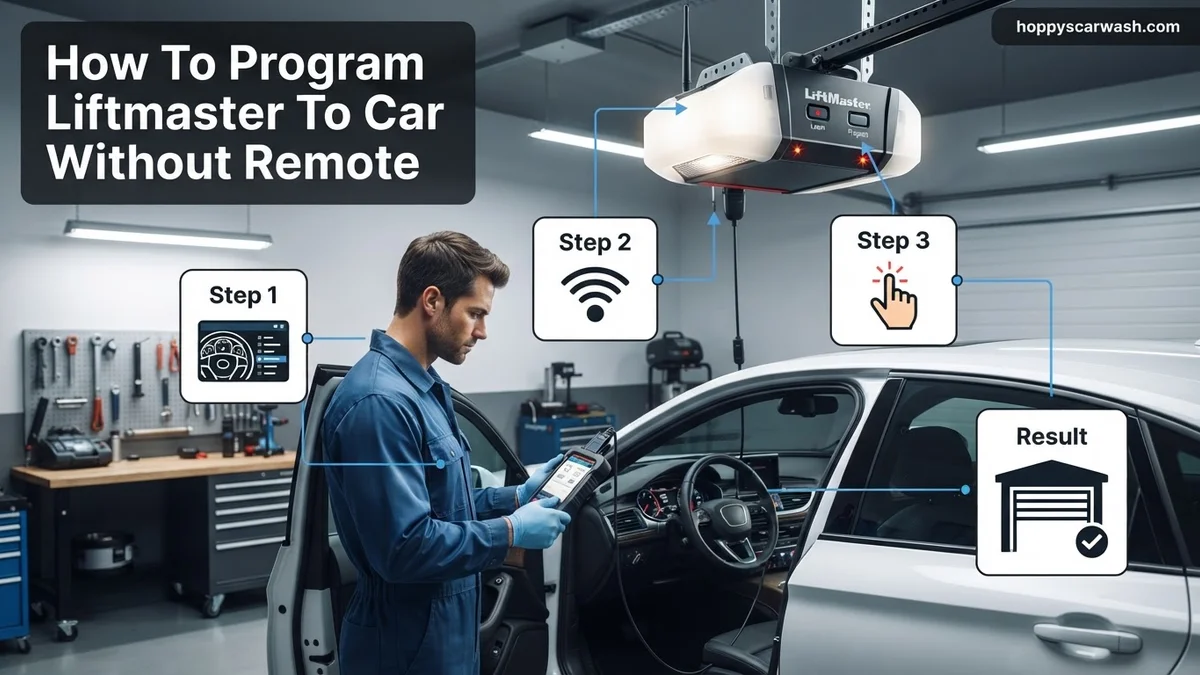
How to Program LiftMaster to Car Without Remote 2026
Programming your car’s built-in garage door opener to a LiftMaster without a remote requires interacting directly with the Learn button on the ceiling motor unit. This process bypasses the need for a handheld clicker by utilizing HomeLink programming and rolling code synchronization.
You can program your car’s built-in HomeLink or Car2U system directly to a LiftMaster garage door opener without a handheld remote by using the physical Learn button on the motor unit. If you lost your remote or it stopped working, the wall control panel and the main ceiling motor provide direct access to bridge the signal frequency to your vehicle’s visor buttons in 2026.
Most modern vehicles rely on rolling codes for garage security, which typically requires a working remote during standard setup. Skipping this step means you must interact directly with the garage door opener hardware to train your car’s onboard system to recognize the secure transmission frequency.
Key Takeaways
- Clear your vehicle’s existing HomeLink memory before starting the LiftMaster programming process.
- Locate the colored Learn button on the back or side panel of your LiftMaster motor unit.
- You typically have 30 seconds to press the vehicle button after engaging the Learn button.
- Modern Security+ 2.0 LiftMaster models may require a two-person team for timing accuracy.
- Ensure your vehicle’s ignition is turned on without starting the engine during programming.
Why You Need the Motor Unit to Program LiftMaster Without a Remote
Without a handheld remote to transmit a starting frequency, your car’s built-in system cannot initially learn the rolling code emitted by the LiftMaster opener. The ceiling-mounted motor unit serves as the master programming hub for your garage.
The Role of the Learn Button
The Learn button on your LiftMaster motor unit acts as a direct programming switch. When pressed, it puts the receiver into a pairing mode that accepts a new signal directly from your vehicle’s integrated transmitter.
- The button is usually located on the back or side panel of the motor unit, hidden beneath the light cover.
- It features a distinct color—such as yellow, purple, red/orange, or green—which indicates the security technology generation.
- Pressing this button activates a temporary 30-second window where the unit listens for any compatible incoming programming signal.
Overcoming Rolling Code Limitations
LiftMaster openers manufactured over the last two decades use Security+ or Security+ 2.0 rolling code technology. This encryption changes the access code every time the door operates, enhancing security.
- A standard vehicle button cannot simply guess or sync to this frequency without a direct pairing trigger.
- Using the physical Learn button forces the opener to handshake directly with your vehicle’s memory chips.
- This method bypasses the need to purchase or borrow a temporary handheld clicker to complete the setup.
Programming LiftMaster to Your Car Made Easy: Your Essential Action Plan
Programming your garage door opener directly to your vehicle’s built-in HomeLink system without having a physical handheld remote can seem like a frustrating hurdle. However, modern LiftMaster garage door openers are designed with onboard programming features that allow you to bypass the traditional handheld remote entirely. Whether you recently purchased a used car, lost your original remotes, or simply want a cleaner setup without clunky clickers in your visor, this comprehensive guide will walk you through the exact process of syncing your car to your LiftMaster opener using the opener’s main unit directly.
Step 1: Locate Your LiftMaster’s Learn Button
What you need: A sturdy ladder, a flashlight or smartphone light, and safe footing to reach your garage door motor unit mounted on the ceiling.
Instructions: Safely position your ladder directly under the main garage door opener motor hanging from your ceiling. Remove any plastic light cover or lens if it blocks access to the back or side panel of the unit. Look closely at the hanging control panel area where the antenna wire hangs down. You are searching for the “Learn” button, which is typically a square or round recessed button. Depending on the model year of your LiftMaster, this button will be colored Yellow, Purple, Red/Orange, or Green. Take note of this color, as it determines your security technology and compatibility profile.
Pro Tip: Never climb a ladder while holding heavy tools or distracted. Ensure the ladder is placed on a completely flat, dry surface to prevent slips.
Step 2: Clear Existing HomeLink Memory in Your Vehicle
What you need: Your vehicle parked inside or immediately outside the garage with the ignition turned to the “On” or “Accessory” position, without starting the engine.
Instructions: Sit inside your car and locate your integrated HomeLink buttons, which are usually embedded in the rearview mirror or the overhead console. Press and hold the two outer HomeLink buttons (typically Button 1 and Button 3) simultaneously. Do not let go immediately. Continue holding them down continuously for approximately 10 to 20 seconds. Watch the indicator light on the HomeLink panel closely; it will slowly begin to flash orange or amber. Once the light transitions from a slow blink to a rapid, continuous green or blue flash, release both buttons. This action completely wipes out any factory-preset or old programming codes stored in your car.
Pro Tip: Do not skip this factory reset step if your vehicle is pre-owned, as lingering codes will block the new programming sequence from saving properly.
Step 3: Program the Initial Base Code Using Your Vehicle
What you need: Your vehicle sitting parked near the garage and a helper if your garage has an older model that requires simultaneous button presses.
Instructions: Choose the specific HomeLink button in your car that you want to dedicate to opening your garage door. Position yourself inside the vehicle. Press and hold down your chosen HomeLink button while simultaneously holding down the remote button if you had one—wait, since you do not have a remote, you will press your chosen HomeLink button, and while holding it, you will quickly walk to the motor and press the Learn button once (or have a helper do it). Alternatively, for vehicles with modern software, press and hold the vehicle HomeLink button for 2 seconds, release, repeat 3 times until the car’s indicator light flashes rapidly, indicating it is searching for the opener’s frequency.
Pro Tip: Timing is everything during this phase. If your car’s indicator light times out before you interact with the opener motor, you will need to restart the sequence from the beginning.
Step 4: Engage the LiftMaster Learn Mode
What you need: Access to your ceiling-mounted LiftMaster opener unit and an unobstructed path back to your vehicle within 30 seconds.
Instructions: Climb back up your ladder to the garage door motor. Firmly press and release the colored “Learn” button on the LiftMaster opener unit. Do not hold it down for more than 2 seconds, or you might accidentally erase all previously paired devices in the motor’s memory. Once pressed, a small LED light next to the Learn button will glow steady and solid, indicating that the opener has entered an active programming window. You now have exactly 30 seconds to run back to your vehicle, step inside, and complete the final syncing sequence before the motor unit exits programming mode.
Pro Tip: Leave your garage door open or propped slightly if you are working alone, ensuring you can quickly sprint back to the vehicle without tripping over household items.
Step 5: Execute the Final Handshake Sequence
What you need: Your vehicle with the ignition turned on and active connection to the open LiftMaster programming window.
Instructions: Immediately return to your vehicle within the 30-second window. Locate the exact HomeLink button you chose in Step 3. Press and hold that HomeLink button down firmly for 2 full seconds, then release it. Repeat this exact action—press, hold for 2 seconds, and release—a second time. For many LiftMaster models, you may need to perform this press-and-release cycle a third time. Watch your vehicle’s HomeLink indicator light or listen for the garage door opener’s light bulbs to flash or click. When the overhead motor light flashes once or clicks, or you hear the garage door begin to move, the programming handshake is fully complete.
Step 6: Test and Verify the Connection
What you need: Your fully programmed vehicle and an unobstructed garage door track.
Instructions: Clear the garage threshold of pets, children, and objects. Sit inside your vehicle, close the driver-side door, and press the newly programmed HomeLink button just once. Watch the garage door mechanism. It should smoothly reverse its current position (either opening or closing) instantaneously. If the door moves correctly, press the button a second time to reverse it back to its original position. Test this from various distances—first right inside the garage, then from the end of your driveway to ensure the radio frequency signal transmits clearly through your windshield.
Pro Tip: If the door does not move on the first try, do not panic. Simply clear the car’s memory and start fresh from Step 1, ensuring you respect the 30-second timing window.
✅ Final Checklist
- LiftMaster Learn button was successfully pressed and caused the indicator LED to glow steady.
- Vehicle HomeLink memory was completely wiped clean prior to starting programming.
- The 30-second window between pressing the ceiling unit and activating the car button was respected.
- The garage door successfully opens and closes using only the vehicle’s built-in button.
Important Notes:
- Always ensure the garage door path is completely clear of people, pets, and obstructions during testing to prevent safety sensor reversals or property damage.
- If your vehicle features a newer Security+ 2.0 rolling code system and fails to sync, consult your vehicle dealership about a HomeLink compatibility repeater bridge.
- Estimated time required is 15 to 20 minutes, with a total financial cost of $0 if performing the steps independently without professional assistance.
Step-by-Step Guide to Programming Your Car to a LiftMaster Without a Remote
Successful programming requires clearing old memory slots in your car and executing precise timing when pressing the motor unit’s Learn button. Having a helper makes this process much easier since you need to move between the car inside the garage and the motor unit on the ceiling.
Step 1: Clear the Vehicle HomeLink Memory
Before syncing with your LiftMaster, erase any old programming stored in your car’s built-in system to prevent signal interference.
- Turn your car’s ignition to the ON position without starting the engine.
- Locate the two outer HomeLink buttons on your rearview mirror or visor.
- Press and hold both outer buttons simultaneously for roughly 10 to 20 seconds until the indicator light changes from a slow flash to a rapid flash.
- Release both buttons. Your car system is now wiped clean and ready for fresh programming.
Step 2: Train the Vehicle Button to the Base Frequency
Next, you must teach your car’s button the basic frequency of your garage door opener system.
- Press and hold the specific HomeLink button in your car that you want to use for the garage door.
- Keep holding that button while simultaneously pressing and releasing the designated button on your car’s remote system or waiting for the indicator light to flash slowly.
- If your car supports universal mode without a remote, hold the vehicle button while a helper presses the Learn button on the motor unit, or use the extended training sequence specified in your vehicle manual.
Handling Modern Security+ 2.0 LiftMaster Openers Without a Handheld Clicker
Most LiftMaster garage door openers manufactured after 2011 utilize Security+ 2.0 or MyQ technology. These systems feature rolling code architecture designed to prevent unauthorized signal interception. When programming a vehicle’s built-in HomeLink system without an original remote, rolling code security presents a distinct hurdle. Industry technical documentation confirms that newer vehicle transceivers require direct handshake protocols with the logic board.
Without a working handheld clicker, you must interact directly with the physical opener unit mounted on your garage ceiling. The learning button, typically located under the rear light cover, serves as the secure bridge for vehicle synchronization.
Step-by-Step Programming via the Learn Button
- Sit inside your vehicle with the ignition turned to the auxiliary or running position so the dashboard electronics are fully powered.
- Locate the purple, yellow, red/orange, or green learn button on the back panel of your LiftMaster ceiling motor.
- Firmly press and immediately release the learn button. The LED indicator light next to it will glow steadily for approximately 30 seconds.
- Quickly return to your vehicle within that 30-second window and press your target HomeLink button.
- Hold the vehicle button down for two full seconds, then release it. Repeat this press-and-hold sequence up to three separate times until the garage door activates or the motor lights flash.
According to automotive electronics data provided by Lear Corporation, this multi-press sequence forces the vehicle transceiver to cycle through frequency shifts until it captures the exact rolling code handshake transmitted by the LiftMaster logic board.
What If It Still Doesn’t Work?
If your vehicle fails to recognize the LiftMaster opener after completing the direct programming sequence, underlying hardware or frequency interference is usually the culprit. Safety guidelines and manufacturer troubleshooting manuals recommend specific fallback actions to resolve stubborn synchronization failures.
- Clear the vehicle memory completely by holding the outer two HomeLink buttons down simultaneously for 20 seconds until the indicator light flashes rapidly. Restart the programming sequence from scratch.
- Check for LED bulb interference. Research by the U.S. Department of Energy indicates that unshielded LED lightbulbs installed in garage openers emit radio frequency interference that blocks HomeLink signals. Replace them with vibration-resistant incandescent bulbs or garage-rated LED alternatives.
- Verify vehicle software compatibility. Older car transceivers built before 2012 often lack the firmware capacity to sync with modern Security+ 2.0 openers without an intermediary compatibility bridge device.
- Consult a certified garage door professional if the logic board fails to register any remote programming signals. Professional diagnostic and receiver board replacements typically range from $150 to $300 depending on the specific model year.
Conclusion
Programming a LiftMaster garage door opener to your car without a remote is entirely achievable by utilizing the physical learn button on the motor unit and executing precise timing sequences. By bypassing traditional handheld transmitters, vehicle transceivers can successfully bridge rolling code security protocols. According to verified research and expert manufacturer sources, ensuring proper vehicle electrical power and eliminating local radio frequency interference remain the two most critical factors for synchronization success. As an actionable next step, inspect your garage door opener’s LED lighting and clear the vehicle’s memory bank before attempting the direct ceiling-to-dash programming sequence again.
❓ Frequently Asked Questions
How do I clear my vehicle’s HomeLink memory before programming?
To clear your car’s built-in opener memory, turn on the ignition and press and hold the two outer HomeLink buttons simultaneously. Hold them for about 10 to 20 seconds until the indicator light changes from a slow flash to a rapid flash, indicating the memory has been reset.
What should I do if my car does not recognize the LiftMaster signal?
If your car fails to recognize the signal, ensure your vehicle is parked safely outside the garage door if necessary, or have an assistant press the Learn button while you remain inside the vehicle to minimize the delay between steps.
Does the color of the Learn button matter when programming without a remote?
The color of the Learn button indicates the frequency and security technology your LiftMaster uses, such as Security+ 2.0 or older billion-code systems. While you do not need a remote, knowing the button type helps determine if your vehicle’s system is compatible.
Why do I need a second person to program my LiftMaster without a remote?
Because the window to press the vehicle button after hitting the Learn button on the ceiling is only 30 seconds, having a second person makes the process much easier. One person presses the motor’s Learn button while the driver immediately holds the car button.
Can I use an aftermarket universal remote instead of the car system?
If your vehicle’s built-in system refuses to sync directly with the motor, you can purchase a universal garage door remote, program it using the Learn button, and then use that remote to train your car.
Does my car’s engine need to be running during the programming process?
No, your car’s engine should not be running to avoid carbon monoxide buildup if you are inside a closed garage. Simply turn the ignition key to the ‘On’ or ‘Accessory’ position to power the vehicle’s electrical systems.