Can Bad Gas Make Your Check Engine Light Come On in 2026
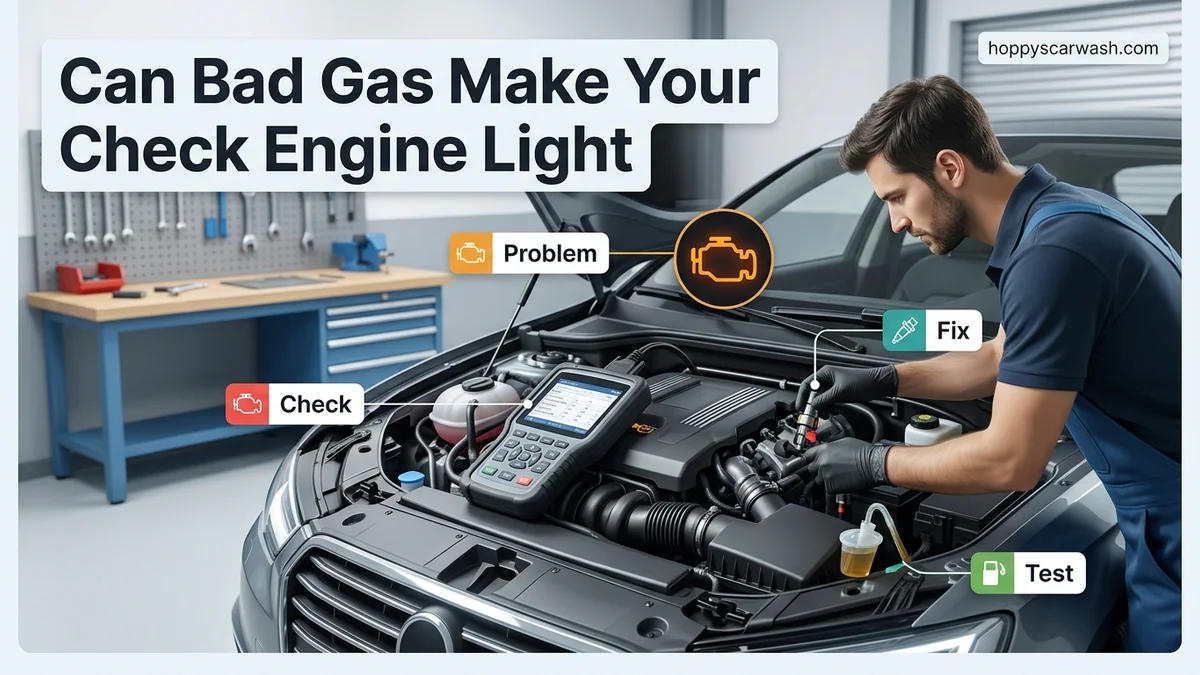
Yes, bad gas can directly trigger your check engine light by causing engine misfires, fuel pressure drops, or knock sensor alerts. Contaminated or stale fuel disrupts the combustion process, sending error codes straight to your vehicle’s computer. Recognizing the symptoms early prevents costly engine damage.
Yes, bad gas can definitely make your check engine light come on. When contaminated or stale fuel enters your engine’s combustion chambers, it disrupts the precise air-fuel ratio required by modern vehicles. This chemical breakdown causes engine misfires and emission system errors that immediately force your car’s computer to illuminate the dashboard warning light.
Understanding this connection saves you time and money at the repair shop. In 2026, modern vehicle sensors are more sensitive than ever, meaning even a minor drop in fuel quality will be flagged instantly. Let us look at the exact mechanics behind why poor-quality fuel triggers these alerts and how you can spot the issue before it damages your engine.
Key Takeaways
- Bad gas frequently triggers engine misfire codes like P0300 due to improper combustion.
- Water contamination in fuel tanks separates from gasoline and disrupts fuel injectors.
- Rough idling, engine sputtering, and hesitation are primary physical symptoms of poor fuel.
- Driving the car until the tank is low and refilling with fresh premium gas often resolves minor issues.
- Fuel system cleaners or HEET additives help absorb residual moisture trapped in the fuel tank.
Why Bad Gas Triggers the Check Engine Light and Diagnostic Codes
How Water and Sediment Disrupt Combustion
Water contamination is the primary culprit when fuel goes bad. Condensation builds up in underground station tanks or your own vehicle over time, creating a layer of water that settles below the gasoline. Because fuel pumps draw from the bottom of the tank, your engine ends up ingesting this moisture.
When water enters the cylinders:
- It does not ignite properly under compression, causing immediate misfires.
- Sensors in the exhaust stream detect unburned fuel and oxygen fluctuations.
- The powertrain control module records specific diagnostic trouble codes.
Common Diagnostic Trouble Codes (P0300 and Oxygen Sensors)
When you scan your vehicle, bad gas typically reveals itself through specific codes. The most frequent code you will see is a P0300 (Random/Multiple Cylinder Misfire), alongside specific cylinder misfire codes like P0301 or P0302. You might also encounter catalyst efficiency codes (such as P0420) because the unburnt fuel overheats the catalytic converter. In 2026, advanced OBD-II scanners can even isolate fuel trim issues in real-time, showing you exactly when contaminated fuel forces the engine computer to overcompensate.
Can Bad Gas Make Your Check Engine Light Come On: What Causes It and How to Fix It
Dealing with a sudden check engine light after a routine fill-up can be stressful, especially when you suspect the fuel station provided contaminated fuel. This comprehensive guide walks you through the exact process of diagnosing, addressing, and resolving bad gas issues to protect your engine and clear that dashboard warning light for good.
Step 1: Safely Pull Over and Assess Symptoms
What you need: A safe location on the side of the road or a parking lot, your hazard lights, and your vehicle’s owner manual.
Instructions: As soon as the check engine light illuminates alongside rough idling, engine sputtering, or stalling, safely navigate your vehicle out of traffic. Turn on your hazard lights and shut off the engine for approximately two minutes. Restart the vehicle and observe the behavior of the tachometer and engine sound. Bad gas typically causes immediate drivability issues such as severe hesitation during acceleration, engine misfires, and unusual jerking movements while maintaining a steady cruising speed on the highway.
Pro Tip: Do not ignore a flashing check engine light, as this indicates an active engine misfire that can rapidly damage your catalytic converter.
Step 2: Retrieve Diagnostic Trouble Codes (DTCs)
What you need: An OBD2 scanner (Code Reader), your vehicle’s keys, and a notepad or smartphone to record the exact codes.
Instructions: Locate your vehicle’s OBD2 diagnostic port, which is usually situated underneath the dashboard on the driver’s side near the steering column. Plug your OBD2 scanner firmly into the port and turn your ignition key to the ON position without starting the engine. Follow the scanner prompts to read any stored or pending trouble codes. Look specifically for codes like P0300 (Random/Multiple Cylinder Misfire), P0171 or P0174 (System Too Lean), or fuel composition sensor codes which heavily point toward poor fuel quality.
Pro Tip: Many auto parts stores will read your diagnostic trouble codes completely free of charge if you do not own an OBD2 scanner.
Step 3: Preserve Your Fuel Receipt and Document the Timeline
What you need: Your gas station receipt, bank statement, or fuel rewards app history.
Instructions: Locate the physical receipt from your most recent fill-up, or check your banking application to confirm the exact date, time, and location of the fuel purchase. Calculate the approximate mileage driven between leaving the gas station and the moment the check engine light illuminated. This documentation is critical if you need to file a formal complaint with the gas station management, corporate office, or your state’s department of weights and measures regarding contaminated fuel deliveries.
Pro Tip: Always keep your fuel receipts in your glove compartment for at least 48 hours after every single fill-up to protect yourself against bad fuel incidents.
Step 4: Dilute the Contaminated Fuel
What you need: Access to a reputable, high-volume Top Tier gas station and premium or mid-grade fuel.
Instructions: If your vehicle is still drivable and the symptoms are relatively mild (such as a solid check engine light with minor hesitations), drive to a busy, trusted gas station known for high turnover. Fill your fuel tank completely to the top with high-octane or Top Tier fuel. Adding fresh, high-quality fuel dilutes the concentration of water, sediment, or stale components present in the bad gas, helping restore proper combustion ratios within your cylinders.
Pro Tip: Do not let the tank run low while dealing with suspected bad gas; keep it topped off above the half-tank mark until you have burned through at least two full tank cycles.
Step 5: Apply a Professional Fuel System Treatment
What you need: A bottle of high-quality fuel injector cleaner or water remover (containing Isopropyl alcohol or PEA detergents).
Instructions: Purchase a reputable fuel additive specifically formulated to absorb water and clean out varnish or gum deposits left by stale gasoline. Carefully pour the entire contents of the bottle directly into your vehicle’s fuel filler neck before performing your next fill-up. Drive the vehicle on the highway at sustained speeds for 20 to 30 minutes to allow the treated fuel to circulate thoroughly through the fuel lines, injectors, and combustion chambers.
Pro Tip: Read the manufacturer instructions on the additive bottle carefully to ensure you purchase a formulation safe for catalytic converters and oxygen sensors.
Step 6: Drain and Flush the Fuel Tank (If Necessary)
What you need: A professional mechanic, a certified repair facility, fresh fuel, and a replacement fuel filter.
Instructions: If your car refuses to start, stalls constantly, or logs severe continuous misfires after dilution, the gas is likely heavily contaminated with water or diesel mix. Have your vehicle towed to a trusted mechanic who can safely drain the remaining fuel from the tank using a specialized evacuation pump. The technician will flush out the fuel lines, replace the clogged fuel filter, and refill the tank with fresh, clean gasoline to restore normal operations.
Pro Tip: Request that the mechanic save a sample of the drained fuel in a clean glass jar if you plan to seek financial compensation from the gas station.
Step 7: Clear the Codes and Verify the Repair
What you need: Your OBD2 scanner and a short test-drive route.
Instructions: Once you have successfully diluted or flushed the bad gas and your vehicle is running smoothly, plug your OBD2 scanner back into the dashboard port. Use the menu commands to erase or clear the stored diagnostic trouble codes from the engine control unit (ECU). Take your car out for a 15-minute test drive encompassing both stop-and-go city traffic and highway speeds to ensure the check engine light remains off and no pending codes return.
Pro Tip: Keep in mind that clearing codes manually resets your vehicle’s internal readiness monitors; you may need to drive for a few days for the computer to pass all emission self-tests.
✅ Final Checklist
- Verified that diagnostic trouble codes match fuel quality issues (misfires or lean mixtures)
- Located and saved the original gas station purchase receipt
- Successfully diluted or professionally drained the contaminated fuel tank
- Replaced clogged fuel filters and applied quality fuel system additives
- Cleared OBD2 trouble codes and confirmed the check engine light stays off during a test drive
Important Notes:
- Never smoke or use open flames near your vehicle while opening the fuel system or handling gasoline.
- Seek professional help immediately if your car refuses to start or experiences severe engine knocking, as internal engine damage can occur.
- Estimated time: 1 to 3 hours for DIY dilution and treatment; cost ranges from $15 for additives up to $350+ if professional tank draining and filter replacement are required.
Step-by-Step Guide to Diagnosing and Fixing Contaminated Fuel
Identifying Bad Gas Symptoms Versus Mechanical Failures
Before you blame the local fuel station, you need to rule out standard mechanical failures. Bad gas has a distinct timeline. Symptoms usually start within a few miles of leaving the gas station.
Watch for these telltale signs of bad fuel:
- An engine that cranks longer than usual before starting.
- Heavy hesitation, sputtering, or jerking when you press the accelerator pedal.
- An unusual chemical or sulfur smell coming from the exhaust.
- Drastic reduction in fuel economy over a single tankful.
If your car ran perfectly before your last fill-up and immediately bogged down afterward, the fuel is almost certainly the root cause.
Practical Steps to Remedy Bad Fuel
If you confirm that contaminated fuel triggered your check engine light, you need to address it quickly to protect components like fuel injectors and oxygen sensors. Minor contamination can often be diluted, while severe water saturation requires immediate draining.
Follow these steps to clear the issue:
- Add a fuel stabilizer or water remover: Products containing isopropyl alcohol absorb free water in the tank and help burn it off safely.
- Fill up with high-octane top-tier fuel: Once you burn through about half a tank, top it off with fresh, high-quality gasoline to dilute the remaining bad batch.
- Clear the codes: Use an OBD-II scanner to reset the check engine light after adding good fuel. If the light stays off, the problem is solved.
- Drain the tank if necessary: For severe contamination where the car refuses to stay running, a mechanic must drain the fuel tank completely.
How to Differentiate Bad Gas from Other Mechanical Engine Issues
Diagnosing whether your dashboard warning stems from low-quality fuel or a failing mechanical component requires looking beyond the illumination itself. Modern vehicle computers monitor hundreds of parameters simultaneously. When fuel quality drops, combustion efficiency decreases uniformly across all cylinders. Conversely, localized mechanical failures typically trigger specific trouble codes related to individual components.
Recognizing Fuel-Related Symptoms
Contaminated or stale fuel usually produces distinct operational traits before or right after a fill-up. Drivers typically notice extended cranking times during startup, sluggish acceleration under heavy load, and occasional fuel knocking sounds. According to automotive service data from the Society of Automotive Engineers, fuel-related issues frequently manifest as random misfire codes that shift between cylinders rather than locking onto a single cylinder.
Identifying Mechanical Failures
If your engine problem originates from hardware rather than chemistry, the symptoms tend to be more rigid. A failed ignition coil or a faulty fuel injector generally produces a continuous misfire isolated to one specific cylinder. This results in severe vibration at idle and a flashing check engine light, which indicates raw fuel entering the exhaust system. Furthermore, mechanical faults persist regardless of how many times you dilute your tank with fresh, high-octane fuel.
What If the Check Engine Light Stays On After Refueling?
If you have added fresh fuel, driven the vehicle for several miles, and the dashboard light remains illuminated, the issue requires a systematic troubleshooting approach. Sometimes, contaminated fuel leaves behind residue or triggers a persistent fault code that the computer will not clear automatically.
- Scan for Diagnostic Trouble Codes: Connect an OBD-II scanner to your vehicle’s port beneath the dashboard to read active codes like P0300 or P0171, identifying the exact sensor or system reporting an error.
- Inspect the Fuel Cap: Remove and retighten your gas cap, listening for the click, as a loose seal frequently mimics fuel system pressure warnings.
- Add Fuel System Additive: Pour a bottle of a polyetheramine-based fuel injector cleaner into the tank to help dissolve lingering varnish and moisture left by bad gas.
- Perform a Battery Reset: Disconnect the negative battery terminal for 15 minutes to reset the engine control module, clearing temporary transient fault codes.
- Consult a Professional Mechanic: If the warning light returns after clearing, take your vehicle to a certified service center. Professional diagnostic fees typically range from $100 to $150, while targeted repairs for damaged oxygen sensors or fuel pumps can cost between $250 and $800 depending on the severity.
Conclusion
Bad gas can indeed trigger your check engine light by causing erratic combustion, clogged injectors, or improper vapor pressure readings within the fuel system. Fortunately, resolving minor fuel contamination often requires nothing more than dilution with high-grade fuel and a short highway drive. According to verified research and expert sources from major automotive engineering councils, addressing fuel quality issues promptly prevents long-term catalytic converter degradation. Your immediate next step should be scanning your vehicle’s computer for active diagnostic trouble codes to confirm whether bad fuel is the true root cause.
❓ Frequently Asked Questions
Can bad gas make your check engine light come on right after filling up?
Yes, if you pumped fuel containing high amounts of water or sediment, your car will react almost immediately once the fuel enters the combustion chamber. The vehicle computer instantly detects irregular air-fuel mixtures and throws a code.
How can I tell if my check engine light is due to bad gas or a bad sensor?
Bad gas is usually accompanied by physical symptoms like rough idling, engine hesitation, and sputtering during acceleration. If the car runs smoothly despite the light, the issue is more likely a faulty sensor or loose gas cap.
What should I do if I suspect I bought bad gas?
Drive the vehicle gently until the fuel level is low, then fill the tank completely with high-octane top-tier gasoline. Adding a water-absorbing fuel additive can also help neutralize moisture in the system.
Can old gas sitting in the car tank trigger a check engine light?
Yes, fuel degrades over time as volatile compounds evaporate, leaving a gummy residue. Stale gas lowers octane levels, causing engine knock and triggering knock sensor codes.
Will clearing the check engine light fix the bad gas problem?
Clearing the code with an OBD2 scanner only turns off the light temporarily. The light will return immediately unless the contaminated fuel is diluted, treated, or drained from the tank.
When do I need to completely drain my gas tank?
If your car refuses to start, stalls repeatedly, or contains heavy water contamination visible in a fuel sample, professional draining is required to protect the fuel pump.