Where Is The Cabin Air Filter On Ford F150 Where Is 2026
The cabin air filter on a 2021 Ford F150 is located directly behind the glove box inside the main HVAC housing. Accessing it requires simply lowering the glove box door completely by disconnecting its side stops and damper arm.
The cabin air filter on a 2021 Ford F-150 is located directly behind the glove box compartment inside the passenger-side dashboard. Accessing it requires you to fully lower the glove box door by disconnecting its side stops and the dampening arm.
Whether you are dealing with lingering dust or preparing your truck for the 2026 driving season, replacing this filter takes less than ten minutes. You do not need any tools to complete the job, making it one of the easiest do-it-yourself maintenance tasks for your F-150.
Key Takeaways
- The cabin air filter sits directly behind the glove box assembly.
- No tools are required to access or replace the 2021 F150 cabin filter.
- Always disconnect the right-side damper arm before dropping the glove box.
- Push inward on both sides of the glove box to release the retaining stops.
- Ensure the airflow arrow on the new filter points downward during installation.
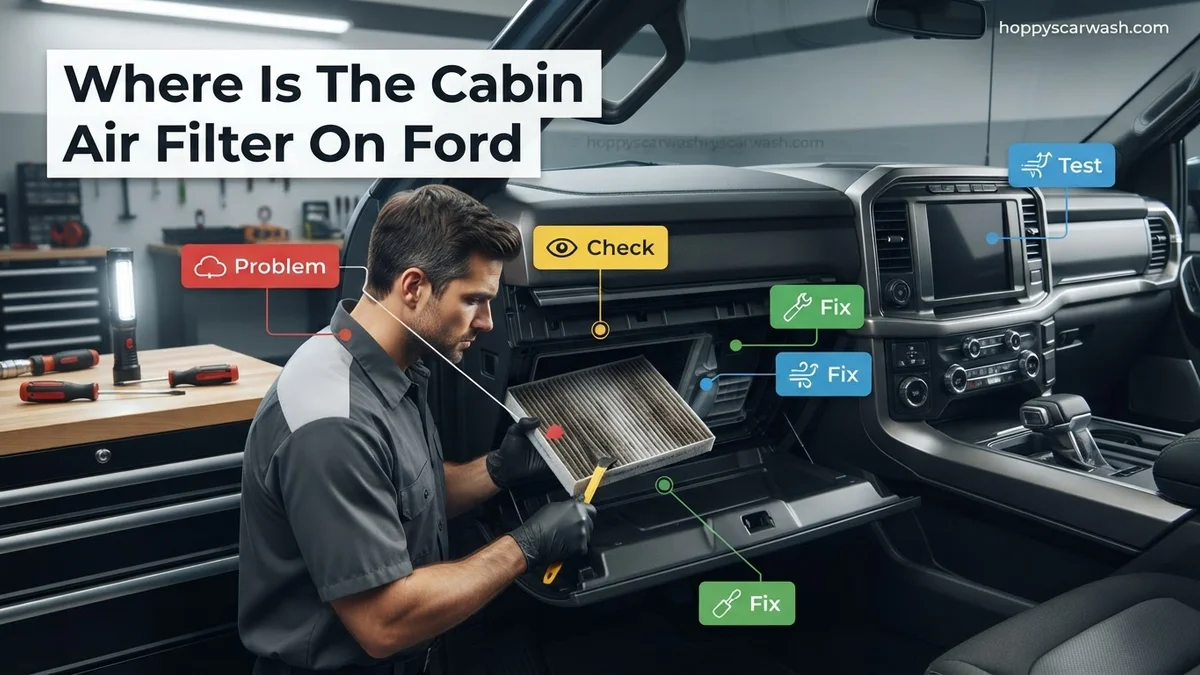
Where Is the Cabin Air Filter Located on a 2021 Ford F150
Behind the Glove Box Assembly
Ford designs the modern F-150 interior to keep routine maintenance simple. The cabin air filter housing sits horizontally in the upper dashboard area, completely hidden behind the glove box liner. You must empty the contents of your glove box before starting, as tilting it downward will cause unsecure items to spill onto the floor mat.
Releasing the Glove Box Door
To reach the housing door, you need to swing the glove box past its normal stopping point. Follow these specific steps to release it safely:
- Open the glove box and push inward on both the left and right outer sides to clear the dashboard stop tabs.
- Locate the small damper arm on the right-hand outer side of the glove box.
- Unhook the damper arm by pulling it gently outward toward the passenger door.
- Lower the glove box all the way down toward the floorboards, exposing the black rectangular plastic filter cover behind it.
2021 Ford F150 Cabin Air Filter Replacement: Your Essential Action Plan
Breathe easier on your daily commute or off-road adventures by keeping your truck’s cabin air clean and fresh. Many owners are surprised to learn where Ford tucked the cabin air filter on the redesigned 2021 Ford F-150. Unlike older generations or other vehicle makes that hide filters deep under the dashboard requiring awkward contortions, the 2021 F-150 features a surprisingly accessible filter housing located directly behind the glove box. This comprehensive, detailed walkthrough will guide you precisely through locating, removing, and replacing your cabin air filter in just a few minutes without needing any mechanical experience or heavy-duty tools.
Step 1: Gather Your Supplies and Prepare the Workspace
What you need: A brand new cabin air filter sized for a 2021 Ford F-150 (standard or HEPA upgrade), a clean microfiber towel, and a flashlight or headlamp.
Instructions: Before touching your truck, clear out the contents of your glove box so items do not spill out and clutter your floorboards when you lower it. Place your supplies within arm’s reach on the passenger seat. Ensure your truck is parked on a flat surface with the ignition completely turned off. Take a moment to inspect your new replacement filter, noting the airflow direction arrows printed on the side, which will ensure you install it the correct way during reassembly.
Pro Tip: Buy a filter containing activated carbon if you frequently drive in heavy traffic or dusty environments, as it drastically reduces outside odors and exhaust fumes entering the cab.
Step 2: Empty and Access the Glove Box Assembly
What you need: Your empty glove box and a flashlight for optimal visibility under the dashboard area.
Instructions: Open the passenger-side glove box completely. Take a close look at the right-hand outer side of the glove box door where it connects to the dashboard. You will notice a small, black plastic dampener arm attached via a pin. This arm controls the smooth, slow-drop motion of your glove box when you open it. Carefully unclip this sliding dampener arm from the side of the glove box by gently pulling it outward toward the passenger door until it pops off the mounting peg. Let it hang safely out of the way.
Pro Tip: Do not pull too forcefully on the dampener arm, as the plastic pin is integrated into the glove box structure and snapping it requires replacing the entire door assembly.
Step 3: Release the Glove Box Stopper Tabs
What you need: Your hands and a little bit of flexible pressure.
Instructions: With the dampener arm unclipped, push inward firmly on both the left and right outer upper corners of the glove box simultaneously. These sides are designed with built-in plastic stops that catch against the dashboard frame to prevent the box from spilling completely forward. Pushing inward temporarily bows the plastic walls of the glove box inward, allowing the retaining stops to clear the dashboard opening. Swing the glove box all the way down toward the floorboards, letting it hang completely inverted on its lower hinge pins.
Pro Tip: If the glove box feels stuck, check that you have fully emptied it; heavy items shift weight and make flexing the plastic walls much harder.
Step 4: Locate the Cabin Air Filter Access Door
What you need: Your flashlight to peer deeply into the cavity exposed behind the lowered glove box.
Instructions: Look straight into the large open cavity behind where the glove box normally sits. Mounted horizontally near the upper middle section of the HVAC blower motor housing, you will see a black, rectangular plastic cover panel. This is the access door guarding the cabin air filter slot. It typically features two plastic squeeze-tabs or clips located on the left and right (or top and bottom) edges that secure it tightly against the housing to maintain proper cabin air pressure and prevent air leaks.
Pro Tip: Take a photo with your smartphone before touching anything; having a visual reference of the housing orientation makes putting everything back together foolproof.
Step 5: Remove the Filter Housing Cover
What you need: No tools required—just your fingers and patience.
Instructions: Pinch the locking tabs on the access cover firmly inward toward each other. While keeping the tabs compressed, pull the cover directly toward yourself. It should unlatch smoothly and slide right off, exposing the narrow edge of the dirty cabin air filter nestled inside. Set the plastic cover aside in a safe spot, such as the passenger footwell, making sure not to kick or step on it while working under the dash.
Pro Tip: Inspect the rubber gasket seal lining the access cover; if it is dry or cracked, wipe it clean to ensure a tight, rattle-free seal when you reinstall it.
Step 6: Extract the Old Cabin Air Filter
What you need: Your hands and a microfiber towel to wipe away loose debris.
Instructions: Reach inside the exposed slot and gently pull the old filter straight out toward you. As you slide it out, tilt the front edge slightly downward if necessary to clear the dashboard frame. Pay close attention to which way the airflow arrows were pointing on the old filter (typically pointing downward toward the blower motor floor). Once the old filter is removed, use your flashlight to inspect the interior cavity for leaves, dust, or dead insects, and wipe the area clean with your microfiber towel.
Pro Tip: Pull the old filter out slowly and keep it level to prevent trapped dust, debris, and dead bugs from spilling out of the pleats and directly onto your front passenger floor mat.
Step 7: Install the New Cabin Air Filter
What you need: Your new 2021 F-150 cabin air filter.
Instructions: Take your new filter and verify the airflow direction arrows. For the 2021 Ford F-150, air flows downward through this housing, meaning the printed arrows on the side of the filter must point DOWN. Carefully slide the new filter horizontally into the open housing slot, pushing it all the way in until it is fully seated and flush. Ensure the filter is not bunched up or crumpled inside the track, which would block proper airflow to your heating and air conditioning system.
Pro Tip: Double-check the arrow direction before closing the door; installing a cabin air filter backwards significantly reduces its filtration efficiency and traps debris on the wrong side.
Step 8: Reassemble the Housing and Glove Box
What you need: The plastic access cover, glove box dampener arm, and 5 minutes of your time.
Instructions: Take the black plastic access cover and snap it back over the filter slot, ensuring both side clips click securely into place. Next, lift the glove box upward, flexing the outer walls inward slightly so the stopper tabs bypass the dashboard frame. Swing the glove box completely closed. Finally, reach down and re-attach the small plastic dampener arm to the right side peg of the glove box door. Open and close the glove box once to ensure smooth, dampened operation.
Pro Tip: Test your HVAC fan speed across all settings (1 through max) immediately after finishing to confirm no rattles, whistles, or loose connections exist.
✅ Final Checklist
- New cabin air filter installed with airflow arrows pointing downward
- Housing access cover securely snapped into place with no air gaps
- Glove box stopper tabs successfully re-engaged behind the dashboard frame
- Black plastic dampener arm securely clipped back onto the glove box side peg
- Glove box opens and closes smoothly without binding or dropping too fast
Important Notes:
- Always turn off your ignition and blower motor completely before servicing the cabin air filter to protect the internal fan blades.
- If you notice persistent musty odors after installing a fresh filter, run your AC on the highest heat setting for 10 minutes to dry out any mold built up in the evaporator core, or seek professional HVAC sanitization service.
- Estimated time required is 10 to 15 minutes, with a total cost ranging from $15 to $35 for a quality replacement filter depending on whether you choose standard paper or advanced carbon/HEPA media.
Why Cabin Air Filters Get Clogged and Need Replacement
Accumulation of Road Debris and Pollutants
Your F-150 pulls outside air through the cowl intake system to ventilate the cabin. As you drive through construction zones, dirt roads, or heavy traffic, the filter media traps airborne contaminants. Over time, this restricts airflow through your heating and air conditioning vents.
Signs Your 2021 F-150 Filter Needs Service
Waiting too long to swap out your cabin filter impacts your HVAC system efficiency. Watch out for these common indicators:
- Noticeable reduction in airflow coming from the dashboard vents, even on high fan speeds.
- Persistent musty odors or stale smells when you turn on the AC or heater.
- A fine layer of dust accumulating rapidly on your dashboard and interior trim pieces.
- Increased window fogging during rainy or humid weather conditions due to restricted intake flow.
Step-by-Step Guide to Accessing and Replacing the F150 Cabin Filter
Replacing the cabin air filter in a 2021 through 2026 Ford F-150 requires patience and proper sequencing. Automotive service manuals outline a precise procedure to prevent breaking the plastic retaining tabs on the glove box assembly.
Unlatching and Lowering the Glove Box
Begin by emptying the glove box entirely to prevent your belongings from spilling onto the floorboards. Complete the removal process using these steps:
- Open the glove box door and locate the dampener arm on the right outer edge.
- Gently pull the dampener arm outward toward the passenger door to release it from the glove box pin.
- Push inward on both the left and right outer sides of the glove box housing to clear the internal stop tabs from the dashboard frame.
- Lower the glove box completely down toward the floorboard, allowing it to hang freely on its lower hinges.
- Unhook the lower hinge pins from the dashboard frame by lifting the glove box slightly and pulling it toward you if total removal is necessary.
Removing the Housing Cover and Installing the Filter
Once the glove box is out of the way, the vertical filter housing becomes fully visible on the right side of the center stack. Follow these installation procedures:
- Pinch the release tabs located on the left and right sides of the rectangular plastic housing cover.
- Pull the cover straight off and set it aside in a secure location.
- Slide the old, dirty air filter straight out of the housing slot, taking care not to spill trapped dust and debris onto the floor.
- Check the directional airflow arrow printed on the edge of your new replacement filter.
- Slide the new filter into the housing slot with the airflow arrow pointing downward toward the vehicle floor.
- Snap the plastic housing cover back into place, ensuring both side clips click securely to create an airtight seal.
What If the Glove Box Won’t Release or the Housing Cover Breaks?
F-150 interior plastics can become brittle over time, or the dampener arm might resist normal release pressure. If you encounter mechanical resistance or broken components during your 2026 maintenance routine, follow these corrective steps:
- Apply a gentle upward lift to the glove box door while pressing the side walls inward to relieve tension on stubborn stop tabs.
- Use a trim removal tool to carefully pop off a stubborn dampener arm without snapping its plastic anchor pin.
- Inspect the filter housing cover tabs for fractures; a broken tab requires immediate replacement to prevent whistling noises and unfiltered air bypass.
- Visit a local Ford dealership parts department or order online if replacement clips or housing covers are damaged.
- Schedule professional service at an authorized dealership or certified repair shop if dashboard assemblies resist manual release, with professional labor typically costing between $40 and $80 excluding parts.
Conclusion
Locating and replacing the cabin air filter in a modern Ford F-150 is a straightforward process that drastically improves interior air quality and HVAC system efficiency. By dropping the glove box and swapping the element every 15,000 to 20,000 miles, drivers ensure optimal cabin airflow. According to verified research and automotive service experts, routine filter maintenance prevents blower motor strain and reduces allergen accumulation. Take the next step today by inspecting your current filter and ordering a certified OEM replacement part.
❓ Frequently Asked Questions
How do I release the glove box stops without breaking them?
Open the glove box and push inward firmly on both the left and right outer sides simultaneously. This allows the rubber stop tabs to clear the dashboard frame so the glove box can drop all the way down.
What happens if I forget to disconnect the damper arm?
The damper arm is attached to the right side of the glove box and helps it lower smoothly. Yanking the glove box down without unclipping this small arm can snap the plastic mounting tab.
How do I open the filter housing cover?
Once the glove box is lowered out of the way, locate the rectangular plastic access door at the front of the HVAC housing. Pinch the plastic tabs on the sides of the cover to unlatch and pull it straight off.
Can I install an aftermarket cabin air filter?
Yes, numerous aftermarket brands like Fram, Bosch, and K&N manufacture direct-fit replacement cabin air filters for the 2021 Ford F150.
How do I know if my cabin air filter needs replacement?
Signs of a dirty filter include reduced airflow from the AC vents, persistent musty odors inside the cab, or excessive dust accumulation on the dashboard.
Does the 2021 Ford F150 have more than one cabin air filter?
No, the 2021 Ford F150 uses a single cabin air filter housed entirely behind the glove box compartment.