How to Calibrate a Speedometer for Bigger Tires in 2026
Installing larger tires alters your vehicle’s overall rolling diameter, causing your speedometer and odometer to read slower than your actual speed. You must calculate the tire size difference and use electronic programmers, inline calibrators, or physical gear swaps to fix the discrepancy.
Recalibrating your speedometer after installing larger tires requires updating your vehicle computer’s rev-per-mile setting using an electronic OBD2 programmer, or swapping the mechanical speedometer gear for older vehicles. When you bolt on bigger rubber, your factory computer still assumes you are running the stock dimensions, which creates an immediate discrepancy between your actual ground speed and what your dashboard displays.
Fixing this issue in 2026 is critical not just for avoiding speeding tickets, but for maintaining accurate odometer readings, proper transmission shift points, and reliable fuel economy tracking. Ignoring the calibration means your truck or SUV actually travels faster and farther than the instrument cluster indicates, throwing off your routine maintenance schedules.
Key Takeaways
- Bigger tires increase rolling diameter, causing your speedometer to read slower than actual speed.
- Use the mathematical percentage difference between old and new tire sizes to determine error.
- Electronic programmers plug into the OBD-II port to quickly update vehicle computer settings.
- Inline speed calibrators wire directly into the vehicle harness to adjust pulse signals.
- Older mechanical vehicles require physical speedometer gear replacements inside the transmission.
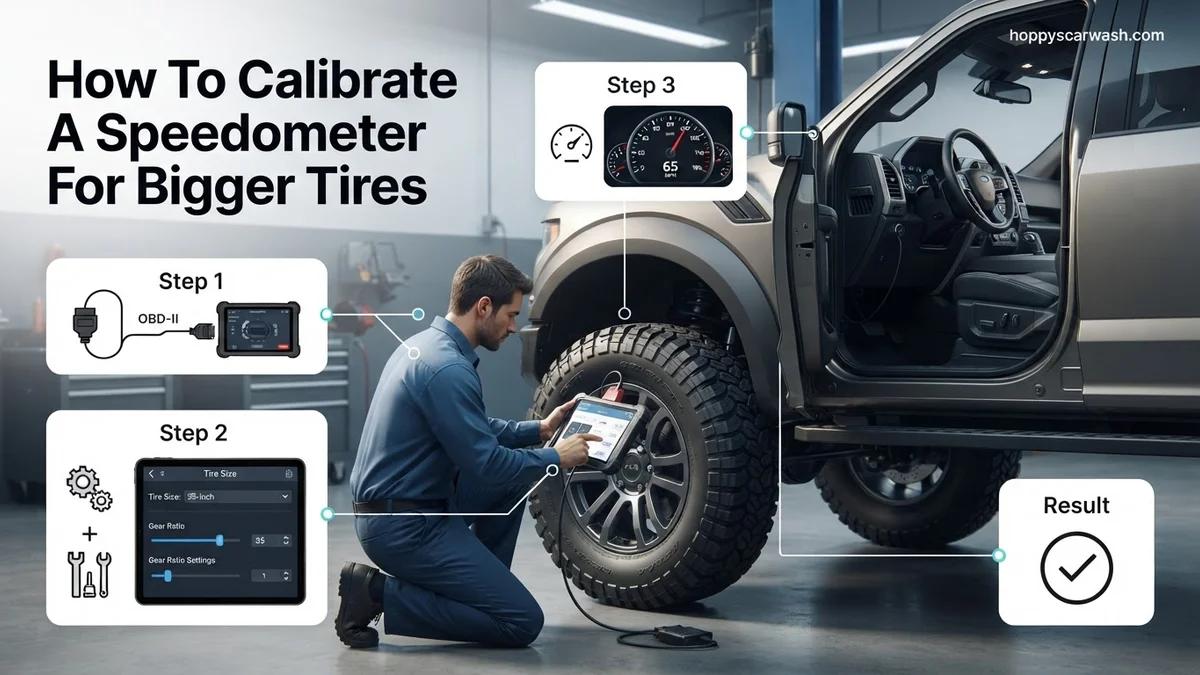
Why Bigger Tires Cause Speedometer and Odometer Inaccuracies
How Tire Revolutions Per Mile Change
Your vehicle’s factory speedometer calculates speed based on how fast the driveshaft or wheels rotate, translated through a specific tire diameter programmed at the factory. When you install larger tires, the physical circumference increases significantly. One complete rotation of a 35-inch tire covers more ground than a stock 30-inch tire. Because the outer edge travels a greater linear distance per revolution, your wheels rotate fewer times per mile than the computer expects. The vehicle control module measures axle rotation and assumes stock proportions, leading it to report a slower speed than you are actually traveling.
The Hidden Impact on Shift Points and Odometer Roll
The speed sensor data feeds critical systems throughout modern 2026 drivetrains, extending far beyond the simple dashboard needle. Automatic transmissions rely on speed inputs to determine precise shift points and torque converter lockup. Uncalibrated large tires cause sluggish shifting, premature gear hunting, and potential overheating. Furthermore, your odometer logs fewer miles than you genuinely drive. If your tires are ten percent larger than stock, a ten-thousand-mile road trip actually racks up eleven thousand physical miles on your chassis and engine. This skews resale values, warranty tracking, and service intervals.
Master Speedometer Calibration in 7 Simple Steps
Swapping your factory tires for larger off-road rubber transforms the look and capability of your vehicle, but it throws off your speedometer and odometer readings. Because larger tires have a greater circumference, they cover more ground per single rotation than your factory tires did, tricking your vehicle’s computer into thinking you are traveling slower than you actually are. This comprehensive walkthrough provides a foolproof method to recalculate your tire size and properly calibrate your speedometer, ensuring you avoid speeding tickets and keep your transmission shifting correctly.
Step 1: Measure Your Existing Tire Size
What you need: A heavy-duty tape measure (preferably in inches), a piece of chalk, and a flat, level surface.
Instructions: Do not just rely on the mathematical conversion of the numbers printed on your tire sidewall, as real-world tire measurements often vary significantly by brand and actual vehicle weight. Park your vehicle on a flat surface, and use the chalk to draw a small dot directly on the center of the tire tread and a corresponding dot on the pavement directly beneath it. Roll the vehicle forward in a straight line for exactly one full tire rotation until the chalk mark on the tire hits the pavement again. Stop, mark the pavement at that new spot, and use your tape measure to find the exact distance in inches between the two pavement marks.
Pro Tip: Always measure your tires while they are mounted on the vehicle and inflated to your normal daily driving pressure with the vehicle’s weight resting on them.
Step 2: Calculate the New Tire Circumference
What you need: A calculator, a pen, and a notepad to record your measurements.
Instructions: Take the rolling circumference measurement you obtained in Step 1 (in inches) and prepare to convert it into revolutions per mile. To find the revolutions per mile, divide 63,360 (the total number of inches in one mile) by your measured rolling circumference. For example, if your measured circumference is 100 inches, you would divide 63,360 by 100, giving you 633.6 revolutions per mile. If you are using a digital programmer that requires metric measurements, you can also convert this final number or calculate the height using standard tire size codes found on the sidewall, though the physical rolling method is always the most accurate.
Pro Tip: Double-check your math twice. A small calculation error here will throw off your speedometer calibration across the entire speed range.
Step 3: Choose Your Calibration Method
What you need: Vehicle owner’s manual, budget planning, and an understanding of your vehicle’s electronic architecture.
Instructions: Depending on the year, make, and model of your vehicle, you have a few ways to fix your speedometer. Modern vehicles (typically 1996 and newer) can usually be recalibrated via an OBD-II electronic flash programmer or an inline module. Older vehicles with mechanical speedometers may require swapping out the physical speedometer gear inside the transmission tail housing. Research your specific vehicle platform online to determine if you need to purchase a handheld programmer, a digital calibration module, or a mechanical gear tooth replacement.
Pro Tip: Avoid cheap plug-and-play resistors sold online, as they often trick your engine computer and cause rough running conditions or transmission shifting issues.
Step 4: Connect Your Programming Device
What you need: OBD-II flash programmer, handheld tuner, or smartphone calibration app depending on your chosen hardware.
Instructions: Locate your vehicle’s OBD-II diagnostic port, which is almost always situated underneath the driver’s side dashboard near the steering column. Turn your vehicle’s ignition key to the “On” position without starting the engine, ensuring all dashboard warning lights illuminate. Plug your electronic calibration device or programmer into the OBD-II port. Wait a few moments for the device to handshake with your vehicle’s Powertrain Control Module (PCM) or Body Control Module (BCM), and navigate through the menu system to the speedometer or tire size adjustment section.
Pro Tip: Ensure your vehicle battery is fully charged or connect a battery tender before flashing your computer. A sudden drop in voltage during a flash can corrupt your PCM.
Step 5: Input Your New Tire Data
What you need: Your calculated revolutions per mile or exact new tire dimensions from the earlier steps.
Instructions: Follow the on-screen prompts on your programmer to input your new tire parameters. Depending on your software, you may be asked to enter the new tire height in inches (e.g., 35.5 inches), the metric size code, or the exact revolutions per mile you calculated in Step 2. Input the data carefully. If your programmer also allows you to update your axle gear ratio, make sure to enter that correctly as well, especially if you re-geared your differentials when installing your larger tires.
Pro Tip: If your programmer gives you the option between entering a standard tire size string and exact revolutions per mile, always choose revolutions per mile for maximum precision.
Step 6: Flash the Vehicle Computer
What you need: Patience, an uninterrupted environment, and your connected programming tool.
Instructions: Once you have verified that the tire data entered into your calibration device is completely accurate, select the “Apply,” “Flash,” or “Save” option on your programmer. The device will begin transferring the new configuration data into your vehicle’s computer system. This process usually takes anywhere from two to five minutes. During this time, your dashboard lights may flicker, and you might hear various relays clicking—this is completely normal. Do not disconnect the cable, turn off the ignition, or open the doors until the device displays a successful completion message.
Pro Tip: Never unplug the programmer mid-flash, as this can brick your vehicle’s computer, requiring a costly tow to a dealership to get it reflashed.
Step 7: Verify Accuracy Using GPS
What you need: A smartphone running a real-time GPS navigation app (such as Waze or Google Maps) or a dedicated dashboard GPS unit.
Instructions: Start your vehicle and drive to a safe, straight stretch of open highway where you can maintain a constant speed limit, such as 60 MPH. Mount your GPS device securely where you can safely glance at it while keeping your eyes on the road. Compare your vehicle’s analog or digital dashboard speedometer reading against the true ground speed displayed by the GPS. Test this at multiple speeds, such as 30 MPH, 45 MPH, and 65 MPH, to ensure your speedometer matches the GPS readout across the entire operating range.
Pro Tip: If your speedometer is still off by a couple of miles per hour, plug your programmer back in and slightly adjust your revolutions per mile up or down to fine-tune the results.
✅ Final Checklist
- Measured rolling circumference accurately under vehicle load
- Calculated exact revolutions per mile without mathematical errors
- Connected programmer securely to the OBD-II port with stable battery power
- Successfully flashed the PCM/BCM with new tire parameters
- Verified speedometer accuracy against a GPS device at highway speeds
Important Notes:
- Always perform programming work in a well-ventilated area with the vehicle parked securely on level ground.
- Seek professional help from a transmission or performance shop if your vehicle requires a physical speedometer gear swap or if your computer rejects the calibration flash.
- Estimated time: 30 to 60 minutes. Estimated cost: $0 (if using pre-owned tools) to $400+ for a new electronic programmer or custom dyno tune.
How to Calculate Speedometer Error Using the Tire Size Math Formula
Finding Your Old and New Tire Dimensions
Before programming any electronic corrections, you must calculate the exact mathematical percentage error between your factory tires and your new setup. Read the metric size code printed on your tire sidewall, such as 285/70R17. The first number is section width in millimeters, the second is the aspect ratio, and the final number is the wheel diameter in inches. Calculate your total tire diameter in inches using this standard formula:
- Multiply section width by aspect ratio (e.g., 285 x 0.70 = 199.5 mm)
- Convert millimeters to inches by dividing by 25.4 (199.5 / 25.4 = 7.85 inches)
- Multiply the wheel diameter by two (e.g., 17 inches x 2 = 34 inches)
- Add sidewall height and wheel diameter together for total height (7.85 + 34 = 41.85 inches total diameter)
Calculating the Percentage Difference for Calibration
Once you have both your stock tire diameter and your new actual tire diameter, you can determine the exact speed error percentage. Divide your old factory tire diameter by your new measured tire diameter. For instance, moving from a 32-inch stock tire to a 35-inch aftermarket tire gives you 32 divided by 35, which equals 0.914. Subtract that result from 1 to find your error rate of roughly 8.5 percent. When your speedometer reads 60 miles per hour, you are actually traveling at roughly 65 miles per hour. Plug this exact percentage or your new rev-per-mile metric directly into your electronic programmer to lock in complete accuracy.
Step-by-Step Guide on How to Fix Speedometer Calibration
Fixing your speedometer after installing larger tires requires precision. Whether you are using a digital programmer or a mechanical gear swap, following a structured process ensures accuracy. Modern vehicles from 2026 rely heavily on electronic modules, making the digital approach the industry standard.
Using a Digital Speedometer Calibrator
Electronic programmers plug directly into your vehicle’s OBD-II port. This method allows you to input exact tire dimensions or revs-per-mile data gathered from manufacturer specifications.
- Locate the OBD-II port beneath your vehicle’s driver-side dashboard and plug in your digital calibrator or programmer.
- Turn your vehicle’s ignition to the ON position without starting the engine to power the device.
- Navigate the device menu to the speedometer or tire size adjustment setting.
- Input your new tire’s actual measured height or the verified revs-per-mile data provided by the tire manufacturer.
- Save the changes and flash the vehicle’s Powertrain Control Module (PCM), following all on-screen prompts until the device confirms completion.
Using a GPS Verification Run
Automotive technicians recommend verifying your newly calibrated speedometer against a reliable GPS device or mobile speed-tracking application.
- Find a straight, safe stretch of highway where you can maintain a steady speed legally.
- Set your cruise control to a flat increment, such as 60 miles per hour.
- Compare your dashboard speedometer reading against the live GPS speed readout.
- If a minor discrepancy remains, reconnect your programmer and adjust the tire circumference parameter by a fraction of an inch until both readings match perfectly.
What If Your Speedometer Still Reads Incorrectly After Calibration
Sometimes, an initial calibration attempt fails to resolve speed discrepancies due to software glitches or hardware limitations. If your speedometer still reads incorrectly after programming, several advanced troubleshooting steps can resolve the issue.
- Perform a Hard System Reset: Disconnect your vehicle’s negative battery terminal for 15 to 20 minutes to clear the PCM memory, then reconnect it and reflash the tire size settings.
- Check for Module Firmware Updates: Outdated vehicle software can reject calibration inputs. Visit a certified dealership or use an advanced scan tool to check for factory software updates.
- Re-measure Tire Dimensions: Do not rely solely on the sidewall numbers. Measure the actual mounted and inflated tire height with a tape measure under normal vehicle load.
- Seek Professional Assistance: If electronic calibration persistently fails, consult a professional drivetrain specialist or custom off-road shop. Professional diagnostic labor typically ranges from $100 to $250 depending on the vehicle make and model.
Conclusion
Failing to recalibrate your speedometer after installing larger tires compromises your odometer accuracy, transmission shift points, and overall vehicle safety. Fixing this issue requires inputting accurate tire dimensions into an OBD-II programmer or replacing mechanical drive gears. According to verified research and automotive safety experts, maintaining correct speedometer calibration prevents premature transmission wear and ensures compliance with legal speed limits. Take the next step today by measuring your true tire height and selecting the appropriate calibration tool for your specific vehicle make and model.
❓ Frequently Asked Questions
How do I calculate the exact percentage error for my new tires?
You must find the total diameter of both your old and new tires in inches. Subtract the old diameter from the new diameter, divide the result by the old diameter, and multiply by 100 to get your percentage error.
Will an OBD-II programmer void my factory vehicle warranty?
Using a programmer to change tire size or axle gear ratios generally does not void your entire warranty, but dealerships may deny coverage for specific powertrain components if they determine the tuner caused a failure.
How long does it take to reprogram a speedometer with an electronic tuner?
Plugging in a handheld electronic tuner and flashing the new tire size into your vehicle’s computer typically takes less than 15 minutes.
Can a local mechanic shop calibrate my speedometer for me?
Yes, professional service shops and dealerships have advanced diagnostic scan tools that can easily update your vehicle computer with custom tire dimensions.
What happens if I ignore my speedometer calibration after lifting my truck?
Aside from risking speeding tickets due to inaccurate readings, your transmission shift points may become erratic because automatic transmissions rely on vehicle speed sensors.
Do inline calibrators work better than programmers?
Inline calibrators are great for vehicles where tuners are unavailable or too expensive, but OBD-II programmers offer more features like reading trouble codes and adjusting other parameters.