Can You Change Manual Transmission to Automatic Expert 2026
Yes, you can physically convert a manual transmission car into an automatic, but it is rarely financially practical. The swap requires extensive mechanical and electrical overhauls that often cost significantly more than simply selling the car and buying an automatic model.
Yes, you can physically change a manual transmission to an automatic, but it is rarely a practical or financially smart choice. Whether you inherited a classic project car or grew tired of shifting gears in 2026 city traffic, this conversion requires stripping out half of your drivetrain and replacing it with entirely different hardware and software systems.
Most professional mechanics will advise you to sell your manual car and simply buy an automatic. The physical engineering challenge is massive, the labor hours are staggering, and the total cost almost always exceeds the actual resale value of the vehicle.
Key Takeaways
- Converting a manual transmission to an automatic is technically possible but highly complex.
- Expect total project costs to easily exceed $3,000 to $7,000 including labor.
- You must replace the transmission, pedal box, shifter assembly, and ECU.
- Wiring harness modifications and computer reprogramming are mandatory for proper operation.
- Trading in your manual car for an automatic factory model is almost always cheaper.
Why Converting a Manual Transmission to Automatic Is So Complex
The Hardware and Mechanical Overhaul
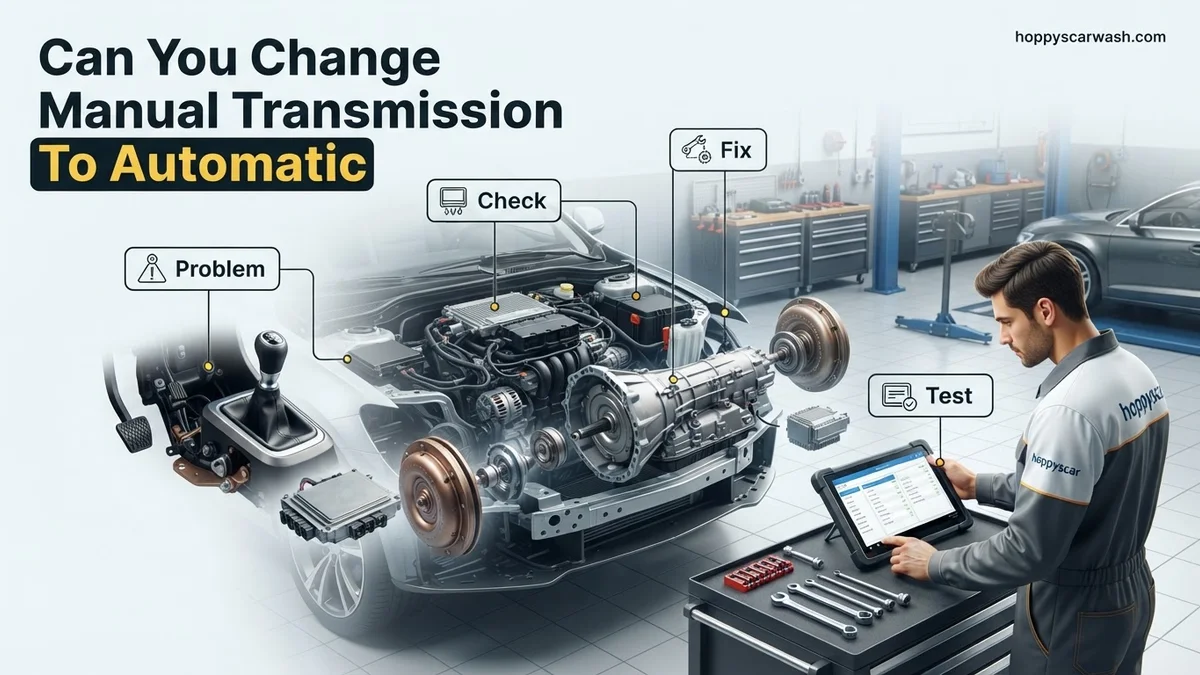
Swapping transmissions involves much more than just unbolting the old gearbox and sliding in a new one. You have to remove the manual transmission, clutch pedal, flywheel, master cylinder, and the entire shift linkage assembly. In their place, you must install an automatic transmission, a torque converter, a flexplate, a new crossmember, and an automatic shifter console. Physical clearance issues are common, often requiring custom fabrication.
Electrical, Wiring, and ECU Integration
Modern vehicles rely heavily on computer integration. A manual car lacks the electronic control units, wiring harnesses, and dashboard displays required to manage an automatic transmission. Without a transmission control module (TCM) and a reprogrammed or swapped engine control unit (ECU), your car will refuse to start or run properly. You face major hurdles with dashboard error codes, cruise control integration, and safety switches like the neutral safety start.
From Start to Finish: Manual to Automatic Transmission Conversion Explained
Switching your vehicle’s transmission from a manual shifter to a smooth-shifting automatic is a massive undertaking, but it is entirely possible for dedicated gearheads. Whether you are adapting a classic car for daily cruising or modifying a track car for effortless drag racing, this comprehensive roadmap details every critical phase required to successfully execute the swap without missing vital mechanical or electrical nuances.
Step 1: Gather Parts and Compatibility Research
What you need: Donor vehicle or complete swap kit, automatic transmission, matching torque converter, flexplate, automatic transmission crossmember, driveshaft (may need shortening or lengthening), shifter assembly, transmission cooler, and factory service manuals.
Instructions: Before turning a single bolt, thoroughly research the compatibility between your engine block and the target automatic transmission. Sourcing a complete donor car is often the most cost-effective method because you will need dozens of small, vehicle-specific components like pedal boxes, transmission lines, and wiring pigtails. Verify that the bolt pattern on the automatic transmission bellhousing matches your engine block. If it does not, you will need to source a specialized adapter plate. Catalog every single component required, keeping in mind that mismatched gear ratios in your rear differential may also need correction to accommodate the automatic’s final drive gearing.
Pro Tip: Always buy a matched transmission and torque converter from the same vehicle to ensure proper spline engagement and pump alignment.
Step 2: Disconnect the Battery and Drain Fluids
What you need: Metric socket set, wrenches, drain pans, fresh fluid catch containers, safety glasses, and chemical-resistant gloves.
Instructions: Safety must always come first when performing major automotive surgery. Start by disconnecting the negative battery terminal to disable the electrical system, preventing accidental shorts when working around the starter and neutral safety wiring. Next, position drain pans beneath the transmission and the engine oil pan. Remove the manual transmission drain plug and let the gear oil empty completely. While that drains, open the radiator petcock to drain the engine coolant, as you will likely be disconnecting or replacing the radiator to install transmission cooler lines. Safely cap or store all fluids in accordance with local environmental disposal regulations.
Pro Tip: Label every fluid container clearly and clean up any spills immediately to maintain a slip-free, safe workspace.
Step 3: Remove the Manual Transmission and Pedal Assembly
What you need: Hydraulic floor jack, heavy-duty jack stands, transmission jack, pry bars, penetrating oil, and basic hand tools.
Instructions: Elevate the vehicle securely on four heavy-duty jack stands or a hydraulic lift, ensuring it is completely stable. Disconnect the driveshaft from the manual transmission tail housing and slide it out of the rear differential yoke. Unbolt the transmission crossmember while supporting the transmission weight securely with a transmission jack. Disconnect the speedometer cable, reverse light switch wiring, and the clutch slave cylinder hydraulic line. Unbolt the transmission bellhousing from the engine block and carefully slide the transmission backward off the input shaft. Inside the cabin, remove the driver’s seat, unbolt the clutch and brake pedal assembly, and pull out the manual clutch pedal and master cylinder.
Pro Tip: Spray penetrating oil on all exhaust and bellhousing bolts at least 24 hours before you begin wrenching to prevent sheared fasteners.
Step 4: Remove the Flywheel and Install the Flexplate
What you need: Impact wrench, torque wrench, flywheel locking tool, new flexplate, and new torque-to-yield crankshaft bolts.
Instructions: With the manual transmission completely out of the way, you now have clear access to the heavy manual flywheel bolted to the back of the engine crankshaft. Install a flywheel locking tool into the starter ring gear teeth to keep the engine from rotating. Carefully unbolt the pressure plate and clutch disc, then remove the flywheel bolts and take off the heavy flywheel. Inspect the rear main seal for any signs of oil weeping; if it looks wet or aged, replace it immediately since access is completely open right now. Mount the new automatic transmission flexplate onto the crankshaft, apply thread-locking compound to the new bolts, and torque them in a criss-cross pattern to the manufacturer’s exact specifications.
Pro Tip: Never reuse old flywheel or flexplate bolts, as they stretch under torque and can fail catastrophically at high RPMs.
Step 5: Install the Automatic Transmission and Torque Converter
What you need: Fully seated torque converter, automatic transmission, transmission jack, alignment dowels, and fresh assembly lube.
Instructions: Before lifting the automatic transmission into place, you must carefully slide the torque converter onto the transmission input shaft. Rotate and push the converter inward until you feel and hear it drop through multiple distinct steps, fully seating into the oil pump. Measure the distance from the bellhousing face to the converter pads to verify proper depth. Use the transmission jack to raise the automatic transmission into position behind the engine. Align the bellhousing with the engine block dowel pins and push it flush. Install and tighten all bellhousing bolts evenly. Bolt the flexplate to the torque converter through the starter access window, making sure to torque these critical fasteners securely.
Pro Tip: If the bellhousing will not sit flush against the engine block, stop immediately. Forcing it with bolts will destroy the front pump of the automatic transmission.
Step 6: Mount the Transmission Cooler and Plumbing Lines
What you need: External automatic transmission fluid cooler, hard or braided flexible lines, tubing benders, flare wrenches, and zip ties or mounting brackets.
Instructions: Automatic transmissions generate immense heat and require dedicated cooling to survive. If your radiator does not have an integrated transmission cooler, you must mount an auxiliary cooler directly in front of the A/C condenser or radiator core. Route high-pressure transmission lines from the transmission’s inlet and outlet ports up to the cooler. Ensure that the lines are securely clamped or threaded using proper flare fittings, and route them safely away from hot exhaust pipes, sharp metal edges, and moving steering components. Secure the lines every 12 to 18 inches using insulated P-clamps or heavy-duty zip ties to prevent vibration fatigue.
Pro Tip: Always double-check line routing. Reversing the inlet and outlet lines on certain automatic transmissions can cause immediate lubrication starvation and internal failure.
Step 7: Install the Shifter Assembly and Linkage
What you need: Floor shifter or column shifter assembly, linkage rod or cable, hole saw (if modifying floorboards), sealing boots, and hand tools.
Instructions: Transitioning to an automatic requires a new gear selector interface inside the vehicle cabin. If you are converting a floor-shift car, you may need to cut an opening in the transmission tunnel using a hole saw or tin snips to accommodate the automatic shifter box and cable. Bolt the shifter securely to the chassis floor or steering column. Connect the mechanical shift linkage rod or heavy-duty shift cable from the cabin shifter lever down to the manual valve lever on the side of the automatic transmission. Adjust the linkage carefully so that when the cabin indicator shows Park, Neutral, or Drive, the transmission detents physically align with those exact gears.
Pro Tip: Test the shifter movement through all gears with the vehicle safely off to ensure the detents click cleanly and the parking pawl engages properly.
Step 8: Wire the Neutral Safety Switch and Reverse Lights
What you need: Electrical wire, wire strippers, heat shrink tubing, soldering iron, wiring diagram, and electrical tape.
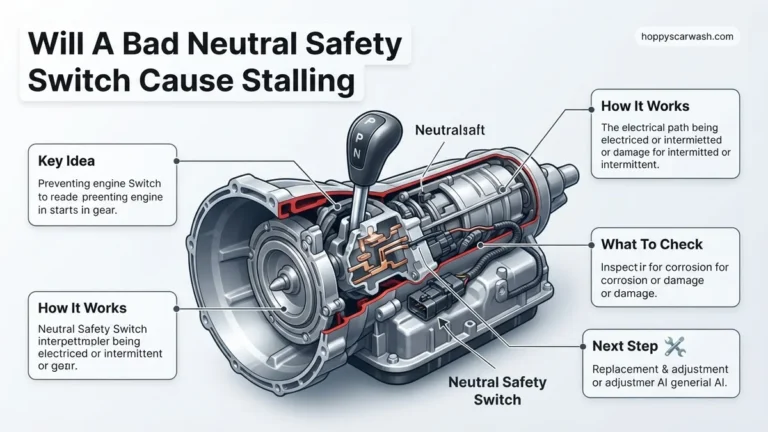
Instructions: Modern automatic transmissions feature a neutral safety switch (or Park/Neutral Position switch) to prevent the vehicle from starting in gear, as well as a switch to activate reverse lights. Locate the existing manual transmission reverse switch wiring harness and extend or adapt it to plug into the automatic transmission’s reverse switch port. Next, locate the starter solenoid ignition wire (usually purple or yellow) that ran to the old clutch pedal safety switch. Reroute and splice this circuit into the automatic transmission’s neutral safety switch. This ensures the starter motor will only engage when the transmission shifter is placed securely in either Park or Neutral.
Pro Tip: Solder all electrical splices and protect them with marine-grade adhesive heat shrink tubing to prevent corrosion from road salt and moisture.
Step 9: Fluid Fill and Road Testing
What you need: Manufacturer-specified automatic transmission fluid, long-neck funnel, fluid pump, and code scanner.
Instructions: With all mechanical and electrical components installed, it is time to fill the system. Insert a long funnel into the transmission dipstick tube and pour in the specified amount of fresh automatic transmission fluid. Reconnect the negative battery terminal. Start the engine and let it idle while keeping your foot firmly on the brake pedal. Slowly cycle the shifter through every gear position (P-R-N-D-2-1) and hold it in each gear for five seconds to fill the torque converter and hydraulic circuits. Check the transmission fluid level using the dipstick while the engine is running and warm, topping it off until it reaches the proper operating mark. Finally, take the vehicle on a low-speed test drive to monitor shift points, fluid temperature, and overall performance.
Pro Tip: Overfilling an automatic transmission is just as dangerous as underfilling it, causing aeration, foaming, and erratic shifting behavior.
✅ Final Checklist
- All bellhousing bolts and flexplate fasteners torqued to factory specifications
- Transmission cooler lines securely routed away from exhaust and moving parts
- Neutral safety switch verified so engine only cranks in Park or Neutral
- Shift linkage precisely adjusted for accurate gear selection (P, R, N, D)
- Transmission fluid checked and filled to the correct operational level
Important Notes:
- Always support heavy vehicle components with rated jack stands; never rely on a hydraulic floor jack alone.
- If your vehicle requires custom driveshaft modifications, electronic transmission controller (TCU) tuning, or complex CAN-bus integration, consulting a professional drivetrain shop is strongly recommended.
- Estimated time for completion ranges from 15 to 30 working hours, with a cost spectrum spanning from $1,000 to $4,000+ depending on whether you use used donor parts or brand-new performance components.
How to Swap Your Manual Transmission for an Automatic Step-by-Step
Sourcing Parts and Planning the Budget
If you decide to proceed with the conversion, gathering the correct parts is your first major hurdle. You can buy a complete donor car or purchase individual components, but missing a single specialized bracket will halt your project.
- Automatic transmission compatible with your specific engine block
- Torque converter and flexplate replacing the manual flywheel
- Transmission control module (TCM) and updated wiring harness
- Automatic shifter assembly, linkage, and center console parts
- Upgraded or auxiliary transmission fluid cooler lines
Execution and Professional Installation
Unless you own a fully equipped fabrication shop and possess advanced automotive programming skills, you will need to hire a specialty performance shop. The mechanical installation alone takes 20 to 40 hours of labor. Once the physical components are mounted, expect to spend additional time programming the computer systems to recognize the new automatic transmission without triggering limp mode.
What It Costs to Change a Manual Transmission to Automatic
Budgeting for a manual-to-automatic transmission swap requires a realistic look at both labor and parts expenses. According to automotive restoration data compiled in 2026, a professional conversion typically ranges from $3,000 to $7,000. Luxury vehicles, sports cars with complex electronic architectures, or modern four-wheel-drive trucks can push this price tag past $10,000.
Parts procurement constitutes the largest portion of this investment. Sourcing a reliable automatic transmission, torque converter, flexplate, transmission control module (TCM), custom driveshaft, and automatic pedal assembly can easily cost between $1,500 and $4,000 for mainstream applications.
Labor charges reflect the sheer complexity of the task. Professional shops generally estimate between 20 to 40 hours of specialized labor to pull the old manual setup, modify the tunnel, fabricate mounts, wire the electronic control units, and calibrate the system. Drivers attempting a DIY approach in 2026 must also account for specialized diagnostic tools, fluid expenses, and potential towing fees if professional reprogramming is ultimately required.
What If It Still Doesn’t Shift Right After the Conversion
Even after a meticulous installation, a newly converted automatic transmission may experience shifting anomalies, error codes, or failure to engage gears properly. When post-conversion troubleshooting becomes necessary, certified technicians recommend following a systematic diagnostic sequence to isolate the root cause.
- Verify Transmission Fluid Levels and Pressure: Incorrect fluid levels or improper line pressure frequently cause delayed engagement and harsh shifts. Check the dipstick with the engine warm and running, ensuring you use the exact fluid spec required by the donor transmission.
- Inspect TCM Wiring and Signal Inputs: Modern automatic transmissions rely heavily on input data from the throttle position sensor, vehicle speed sensor, and crankshaft position sensor. Use an advanced OBD-II scanner to verify that the Transmission Control Module is receiving and processing these electronic signals correctly.
- Check Neutral Safety and Clutch Pedal Switches: Because the vehicle was originally a manual, the starting and safety interlock circuits must be fully bypassed or rewired. A misadjusted neutral safety switch will prevent the starter from engaging or confuse the TCM regarding current gear selection.
- Consult a Drivetrain Specialist: If hydraulic and electrical diagnostics yield no results, the valve body or internal clutches may require professional bench testing. Bringing the vehicle to a certified transmission shop ensures proper calibration of adaptive shift tables, with diagnostic diagnostic fees typically ranging from $150 to $300.
Conclusion
Converting a manual transmission to an automatic is a complex, costly, and technically demanding modification that alters a vehicle’s fundamental powertrain dynamics. While entirely possible with the right donor parts, custom fabrication, and electronic integration, it requires careful financial planning and mechanical precision. According to verified research and automotive restoration experts, thoroughly evaluating parts compatibility before starting ensures a more reliable result. Your next actionable step is to consult a certified drivetrain specialist to obtain a comprehensive, itemized cost estimate for your specific make and model.
❓ Frequently Asked Questions
Is the engine block different between manual and automatic cars?
In most cases, the engine block itself is identical, but you will need to replace the flywheel with a flexplate to mount the automatic’s torque converter. Some vehicles may require custom adapter plates or minor clearancing in the transmission tunnel.
Can I use my existing manual ECU with an automatic transmission?
No, a manual ECU does not have the programming or output pins required to control electronic automatic shift solenoids. You will either need to replace the ECU with an automatic version or install a standalone transmission controller.
Will my dashboard gauges and warning lights work after the swap?
Not automatically; integrating an automatic transmission often disrupts gear indicator lights, neutral safety switches, and cruise control. Rewiring and custom dashboard configuration are usually necessary to restore full instrument cluster functionality.
Can I do a manual to automatic conversion as a DIY project?
While experienced home mechanics with a vehicle lift and advanced tools can attempt it, the electrical integration makes it a very challenging project. Mistakes in wiring or ECU programming can prevent the car from starting or driving safely.
Does insurance go up after a transmission conversion?
Insurance companies generally require you to report major modifications, which can sometimes increase your rates or complicate claims if the conversion causes a mechanical failure.
Are there cars that are easier to convert than others?
Vehicles that were offered with both manual and automatic options from the factory are much easier because parts are readily available. However, even on these models, the sheer volume of parts required keeps the project labor-intensive and costly.