Where to Put Dielectric Grease on Ignition Coil 2026 Guide
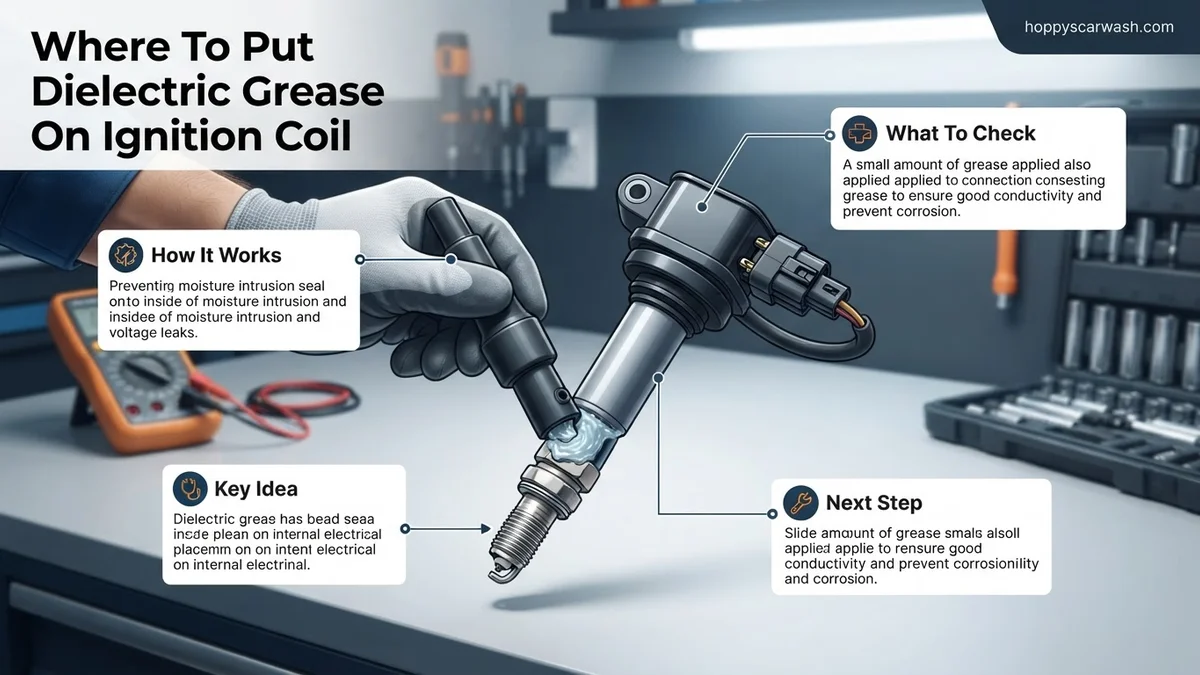
Applying dielectric grease correctly prevents moisture intrusion, corrosion, and stuck boots on your ignition system. You must apply a small amount strictly inside the rubber boot while keeping it away from the metal electrical contacts.
When applying dielectric grease to an ignition coil, you must place a small, pea-sized bead strictly on the inside walls of the rubber boot, focusing on the spark plug terminal end. Never place the grease directly onto the metal electrical contacts where high-voltage current passes.
Applying this silicone compound correctly creates a moisture-tight seal and prevents the rubber boot from vulcanizing to the porcelain of the spark plug. Following this precise 2026 maintenance standard ensures your ignition system remains protected against engine bay humidity, micro-arcing, and premature component failure without interrupting electrical conductivity.
Key Takeaways
- Apply dielectric grease only inside the rubber spark plug boot.
- Never coat the metal electrical terminal pins with grease.
- Use a pea-sized amount to create a proper moisture seal.
- Grease makes future ignition coil removal significantly easier.
- Wipe away any excess grease before final installation.
What Causes Ignition Boot Seizure and Moisture Damage
Modern engine bays operate under extreme thermal cycling. These fluctuating temperatures cause rubber ignition boots to bake onto spark plug porcelain over time.
Thermal Cycling and Rubber Degradation
- Constant heat cycles harden standard EPDM or silicone rubber boots within 30,000 to 50,000 miles.
- Without a lubricating barrier, the rubber bonds chemically to the ceramic spark plug insulator.
- Attempting to pull a seized boot off often tears the rubber or snaps the internal ignition coil spring.
Moisture Intrusion and High-Voltage Tracking
- Humidity and engine wash water find their way down the spark plug tube.
- Trapped moisture creates a conductive path for electrical current to escape, causing engine misfires.
- High-voltage tracking creates carbon traces on the plug, permanently ruining the spark plug and coil boot.
Master Ignition Coil Maintenance in 7 Simple Steps
Applying dielectric grease to your ignition system is one of the most effective preventative maintenance tasks you can perform to prevent engine misfires, hard starting, and moisture intrusion. Whether you are replacing a faulty coil-on-plug (COP) unit or simply performing routine tune-up maintenance, knowing the exact placement zones for this silicone-based compound ensures optimal electrical conductivity and prevents rubber boots from fusing to your spark plugs. This comprehensive walkthrough guides you through the exact procedure for applying dielectric grease on ignition coils without damaging sensitive electronic components or causing secondary ignition failures.
Step 1: Gather Your Tools and Safety Equipment
What you need: A tube of pure silicone dielectric grease (do not confuse with conductive anti-seize), a clean microfiber shop towel, a can of electrical contact cleaner, safety glasses, and nitrile gloves.
Instructions: Before touching any under-hood components, ensure your engine is completely cool to the touch to prevent burns. Lay out all your materials on a clean, flat surface near your workspace. Put on your safety glasses and nitrile gloves. Having your dielectric grease ready and uncapped prevents you from having to touch greasy components with dirty hands later in the process. Inspect your ignition coils to verify whether you are working with a traditional spark plug wire setup or a modern coil-on-plug design.
Pro Tip: Always double-check that you are using dielectric grease (silicone) and not regular automotive grease or petroleum jelly, which can degrade rubber boots and cause electrical arcing.
Step 2: Disconnect the Negative Battery Terminal
What you need: A ratchet and the appropriate metric socket (usually 10mm) to loosen the battery terminal clamp.
Instructions: Open your vehicle’s hood and locate the battery. Using your ratchet, loosen the nut on the negative (-) battery terminal clamp. Once loose, gently twist and lift the cable end off the battery post, tucking it safely to the side so it cannot accidentally spring back and make contact while you work. This crucial safety measure prevents accidental short circuits, electrical shocks, and computer error codes from being triggered while you unplug your ignition coil wiring harnesses.
Pro Tip: Tuck a clean rag or rubber glove over the disconnected battery terminal to ensure it doesn’t accidentally brush against the battery post during the job.
Step 3: Remove and Inspect the Ignition Coils
What you need: A socket set, ratcheting wrench, or screwdriver depending on your vehicle’s specific coil hold-down fastener type.
Instructions: Locate your ignition coils on the valve cover or intake manifold. Carefully depress the plastic locking tab on the electrical wiring harness connector and pull outward to disconnect it from each coil. Next, remove any retaining bolts holding the ignition coils in place. Gently twist each coil back and forth to break the suction seal with the spark plug well, then pull straight up to extract the unit. Visually inspect the rubber boots for cracking, oil contamination, or white powdery residue indicating past electrical tracking.
Pro Tip: If you find oil pooled inside the spark plug wells, you must replace your valve cover gaskets immediately; dielectric grease will not fix an oil leak.
Step 4: Clean the Rubber Boots and Terminals
What you need: Electrical contact cleaner spray and clean, lint-free shop towels.
Instructions: Take your extracted ignition coils to a workbench. Spray a small amount of electrical contact cleaner inside the rubber spark plug boots and onto the internal metal terminal spring. Using a clean shop towel or a lint-free swab, wipe away any dirt, old grease, or carbon tracking residue from the interior of the boot. It is vital that the contact surfaces are completely clean and dry before applying fresh dielectric grease to ensure a strong, uninterrupted electrical connection.
Pro Tip: Never use brake cleaner or harsh solvents inside rubber ignition boots, as these chemicals can cause the rubber to swell, crack, or degrade prematurely.
Step 5: Apply Dielectric Grease to the Inside of the Boot
What you need: A tube of dielectric grease and a clean cotton swab (Q-tip) if precision is needed.
Instructions: Squeeze a small, pea-sized amount of dielectric grease (approximately the size of a BB or grain of rice) onto your gloved finger or a cotton swab. Smear a thin, even coat completely around the inside rim and lower interior walls of the rubber ignition coil boot. You do not need to fill the boot with grease; a light film is all that is required to create a moisture-proof seal and prevent the rubber from vulcanizing to the ceramic spark plug insulator.
Pro Tip: Less is more when it comes to dielectric grease. Applying too much can create a hydraulic lock or attract dirt and debris into the spark plug well.
Step 6: Grease the Internal Terminal Connection Point
What you need: Dielectric grease and a clean applicator tool or gloved fingertip.
Instructions: Place a tiny dab of dielectric grease directly onto the metal spring terminal located deep inside the ignition coil boot. This specific application point is critical because it cushions the metal-to-metal connection between the coil spring and the spark plug terminal tip. The grease acts as a barrier against moisture and atmospheric corrosion while still allowing high-voltage current to pass seamlessly through the contact point without resistance.
Pro Tip: Ensure that no glob of grease gets directly onto the flat tip of the terminal where metal-to-metal contact is made, as this can theoretically cause a misfire, though pure silicone is generally displaced under pressure.
Step 7: Reinstall Coils and Verify Connections
What you need: Torque wrench, appropriate sockets, and your vehicle’s service manual for torque specifications.
Instructions: Carefully push each greased ignition coil straight down over its respective spark plug until you feel a distinct mechanical click or seating action. Reinstall the coil mounting bolts and tighten them to factory specifications—typically between 5 to 8 foot-pounds, depending on the make and model. Reconnect the electrical wiring harnesses, ensuring the locking tabs snap securely into place. Finally, reconnect your negative battery terminal and tighten it firmly.
Pro Tip: Start the engine and let it idle for 3 to 5 minutes to ensure smooth operation and verify that no check engine lights or misfire codes appear.
✅ Final Checklist
- Negative battery terminal is disconnected during installation and securely reconnected afterward
- Ignition coil rubber boots are free of cracks, oil, and old debris before application
- A thin, pea-sized layer of dielectric grease is applied to the inside of each boot
- Metal spring terminals inside the coils have a light coating of grease for corrosion protection
- All ignition coil mounting bolts are torqued to manufacturer specifications and electrical connectors are securely locked
Important Notes:
- Always work on a cold engine to avoid thermal burns and prevent warping of aluminum cylinder head threads.
- Seek professional mechanic assistance if you encounter broken spark plugs, stripped mounting threads, or persistent engine misfires after servicing.
- Estimated time for this job is 30 to 60 minutes, with a total material cost under $15 for a tube of dielectric grease and contact cleaner.
How to Apply Dielectric Grease to an Ignition Coil Step by Step
Correct application requires precision. Using too much grease causes hydraulic lock inside the boot, preventing it from seating fully on the spark plug.
Preparing the Ignition Coil Boot
- Inspect your ignition coil boot for cracks, tears, or oil contamination from a leaking valve cover gasket.
- Wipe the interior of the rubber boot completely clean using a lint-free shop rag and a quick-drying electrical contact cleaner.
- Ensure the interior is completely dry before moving on to the next step.
Applying the Grease Correctly
- Squeeze a tiny, rice-sized amount of dielectric grease onto a cotton swab or your gloved finger.
- Apply a thin, uniform film around the inside rim of the spark plug end of the boot.
- Focus the grease on the sealing lips that grip the ceramic insulator, leaving the internal metal spring clean and dry.
Critical Warnings on Where NOT to Put Dielectric Grease on Ignition Coil
Applying dielectric grease requires precision. Misapplying this compound can disrupt electrical conductivity and damage expensive engine components. According to automotive engineering guidelines from manufacturers like Delphi and Denso, silicone-based grease is an electrical insulator. Therefore, location matters entirely.
Never Apply Grease to Terminal Pins
You must never place dielectric grease directly onto the metal terminal pins inside the electrical connector. While the grease protects against moisture, putting a thick layer directly between the mating metal contacts creates resistance. This restriction interrupts the low-voltage signal from the powertrain control module. Instead, apply a thin layer only around the plastic housing seal of the connector to block moisture externally.
Keep Grease Away from Spark Plug Tips
Avoid globbing grease onto the very tip of the spark plug or inside the metal terminal clip of the boot. The high-voltage spark must jump cleanly from the coil spring to the spark plug terminal. Excess grease trapped directly between these two metal contact points can dampen the spark energy. Follow these three rules to prevent misapplication:
- Never fill the entire boot cavity with grease, as hydraulic pressure will prevent the boot from seating fully on the spark plug.
- Keep the grease strictly on the rubber interior of the boot and the ceramic insulator of the spark plug.
- Wipe away any excess compound immediately using a clean, lint-free shop towel before final reassembly.
What If It Still Doesn’t Work?
If you properly applied dielectric grease but your engine continues to misfire, the underlying issue extends beyond moisture or minor terminal corrosion. Modern vehicle diagnostic standards require a systematic approach to resolve persistent ignition system failures effectively.
Advanced Troubleshooting Steps
Work through these verified fallback steps to isolate the root cause of the persistent engine misfire:
- Scan the vehicle computer for diagnostic trouble codes using an OBD2 scanner to identify the exact misfiring cylinder.
- Swap the suspect ignition coil with an adjacent cylinder to determine if the fault code follows the coil or stays with the cylinder.
- Inspect the spark plugs for heavy carbon fouling, oil contamination, or excessive electrode gap wear, replacing them if necessary.
- Test the fuel injectors and perform a compression test if swapping the ignition coil fails to eliminate the misfire.
If these diagnostic steps do not resolve the issue, consult a certified professional mechanic. According to 2026 automotive labor data, professional diagnostic fees typically range from $100 to $150, while total ignition coil and spark plug replacement costs span $150 to $400 depending on your vehicle make and model.
Conclusion
Properly applying dielectric grease to your ignition coil seals out moisture, prevents corrosion, and extends the lifespan of your ignition components. By placing a pea-sized amount inside the rubber boot and around the electrical connector seals—while strictly avoiding the metal contact pins—you ensure optimal electrical performance. According to verified research and expert sources from leading automotive service associations, proactive maintenance of ignition connections prevents costly roadside breakdowns. Take action today by inspecting your ignition boots, cleaning away old residue, and applying fresh dielectric grease to safeguard your engine for the road ahead.
❓ Frequently Asked Questions
Where is the exact spot to apply dielectric grease on a coil-on-plug ignition coil?
The correct spot is on the inner rubber rim and walls of the spark plug boot where it slides over the ceramic portion of the spark plug. This creates a waterproof seal and prevents the rubber from fusing to the plug.
Should I put dielectric grease on the electrical connector plug of the ignition coil?
Yes, you can apply a very thin layer around the plastic weather-pack seal of the main wiring harness connector to keep out moisture, but keep it away from the internal metal pins.
Can dielectric grease conduct electricity if applied incorrectly?
No, dielectric grease is a non-conductive silicone compound designed to block electricity. If applied directly onto metal-on-metal electrical contact points, it can interrupt the current flow.
How do I remove old dielectric grease before applying new grease?
Use a lint-free swab and an electrical contact cleaner or brake cleaner inside the boot. Ensure the interior is completely dry before adding fresh grease.
Does dielectric grease help fix engine misfires?
It does not fix a failing ignition coil or spark plug, but it prevents moisture-induced misfires by sealing out water and preventing tracking paths.
How often should I reapply dielectric grease to my ignition coils?
You should reapply a fresh coating every time you change your spark plugs or remove the ignition coils for routine maintenance.