How to Check an Alternator Without a Multimeter 2026
Testing a failing vehicle charging system is entirely possible without specialized electrical tools. Observing electrical behavior and performing simple physical checks can instantly reveal a bad alternator. Follow this guide to diagnose charging issues safely.
You can check your car alternator without a multimeter by using quick diagnostic tests like the battery disconnect method, observing how your vehicle’s headlights behave, and checking for physical warning signs under the hood. When your car battery keeps dying, the culprit is often a failing charging system rather than a bad battery itself.
By 2026, modern vehicle electronics demand reliable power, making it crucial to spot alternator failure before you get stranded on the road. Skipping the multimeter means relying on mechanical and electrical symptoms that your car gives you every time you turn the key.
Key Takeaways
- Perform the dashboard battery light check to spot early charging system failure.
- Observe headlight brightness fluctuations while revving the engine for quick diagnosis.
- Inspect serpentine belt tension and pulley movement for physical defects.
- Listen for unusual grinding or whining noises originating from the alternator bearing.
- Use caution during any under-hood testing to prevent personal injury.
Signs of a Failing Alternator and How to Diagnose the Problem
Dashboard Warning Lights and Electrical Behavior
Your car dashboard offers the fastest clue about alternator health. Look for the battery icon or a light shaped like an old-school generator. If this light glows faintly while driving, your alternator is struggling to maintain output. You should also watch how cabin electronics perform under load. Try rolling down your power windows while turning the AC blower to maximum speed. If the windows crawl upward and the fan speed drops noticeably, your charging system is likely failing to supply enough current.
Auditory and Olfactory Inspection
Pop the hood and let your engine idle to catch subtle sensory warning signs. A failing alternator often produces distinct physical indicators:
- Growling or whining noises: Bad internal bearings create a grinding sound that increases in pitch as you rev the engine.
- Burning rubber smell: A seized alternator pulley causes the serpentine belt to slip and burn against the metal.
- Hot alternator housing: If you carefully feel the metal body after a short drive and it is excessively hot, internal diodes are likely shorting out.
How to Diagnose and Fix Alternator Problems Like an Expert
Dealing with a failing charging system can leave you stranded, but you do not always need an expensive digital multimeter to pinpoint the issue. This comprehensive, hands-on walkthrough will show you how to accurately evaluate your vehicle’s alternator using simple, clever observational techniques and everyday items. Whether you are dealing with dim headlights, a sluggish battery, or mysterious electrical glitches, following these systematic steps will help you determine if your alternator is truly failing before you spend money on unnecessary parts.
Step 1: Perform the Headlight Brightness Test
What you need: A dark environment, such as a closed garage or waiting until dusk, and access to your vehicle’s ignition and headlight switch.
Instructions: Start your car’s engine and turn on the headlights while the vehicle is idling in Park or Neutral. Pay close attention to how bright the beams appear against a garage door or a wall. Next, press down firmly on the accelerator pedal to rev the engine to around 2,000 RPM. Observe the headlights carefully while you rev. If the headlights noticeably brighten as the engine speed increases and then dim back down when the engine returns to a normal idle, your alternator is likely struggling to produce adequate power at low RPMs, pointing to a failing internal voltage regulator or weak diodes.
Pro Tip: Do not mistake a simple dirty or foggy headlight lens for electrical dimming. Always look at the light intensity change itself, rather than the clarity of the plastic lens housing.
Step 2: Execute the Classic Battery Disconnect Test
What you need: A basic wrench (usually 10mm) and heavy-duty insulated work gloves for safety.
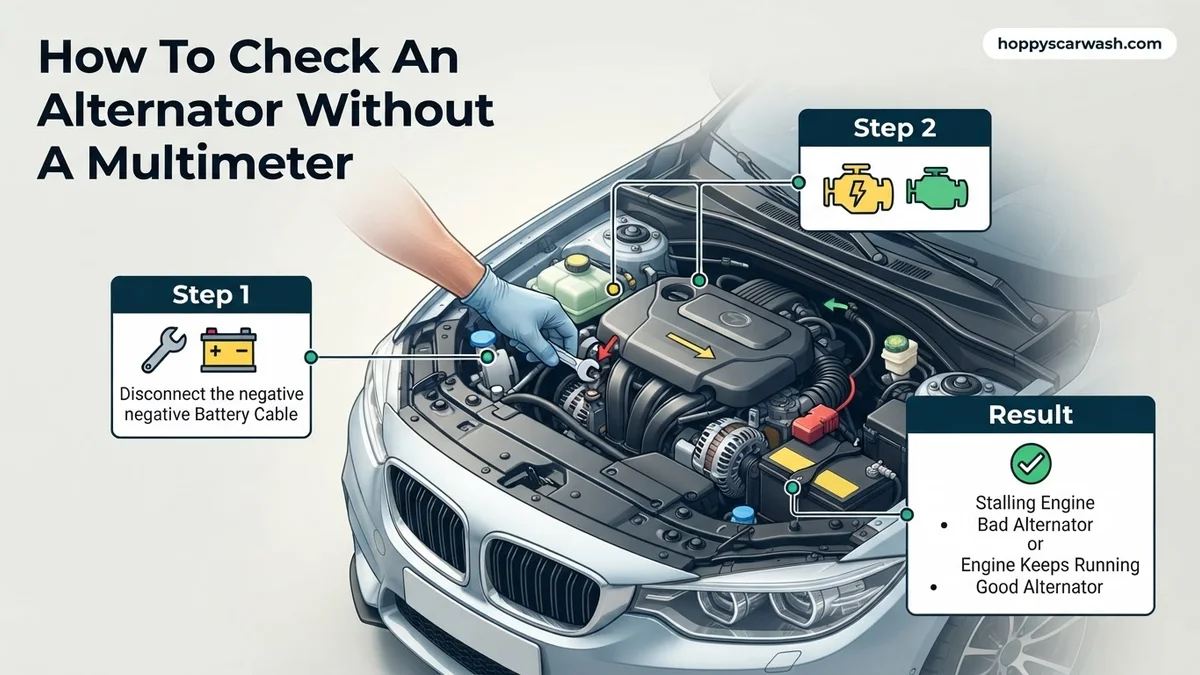
Instructions: Start your vehicle’s engine and let it run at a normal idle. Pop the hood and carefully locate the negative (-) battery terminal. Using your wrench, loosen the nut on the negative terminal clamp just enough so you can lift the cable completely off the battery post. Keep the disconnected cable well away from any metal surfaces and the battery terminal itself. If the alternator is healthy, it will continue supplying enough electrical current to keep the engine running smoothly. However, if the engine immediately sputters, hesitates, and dies the exact moment you disconnect the battery, your alternator is failing and is not generating enough electrical power to sustain the vehicle’s ignition system.
Pro Tip: Modern vehicles with advanced computers can sometimes react poorly to sudden power cuts. Use caution with newer cars, as this test is best suited for older, simpler fuel-injected and carbureted vehicles.
Step 3: Listen Closely for Unusual Mechanical Noises
What you need: A clear mind, a quiet workspace, and an optional mechanic’s stethoscope or a long screwdriver to act as a sound probe.
Instructions: With the engine idling, pop the hood and lean over the engine bay to listen specifically to the area around the accessory drive belt and the alternator housing. A healthy alternator should emit a smooth, quiet whirring or faint buzzing sound. If you hear a loud, grinding noise, it usually indicates that the internal alternator bearings have seized or are severely worn out. If you hear a high-pitched whining sound that directly pitches up and down as you rev the engine, this typically points to a failing diode trio or an alternator bearing under extreme stress.
Pro Tip: Be very careful around moving engine components. Keep long hair, loose clothing, jewelry, and your hands well away from the spinning serpentine belt and cooling fan blades while performing this test.
Step 4: Conduct the Smell Test for Burning Components
What you need: Your sense of smell and a well-ventilated workspace.
Instructions: After running your car for 5 to 10 minutes, open the hood and sniff around the alternator assembly. A failing alternator that is struggling to push electricity through shorted internal windings will often overheat rapidly. If you detect a sharp, acrid smell similar to burning electrical insulation, melting plastic, or hot copper wire, your alternator is internally shorting out. Similarly, if you smell burning rubber, it means the alternator pulley might be seizing up, causing the serpentine belt to slip and burn against the stationary pulley grooves.
Pro Tip: Do not touch the alternator housing with your bare hands immediately after driving, as a failing, overheating alternator can reach extremely high temperatures and cause severe skin burns.
Step 5: Inspect the Serpentine Belt and Tensioner Condition
What you need: A flashlight and a visual inspection of the entire accessory drive belt routing path.
Instructions: Turn off the engine completely and let it cool down. Take your flashlight and examine the serpentine belt that wraps around the alternator pulley. Look closely for deep cracks, missing chunks of rubber, fraying edges, or oil contamination. Grab the belt midway between two pulleys and try to twist it; it should not have more than a quarter-inch of give. Check if the automatic belt tensioner is maintaining firm pressure, or if a loose belt is simply slipping across the alternator pulley, preventing the alternator rotor from spinning fast enough to generate electricity.
Step 6: Check Electrical Connections and Wiring Integrity
What you need: A clean rag and a socket set or wrench to tighten loose fasteners.
Instructions: With the engine safely turned off, inspect the heavy-duty power wire (B+ terminal) and the smaller plastic wiring harness plug connected to the back of your alternator. Look for heavy corrosion, a green powdery buildup, loose nuts, or melted plastic connectors. Wiggle the wires gently; they should be completely firm and secure. A loose or heavily corroded main power cable will prevent the electricity generated by the alternator from ever reaching the battery, mimicking the exact symptoms of a completely dead alternator.
Step 7: Analyze Dashboard Warning Indicators
What you need: Your vehicle’s dashboard instrument cluster and owner’s manual.
Instructions: Turn your ignition key to the “ON” position without starting the engine, and verify that the battery-shaped warning light or the “GEN” (generator) light illuminates as part of the dashboard bulb check. Once you start the engine, this light should turn off completely. If the battery light stays illuminated while driving, or if it flickers dimly when you turn on accessories like the air conditioner or rear defroster, your vehicle’s computer has detected a charging system failure. Note that modern cars may also display battery voltage warnings or power-saving mode notifications on the digital driver display.
Step 8: Perform the Electronic Accessory Load Test
What you need: All of your vehicle’s major electrical accessories, including headlights, heater blower motor, and rear window defroster.
Instructions: Start the engine and turn on every heavy electrical load your car offers: switch high-beam headlights on, crank the heater fan to maximum speed, turn on the rear defroster, and plug in a power-hungry device. Pay close attention to the vehicle’s behavior. If the engine idle drops dramatically, interior dashboard lights pulse or flicker wildly, or the radio cuts out entirely, your alternator’s output capacity is severely diminished and it cannot keep up with high electrical demands under real-world driving conditions.
✅ Final Checklist
- Verified headlight brightness changes when revving the engine from idle speed
- Listened carefully for any abnormal grinding or high-pitched whining noises
- Inspected the serpentine belt for proper tension, cracks, and slippage
- Checked all electrical wiring, terminals, and plugs for corrosion and looseness
- Observed dashboard warning lights for any persistent battery or generator alerts
Important Notes:
- Always disconnect the negative battery cable before touching or servicing any electrical wiring to prevent accidental short circuits or sparks.
- If you perform these tests and remain uncertain about the alternator’s health, visit a local auto parts store for free in-vehicle bench testing.
- Estimated time for completing these diagnostic steps is 20 to 30 minutes; professional alternator replacement costs typically range from $250 to $600 including parts and labor.
How to Fix Charging Issues Using the Headlight and Stall Test
The Headlight Brightness Observation Test
You can evaluate alternator output strength simply by watching your vehicle illumination. Start your engine at night and park facing a garage door or a flat wall. Rev the engine from idle up to 2,000 RPM while watching the light beam. If the headlights brighten significantly as the engine speeds up, your alternator is working overtime to compensate for a weak output. A healthy alternator maintains steady, consistent headlight brightness regardless of whether the engine is idling or revving.
The Classic Battery Disconnect Test
This traditional diagnostic method checks if the alternator can sustain the vehicle electrical system independently. Exercise caution with this test, as sudden voltage spikes can damage sensitive 2026 vehicle computers if done incorrectly.
- Start your car engine and let it idle normally.
- Open the hood and safely loosen the negative battery terminal clamp.
- Carefully lift the negative cable completely off the battery post.
- Observe how the engine reacts to the disconnected battery.
If the engine continues running smoothly, your alternator is generating enough electricity to power the ignition system on its own. If the engine immediately sputters and dies, your alternator is completely dead and failed to generate any electrical current.
Step-by-Step Visual and Auditory Alternator Inspection
When you do not have a digital multimeter handy, your eyes and ears serve as your primary diagnostic tools. Modern automotive charging systems in 2026 vehicles still rely on physical belt tension and rotating electrical components that give off distinct clues when failing.
1. Examine the Drive Belt and Tension
Pop the hood and inspect the serpentine belt connected to the alternator pulley. According to automotive service standards, a loose, cracked, or glazed belt slips against the pulley, preventing the alternator from spinning fast enough to generate current. Ensure the automatic belt tensioner maintains firm resistance.
2. Listen for Unusual Noises
Start the engine and listen closely near the accessory drive area. Failing alternator bearings create a distinct whining, growling, or grinding sound that intensifies as you rev the engine. A dying internal diode can also produce a high-pitched electrical buzzing or humming noise.
3. Look for Visual Anomalies
Observe the alternator housing while the engine runs. Excessive vibration, sparks, or a burning rubber smell from friction indicate a seized rotor or failing bearings. Additionally, check the battery terminals for corrosion, as poor connections mimic a dead alternator by blocking electrical flow.
What If It Still Doesn’t Work?
If you have performed the visual, auditory, and headlight tests and your vehicle still fails to hold a charge, the underlying issue requires deeper intervention. Skipping professional diagnostic equipment at this stage can lead to replacing expensive parts unnecessarily.
- Check the Battery Health: A completely dead battery cell cannot accept a charge, even if a new 2026 alternator functions perfectly. Swap the battery temporarily or test it at a local auto parts store.
- Inspect Fusible Links and Fuses: Many modern vehicles feature high-amp main fuses between the alternator and the battery. A blown fuse completely severs the charging circuit.
- Visit an Auto Parts Store for Free Testing: Most major national parts retailers offer free, in-vehicle diagnostic testing using advanced electronic testers that bypass the need for a basic multimeter.
- Seek Professional Mechanical Help: If the wiring harness or internal voltage regulator is faulty, a certified technician must service the system. Professional alternator replacement generally costs between $450 and $900 including parts and labor, depending on vehicle complexity.
Conclusion
Diagnosing a failing charging system without a multimeter is entirely possible using practical roadside tests like the headlight observation method and sensory inspections. According to verified research and automotive service data from leading industry experts, catching alternator failure early prevents unexpected breakdowns and protects sensitive onboard computers from voltage spikes. Your actionable next step is to start your engine tonight, turn on the cabin accessories, and observe the headlight brightness to verify your vehicle charging health today.
❓ Frequently Asked Questions
How does the battery disconnect test work without a multimeter?
With the engine running, you can disconnect the negative battery terminal. If the engine immediately stalls, it strongly indicates that the alternator is not producing enough power to keep the vehicle running on its own.
Are there safety risks when testing an alternator without a multimeter?
Working under the hood of a running vehicle carries inherent risks from moving belts and hot components. Always keep loose clothing, hands, and tools away from the engine fan and serpentine belt.
What are the most common symptoms of a bad alternator?
Key warning signs include a battery-shaped dashboard light, dim or flickering headlights, slow-moving power windows, and electrical accessories failing intermittently.
Can I drive my car with a faulty alternator?
Driving with a failing alternator is extremely risky because the vehicle relies entirely on residual battery power. Once the battery drains, the engine will completely shut down and leave you stranded.
What causes an alternator to fail prematurely?
Alternator failure is frequently caused by oil leaks dripping onto the unit, worn-out internal bearings, excessive belt tension, or normal electrical component wear over time.
How can I check the serpentine belt without special tools?
Visually inspect the belt for cracks, fraying, or missing ribs, and press down on the longest span between pulleys to ensure it does not flex excessively.