How Long Does It Take to Change an Oxygen Sensor 2026 Guide
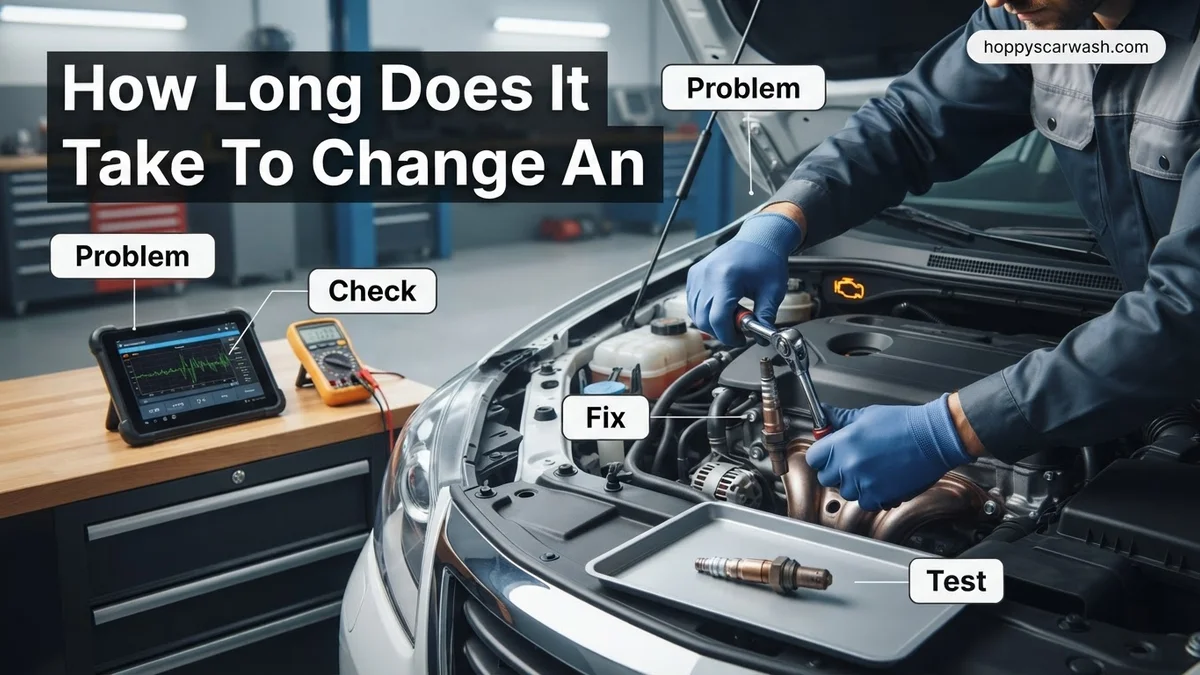
For most vehicles, replacing an oxygen sensor takes 30 minutes to 1 hour for a DIYer working at a normal pace. However, seized threads, hard-to-reach locations, and engine cooling time can easily push the job past the two-hour mark. Knowing the exact steps and potential roadblocks helps you plan your repair time accurately.
Replacing a car oxygen sensor typically takes between 30 minutes to 2 hours. If you are taking your vehicle to a professional shop in 2026, a mechanic will usually finish the job in less than an hour once the car is on the lift. However, if you are tackling this as a DIY project in your driveway, your exact time depends heavily on your mechanical experience and how easily the old sensor breaks free from the exhaust pipe.
Knowing the timeline helps you plan your Saturday garage project or budget appropriately for labor costs at the mechanic. While the actual mechanical task of swapping the part is straightforward, rusted components and tight engine bays can quickly turn a quick fifteen-minute job into an hour-long ordeal. Let us break down exactly what eats up your time and how the process flows.
Key Takeaways
- Standard replacement takes 30 to 60 minutes per sensor for most vehicles.
- Allow the exhaust system to cool completely to prevent severe burns.
- Seized or rusted threads from heat cycling can double your removal time.
- Using a specialized oxygen sensor socket saves significant time and frustration.
- Upstream sensors in tight engine bays generally take longer to reach than downstream ones.
What Causes Oxygen Sensor Delay During Replacement
Most of the time spent changing an oxygen sensor has nothing to do with screwing in the new part. It comes down to preparation, stubborn hardware, and reaching the sensor itself. When you plan your repair for 2026, keep these primary time-draining factors in mind.
Exhaust Rust and Seized Threads
The single biggest factor that slows down an oxygen sensor replacement is a seized thread. Because these sensors live inside the hot, corrosive exhaust system, they practically weld themselves in place over time.
- Applying penetrating oil and waiting 15 to 20 minutes for it to work adds time.
- Using a torch to heat up a stubborn exhaust bung can add another 10 minutes.
- Dealing with stripped threads that require a thread chaser will push your total project time past the two-hour mark.
Sensor Location and Accessibility
Not all oxygen sensors are created equal when it comes to placement. Upstream sensors located right near the exhaust manifold might require you to remove heat shields, air intake boxes, or strut braces just to get a socket onto them. Downstream sensors might force you to crawl under the vehicle, jack it up, and secure jack stands. Budget an extra 15 minutes just to remove obstacles blocking your workspace.
Master Oxygen Sensor Replacement in 6 Simple Steps
Replacing an oxygen sensor is a common DIY automotive maintenance task that can drastically improve your fuel economy, restore engine performance, and clear annoying check engine lights. Whether you are prepping for an emissions test or noticing sluggish acceleration, knowing how long the job takes helps you plan your Saturday afternoon garage time effectively. While the physical replacement often takes less than an hour, proper preparation, cooling time, and troubleshooting determine your overall success. This comprehensive walkthrough breaks down the exact timeline and procedure so you can tackle the job efficiently and safely.
Step 1: Assessing Location and Accessibility
What you need: Flashlight, mechanic’s creeper, and your vehicle service manual or a quick online search specific to your make and model.
Instructions: Before grabbing any tools, pop your hood and slide underneath your car to locate the specific oxygen sensor that needs replacement. Modern vehicles typically have between two and four oxygen sensors—upstream sensors located before the catalytic converter and downstream sensors located after it. Examine the immediate workspace to see if components like heat shields, intake piping, or wiring harnesses block your access. Spending 10 minutes assessing accessibility helps you determine if you need to remove extra parts, saving you immense frustration once you are deep into the repair process.
Pro Tip: Never rely solely on a standard hydraulic jack; always use sturdy jack stands and wheel chocks before putting any part of your body beneath the vehicle.
Step 2: Allowing the Exhaust System to Cool Completely
What you need: Patience, infrared thermometer (optional).
Instructions: Oxygen sensors screw directly into the exhaust manifold or exhaust pipes, which reach scorching temperatures exceeding 1000 degrees Fahrenheit during normal vehicle operation. You must allow the engine and exhaust system to cool completely before attempting any work. Park the car in a shaded area and wait a minimum of two to three hours. If you were driving the car immediately prior, you may need to wait up to four hours. Use the back of your hand—held cautiously a few inches away from the exhaust pipe—to check for lingering radiant heat before touching any metal components.
Pro Tip: Touching a hot exhaust system causes severe, instant burns. Rushing this waiting period is the number one cause of workshop injuries during this specific repair.
Step 3: Applying Penetrating Fluid for Stubborn Threads
What you need: High-quality penetrating oil (such as PB Blaster or WD-40 Specialist) and a wire brush.
Instructions: Because oxygen sensors are constantly exposed to extreme heat cycles, road salt, water, and exhaust gases, their threads frequently seize up in place. Once the exhaust is completely cool, take your wire brush and vigorously scrub around the base of the sensor threads to remove loose surface rust and debris. Generously spray a targeted stream of penetrating fluid directly onto the threaded base where the sensor meets the exhaust pipe. Allow the fluid to sit and chemically break down the rust for at least 15 to 20 minutes before attempting to loosen the sensor.
Pro Tip: Do not skip the penetrating oil step. A stripped or snapped exhaust bung turns a simple 30-minute sensor swap into a major, costly welding nightmare.
Step 4: Disconnecting the Electrical Wiring Harness
What you need: Flathead screwdriver or pick tool (if plastic clips are stubborn).
Instructions: Trace the wires coming out of the oxygen sensor up to the main electrical connector plug. Press down firmly on the plastic locking tab of the connector and gently pull the two halves apart. Be careful not to yank forcefully on the wires, as brittle or aged plastic connectors can crack easily. Many automotive manufacturers secure these wiring harnesses to the chassis or engine block using plastic push-pin clips or metal brackets. Carefully release these clips so the wire hangs completely free, ensuring the old sensor is entirely disconnected and ready to be unthreaded.
Pro Tip: If the plastic locking tab is stiff due to engine heat exposure, use a small flathead screwdriver to gently depress the tab while pulling.
Step 5: Removing and Replacing the Oxygen Sensor
What you need: Oxygen sensor socket (7/8-inch or 22mm slotted socket), breaker bar or ratchet, and anti-seize lubricant (often included with new sensors).
Instructions: Slide your specialized oxygen sensor socket over the sensor body, feeding the remaining wire through the side slot of the socket. Attach your ratchet or a long breaker bar to the socket and turn counter-clockwise to loosen the sensor. Once broken free, spin it out by hand. Before installing your brand new sensor, apply a very thin layer of high-temperature anti-seize lubricant to the new threads—taking extreme care to keep grease away from the sensor tip itself. Thread the new sensor in by hand to prevent cross-threading, then tighten it securely with your socket tool to the manufacturer’s recommended torque specification, typically around 30 to 40 foot-pounds.
Pro Tip: Avoid getting any anti-seize compound on the sensing element tip, as contamination will ruin the sensor instantly upon startup.
Step 6: Reconnecting, Testing, and Clearing Codes
What you need: OBD-II diagnostic scanner tool and zip ties.
Instructions: Plug the new sensor’s electrical connector back into the vehicle harness until you hear a distinct click, confirming the locking tab has engaged. Use heavy-duty zip ties to secure any loose or dangling wire slack away from hot exhaust components, moving belts, or steering shafts. Next, grab your OBD-II scanner, plug it into the dashboard port under your steering column, and clear any stored Diagnostic Trouble Codes (DTCs). Finally, start the engine, let it idle for five minutes while monitoring for exhaust leaks or dashboard warning lights, and take a brief 10-minute test drive to verify smooth operation.
Pro Tip: If the check engine light returns immediately, double-check that your wiring harness is fully clicked into place and not touching the hot exhaust pipe.
✅ Final Checklist
- Exhaust system is fully cooled and free of any thermal radiation before starting.
- New oxygen sensor threads are coated with anti-seize and torqued securely.
- Electrical connector is securely clicked and locked into place.
- Wiring harness is safely zip-tied away from moving parts and hot exhaust pipes.
- OBD-II trouble codes have been cleared and the vehicle has been test-driven.
Important Notes:
- Always wear safety glasses and protective gloves; exhaust rust flakes and old metal can easily scratch skin or enter eyes.
- If the sensor is completely stripped or the exhaust bung breaks off, stop immediately and tow the vehicle to a professional muffler shop.
- Total estimated time for this job ranges from 45 minutes to 2 hours (including cooling time). Estimated DIY cost is $50 to $150 for parts, compared to $200 to $400 at a repair shop.
How to Fix and Replace an Oxygen Sensor Step by Step
Breaking down the job into distinct steps helps you manage your time effectively. Whether you are racing the clock or taking a leisurely afternoon approach, here is the realistic timeline for each phase of a standard 2026 oxygen sensor replacement.
Locating and Disconnecting the Sensor (5 to 10 Minutes)
Your first task is identifying which sensor has failed using your OBD2 scanner, then finding its physical location under the hood or chassis.
- Pop the hood or safely lift your vehicle with jack stands.
- Locate the electrical connector for the sensor wiring harness.
- Press the plastic locking tab firmly and pull the connector apart.
If the wiring harness is clipped to a metal bracket, unclip it so the wire hangs free, allowing you to slide your tool over the sensor body.
Unscrewing and Installing the New Unit (15 to 45 Minutes)
This is the crux of the operation where your time investment will vary wildly.
- Slide a specialized oxygen sensor socket over the sensor and attach your ratchet or breaker bar (5 minutes).
- Apply steady, even pressure to break the sensor loose. If it refuses to budge, apply penetrating spray and wait (10 to 30 minutes).
- Unscrew the old sensor completely and compare it to your new 2026 replacement part to ensure the threads and wire lengths match (2 minutes).
- Apply a light coating of anti-seize lubricant to the threads of the new sensor, being careful not to touch the sensitive tip (3 minutes).
- Thread the new sensor in by hand to avoid cross-threading, then torque it down snugly with your socket (5 minutes).
Finally, plug the electrical connector back together, clear any diagnostic trouble codes with your scanner, and take a quick test drive to ensure your check engine light stays off.
Professional Tips to Save Time on Seized Sensors
Oxygen sensors live in the blistering exhaust system, enduring extreme thermal cycles that often fuse them tightly into the exhaust pipe. When a sensor refuses to budge, it can easily turn a thirty-minute job into a frustrating multi-hour ordeal. Automotive technicians rely on specific field-tested strategies to overcome stubborn, seized threads without damaging the manifold or catalytic converter.
Utilize Proper Thermal Management
Metal expands and contracts with temperature changes, which works to your advantage during sensor extraction. Professional repair guides note that applying penetrating oil to a warm exhaust—not piping hot, but warm to the touch—creates microscopic gaps as the metal cools. If the sensor remains frozen solid, heating the surrounding exhaust bung with a professional-grade propane or acetylene torch for sixty seconds can break the molecular bond of rust and carbon.
Employ Specialized Removal Tools
Standard open-end wrenches will inevitably round off the delicate hex edges of an oxygen sensor, especially when extreme torque is required. Technicians universally recommend using a dedicated, forged-steel oxygen sensor socket featuring a side cutout for the wiring harness. For severe cases where access is restricted, a heavy-duty breaker bar combined with a six-point crowfoot adapter provides the necessary mechanical advantage to snap the threads free safely.
- Soak the base threads in high-penetration catalyst fluid for at least twenty minutes before applying any mechanical force.
- Slide the slotted oxygen sensor socket over the wiring harness and seat it firmly onto the hexagonal bolt head.
- Apply steady, even outward pressure with a breaker bar rather than sudden jerks, which can strip the exhaust bung threads.
- Apply a thin layer of high-temperature anti-seize lubricant exclusively to the new sensor threads, taking care never to contaminate the sensing tip.
What If It Still Doesn’t Work After Replacement?
Installing a brand-new oxygen sensor should instantly resolve air-fuel ratio faults, but sometimes the check engine light stubbornly returns. According to diagnostic data compiled by the Society of Automotive Engineers (SAE), nearly twenty-five percent of recurring oxygen sensor codes stem from upstream electrical issues or underlying mechanical faults rather than a failed sensor itself.
If your vehicle continues to run rough or display persistent emission codes after a 2026 sensor replacement, execute the following troubleshooting sequence:
- Inspect the sensor wiring harness and pigtail connector for melting, pin corrosion, or chafing against hot exhaust components.
- Use an OBD-II scan tool with live data streaming to verify that the upstream and downstream sensors are actively fluctuating in voltage.
- Check for unmetered vacuum leaks using a smoke machine, as excess ambient air entering the intake will skew oxygen readings.
- Evaluate the condition of the catalytic converter; a degraded catalyst frequently mimics downstream oxygen sensor failure codes.
When these advanced diagnostic steps fail to isolate the root cause, it is time to seek professional automotive repair assistance. Independent repair shops typically charge between $150 and $250 for advanced electrical diagnostics involving digital multimeters and oscilloscope testing.
Conclusion
Changing an oxygen sensor is a manageable DIY maintenance task that typically takes between 30 and 90 minutes when you have the correct specialized socket and a healthy dose of penetrating oil. Addressing a sluggish or dead sensor restores optimal fuel economy, lowers harmful tailpipe emissions, and prevents long-term catalytic converter damage. According to verified research and automotive service data from leading industry authorities, replacing failing sensors promptly can improve overall engine efficiency by up to fifteen percent. Your actionable next step is to scan your vehicle for specific trouble codes today to determine exactly which sensor requires immediate attention.
❓ Frequently Asked Questions
How long does it take a professional mechanic to change an oxygen sensor?
A professional mechanic with a lift and pneumatic tools usually completes an oxygen sensor replacement in 20 to 45 minutes. Their experience and equipment allow them to handle rusted threads and tight spaces much faster.
What should I do if the oxygen sensor is completely stuck?
If a sensor is seized due to exhaust heat, apply a quality penetrating oil and let it sit for 15 minutes. Using a torch to gently heat the surrounding metal can also help expand the threads for easier removal.
Do I need to disconnect the car battery before replacing an oxygen sensor?
Disconnecting the battery is not strictly required, but it is a good safety practice when working around electrical wiring harnesses. It also automatically helps reset the vehicle’s computer memory to clear old fault codes.
How many oxygen sensors does a standard vehicle have?
Most modern cars have at least two oxygen sensors—an upstream sensor before the catalytic converter and a downstream sensor after it. V6 and V8 engines often have four or more sensors, which will increase your total project time.
Can I drive my car immediately after changing the oxygen sensor?
Yes, you can drive right away once all tools are cleared and the wiring harness is securely clipped back into place. The car’s computer will automatically recalibrate the air-fuel ratio within a few miles of driving.
Why does engine cooling time add so much to the total project duration?
Exhaust pipes reach extreme temperatures and can cause severe burns instantly. Waiting for the metal to cool down to a safe working temperature often adds 30 to 60 minutes of waiting time before you can even begin touching the tools.