Can I Change From Conventional Oil to Synthetic 2026 Guide
Yes, you can safely switch from conventional motor oil to synthetic oil at any time without damaging your engine. The common myth that synthetic oil causes leaks in older or high-mileage cars is largely outdated, as modern synthetic oils are fully compatible with all standard engine seals.
Yes, you can safely switch from conventional oil to synthetic oil at any time, regardless of your car’s mileage. Whether you drive a brand-new 2026 model or an older vehicle with over 150,000 miles on the odometer, modern synthetic oils are fully compatible with engines that have run exclusively on conventional mineral oil.
For years, drivers have worried that upgrading their motor oil would trigger sudden mechanical failures. This transition matters practically because synthetic oil provides superior thermal stability, better cold-weather flow, and longer intervals between changes, protecting your investment without requiring any risky engine modifications.
Key Takeaways
- Switching from conventional to synthetic oil is completely safe for almost all modern engines.
- Synthetic oil does not cause new leaks, though it may clean away sludge that was masking an existing seal issue.
- You do not need to use a special engine flush when making the transition.
- Conventional and synthetic oils can be safely mixed in an emergency without causing engine damage.
- Synthetic oil offers superior temperature resistance and allows for longer intervals between oil changes.

What Causes Concerns When Switching to Synthetic Oil
The hesitation to switch usually stems from persistent automotive myths that circulated decades ago. Understanding the science behind these concerns helps you make the transition with complete confidence.
The Myth of Synthetic-Induced Oil Leaks
You have likely heard that synthetic oil causes engine seals to shrink and leak. This rumor started back in the 1970s when early polyalphaolefin (PAO) synthetics reacted poorly with older cork and nitrile gasket materials. Modern synthetic formulas used in 2026 contain seal-conditioning additives that actually keep your engine gaskets soft and pliable. If an older engine starts leaking after switching, the synthetic oil is simply cleaning away the heavy sludge deposits that were previously plugging up a failing gasket.
Separating Fact from Fiction About Engine Damage
Another common fear is that switching will shock your engine components. In reality, synthetics and conventional oils are chemically miscible. This means you can mix them together in your crankcase without causing any harmful chemical reactions. Synthetic oil simply flows better, coats metal surfaces faster during cold winter startups, and resists breaking down under extreme heat. Your engine will experience less friction and wear from day one.
From Start to Finish: Switching to Synthetic Oil Explained
Switching from conventional motor oil to synthetic oil is one of the smartest upgrades you can make for your vehicle’s engine. Synthetic oil offers superior thermal stability, better resistance to viscosity breakdown, and improved performance in both extreme cold and high heat. However, making the transition requires more than just pouring the new liquid into your engine. This guide walks you through the entire process, ensuring a clean, safe, and proper transition that maximizes the lifespan and efficiency of your engine.
Step 1: Check Your Owner’s Manual and Engine Compatibility
What you need: Your vehicle’s owner’s manual, a notepad, and pen or smartphone.
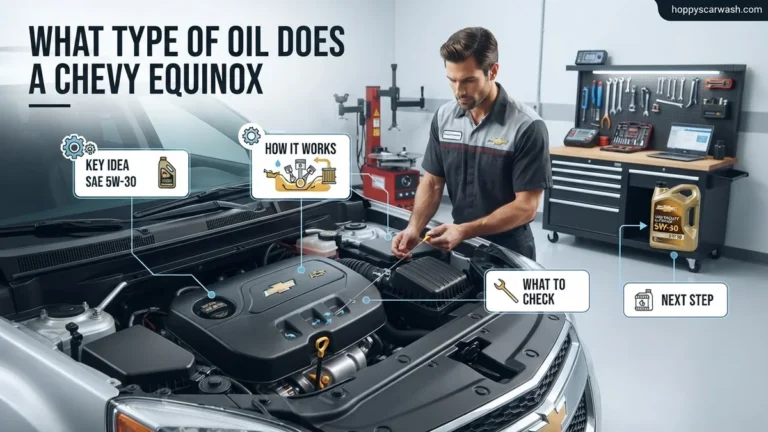
Instructions: Before purchasing any supplies, open your vehicle’s owner’s manual to verify the manufacturer’s recommended oil viscosity (e.g., 5W-30, 0W-20) and specifications. Contrary to popular automotive myths, modern conventional and synthetic oils are fully compatible, meaning you can mix them or switch back and forth without causing damage. However, you must ensure the oil weight matches your engine’s specific requirements. If your car has very high mileage (over 150,000 miles) and has never had synthetic oil, check if a high-mileage synthetic blend is a safer initial step to condition old rubber seals.
Pro Tip: Never rely solely on auto parts store database computers; always cross-reference the oil weight with the cap under your vehicle’s hood.
Step 2: Gather Your Tools and Supplies
What you need: Synthetic oil of the correct weight, a high-quality oil filter, an oil filter wrench, a socket wrench set, a drain pan, a funnel, shop rags, wheel chocks, and a car jack with jack stands.
Instructions: Layout all your equipment on a flat surface before starting. Purchase enough synthetic oil to meet your engine’s exact capacity (usually found in the manual, typically 4 to 6 quarts for standard passenger cars). Crucially, do not skimp on the oil filter. When upgrading to synthetic oil, purchase a premium, synthetic-rated oil filter designed to trap microscopic contaminants and last through extended drain intervals. Ensure you also have a clean, sealable container for recycling your old conventional oil.
Pro Tip: Buy one extra quart of synthetic oil than your engine requires just in case of spills or to keep in the trunk for future top-offs.
Step 3: Prepare the Vehicle and Warm Up the Engine
What you need: Wheel chocks, car jack, sturdy jack stands, and safety glasses.
Instructions: Park your vehicle on a flat, level surface such as a concrete driveway or garage floor. Engage the emergency brake firmly. Start the engine and let it run for approximately 3 to 5 minutes to warm up the oil. Warm oil is less viscous and flows much faster, which ensures that trapped contaminants, sludge, and old conventional oil drain completely out of the pan. Turn off the engine, pop the hood, and securely chock the rear wheels. Safely elevate the front of the vehicle using a hydraulic jack and lower it securely onto sturdy jack stands.
Pro Tip: Never crawl under a car supported only by a hydraulic jack; always use rated jack stands and give the car a firm shake to test stability.
Step 4: Drain the Old Conventional Oil
What you need: Drain pan, correct size socket wrench, shop rags, and disposable gloves.
Instructions: Locate the oil drain plug on the bottom of the engine oil pan. Position your drain pan directly underneath the plug. Using your socket wrench, carefully loosen the drain plug counter-clockwise. Once it is loose, finish unscrewing it by hand, pushing inward slightly as you make the final turn to avoid getting hot oil on your fingers. Allow the old conventional oil to stream completely into the drain pan for about 5 to 10 minutes. Inspect the drain plug washer or O-ring for wear and wipe the area clean with a shop rag once the flow reduces to a slow drip.
Pro Tip: Wear nitrile gloves to protect your skin from harmful heavy metals and toxins found in used engine oil.
Step 5: Remove and Replace the Oil Filter
What you need: Oil filter wrench, new oil filter, fresh synthetic oil, and clean rags.
Instructions: Locate the old oil filter and position your drain pan beneath it, as residual oil will spill out when removed. Use the filter wrench to loosen it counter-clockwise if it is too tight, then spin it off by hand. Before installing the new synthetic-rated filter, dip a clean finger into a bottle of fresh synthetic oil and lightly smear a thin layer of oil around the rubber gasket of the new filter. This ensures a proper seal and makes future removal much easier. Screw the new filter onto the engine mount clockwise until it makes firm contact, then tighten it about three-quarters to one full turn by hand. Do not over-tighten with a wrench.
Pro Tip: Always double-check that the old rubber gasket came off with the old filter; leaving it stuck to the engine block causes catastrophic oil leaks.
Step 6: Reinstall the Drain Plug and Fill with Synthetic Oil
What you need: Socket wrench, new washer (if applicable), funnel, and synthetic oil bottles.
Instructions: Screw the oil drain plug back into the oil pan clockwise by hand to prevent cross-threading. Once finger-tight, use your socket wrench to snug it down properly—do not over-tighten, or you may strip the oil pan threads. Remove the engine oil filler cap under the hood and insert your clean funnel. Pour in the recommended amount of fresh synthetic oil, holding back about half a quart from the total capacity to account for filter absorption and prevent overfilling. Remove the funnel, replace the oil filler cap securely, and wipe away any accidental drips.
Pro Tip: If your drain plug requires a crush washer, replace it every time you change your oil to guarantee a leak-free seal.
Step 7: Test, Check for Leaks, and Verify Levels
What you need: Dipstick and shop rags.
Instructions: Carefully lift the vehicle off the jack stands and lower it back down to level ground. Remove the wheel chocks. Start the engine and let it idle for about 30 to 60 seconds while watching the dashboard dashboard oil pressure warning light—it should turn off within a few seconds. Walk around to the front of the vehicle and peek underneath with a flashlight to ensure there are no active leaks coming from the drain plug or oil filter. Turn off the engine, wait 3 minutes for the oil to settle back into the pan, pull out the dipstick, wipe it clean, reinsert it fully, and check the fluid level against the optimal markers.
Pro Tip: Never drive your car without performing this final dipstick check; running an engine dry will destroy it within minutes.
✅ Final Checklist
- Engine oil capacity matches the manufacturer specification and dipstick reads at the full line
- Oil drain plug and oil filter are securely tightened with zero active leaks underneath
- Used conventional oil is safely stored in a sealed container for proper local recycling
- Service sticker or digital odometer reminder is updated for the next synthetic oil change interval
- Dashboard warning lights are completely clear and engine idles smoothly
Important Notes:
- Always wear safety glasses and allow hot engines to cool down slightly before working underneath to prevent severe burns.
- If you notice persistent oil leaks after switching, consult a professional mechanic, as old, degraded gaskets may need replacement.
- Estimated time: 45 to 60 minutes. Estimated cost: $40 to $80 for quality oil and filter depending on your vehicle’s capacity.
How to Safely Change From Conventional to Synthetic Oil
Making the switch does not require a complex mechanical overhaul. A standard oil and filter change is all it takes to transition your vehicle to full synthetic performance.
Do You Need an Engine Flush?
Most everyday drivers do not need to use a chemical engine flush before switching to synthetic oil. If you have kept up with regular conventional oil changes every 3,000 to 5,000 miles, your engine is already reasonably clean inside. However, if you are buying a used car with an unknown maintenance history and suspect heavy sludge buildup, a professional engine flush might be warranted. For the average vehicle, simply draining the old conventional oil and replacing the filter is entirely sufficient.
Timing and Best Practices for the Switch
The best time to make the switch is during your vehicle’s next scheduled maintenance interval. You do not need to wait for a specific milestone or break-in period. To ensure a smooth transition, keep these core practices in mind:
- Always install a brand-new oil filter designed to handle extended drain intervals.
- Check your owner’s manual to ensure the synthetic oil viscosity matches your manufacturer specifications.
- Monitor your oil level more frequently during the first thousand miles after the switch.
What If Your Engine Develops Leaks After the Switch
A persistent automotive myth suggests that switching to synthetic oil causes engine leaks. According to the Car Care Council and leading lubrication engineers, modern synthetic oils do not shrink engine seals. Instead, synthetics possess superior cleaning agents that wash away sludge and carbon deposits.
When heavy buildup dissolves around an aging, brittle gasket, a pre-existing leak might suddenly become visible. This issue typically affects vehicles with high mileage that have skipped regular maintenance intervals for years.
Addressing Sudden Seepage
If minor weeping occurs shortly after transitioning to synthetic oil in 2026, certified technicians recommend the following protocol:
- Verify the source of the fluid by checking your driveway and engine bay, ensuring the leak is oil and not coolant or power steering fluid.
- Monitor the oil level weekly using the dipstick to gauge the severity of consumption or loss.
- Add a specialized high-mileage additive if the leak is very minor, as these formulas contain seal-conditioner agents that restore pliability to rubber gaskets.
- Schedule a professional inspection with an ASE-certified mechanic if you notice pooling oil or rapid fluid loss between regular drives.
Expert Tips for Maintaining Synthetic Oil Performance
Maximizing the benefits of your new synthetic oil requires adhering to modern maintenance best practices. While synthetic oils resist thermal breakdown much better than conventional lubricants, they still require diligent oversight to protect critical engine components.
Best Practices for 2026 Drivers
Industry standards from the Society of Automotive Engineers (SAE) highlight several key steps to ensure optimal engine protection:
- Always match the precise viscosity grade recommended in your vehicle owner manual, such as 0W-20 or 5W-30.
- Pair your synthetic oil change with a high-efficiency synthetic blend oil filter designed to trap microscopic particles without restricting flow.
- Adhere to extended drain intervals cautiously, keeping in mind that severe driving conditions like frequent short trips or towing still demand earlier changes.
- Keep detailed service records digitally or in your glove box to preserve warranty compliance and vehicle resale value.
What If It Still Doesn’t Work?
If your engine continues to leak oil excessively or exhibit rough performance after transitioning to a synthetic lubricant, immediate troubleshooting is necessary. Ignoring ongoing fluid loss can lead to catastrophic internal engine damage.
- Revert to a high-mileage conventional oil of the same viscosity if the synthetic formula proves too aggressive for severely worn internal gaskets.
- Consult a professional technician to perform a dye test, which accurately pinpoints hidden gasket failures or cracked valve cover seals.
- Budget for necessary mechanical repairs, noting that standard gasket replacements typically range from $150 to $800 depending on labor complexity and engine architecture.
- Request a formal compression test if oil consumption remains abnormally high despite a dry exterior engine block, as this indicates worn piston rings.
Conclusion
Switching from conventional oil to synthetic is a completely safe and highly beneficial upgrade for almost any modern vehicle. By understanding the cleaning properties of synthetic lubricants and adhering to proper viscosity guidelines, drivers can significantly extend engine lifespan and improve fuel efficiency. According to verified research and expert sources from the automotive lubrication industry, making this switch today provides superior long-term protection against wear and thermal breakdown. Take the next step by checking your owner manual today and scheduling your synthetic oil upgrade.
❓ Frequently Asked Questions
Will changing to synthetic oil cause my older car to start leaking?
Synthetic oil itself does not cause seals to shrink or fail. However, because synthetic oils clean sludge and deposits better than conventional oil, they may expose pre-existing wear on old, brittle gaskets that were previously plugged up by sludge.
Can I switch back to conventional oil after using synthetic?
Yes, you can switch back and forth between conventional and synthetic oils as often as you like. They are fully compatible with one another, though sticking to synthetic generally provides superior engine protection.
Is it true that once you go synthetic, you can never go back?
This is a widespread automotive myth. There is no technical reason preventing you from returning to conventional oil if you prefer lower upfront maintenance costs.
Do I need to change my oil filter when switching to synthetic?
Yes, you should always replace the oil filter whenever you change your engine oil, regardless of whether you are switching types. Using a high-quality filter rated for synthetic oil will ensure optimal performance.
How does synthetic oil handle extreme temperatures better?
Synthetic oils are chemically engineered to have a more uniform molecular structure. This allows them to flow more easily during freezing winter startups and resist breaking down under extreme heat.
Are synthetic oil blends a good compromise for the transition?
Synthetic blends offer a middle ground by combining conventional oil with synthetic base stocks, providing better protection than conventional oil at a lower cost than full synthetic.