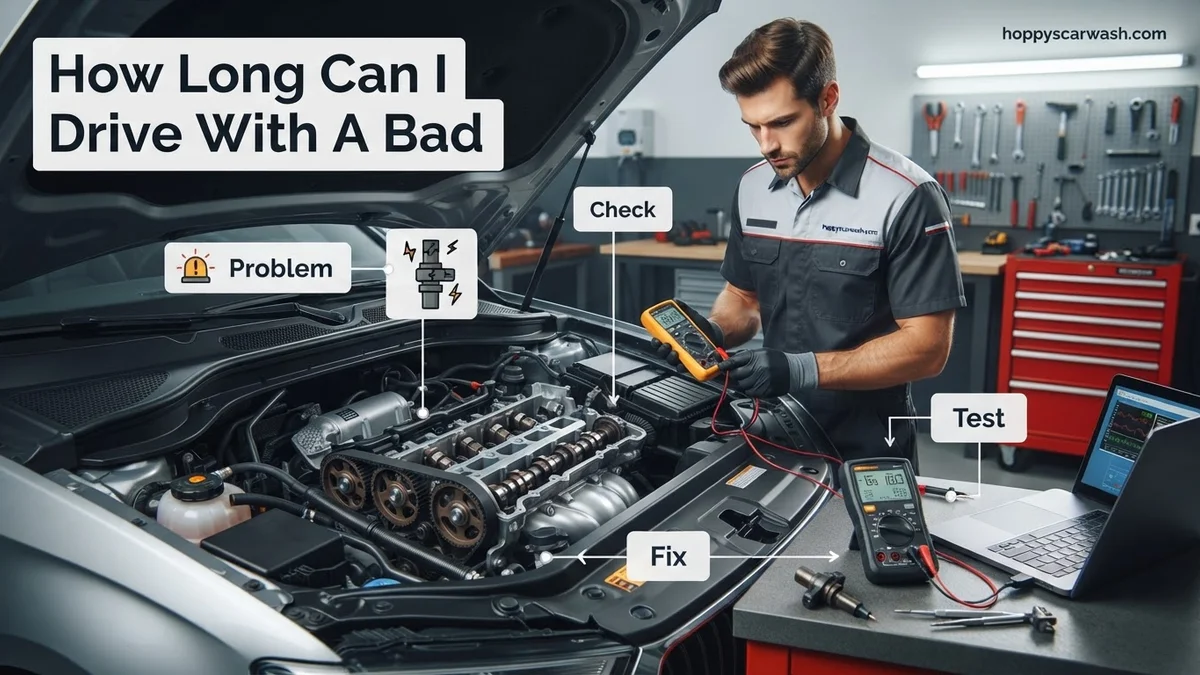
How Long Can I Drive With a Bad Camshaft Sensor 2026
Driving with a failing camshaft position sensor is strongly discouraged because the engine can stall unexpectedly in fast traffic or fail to start entirely. While a vehicle might technically run for a few miles to reach a safe location, doing so risks severe mechanical failure and dangerous loss of power.
You should generally avoid driving with a bad camshaft position sensor, and if you must, limit it to less than 10 to 50 miles at most. When this sensor fails, your engine computer loses track of the exact valve and piston positions. This forces your vehicle into a defensive “limp mode,” restricting your acceleration and putting immense strain on your drivetrain.
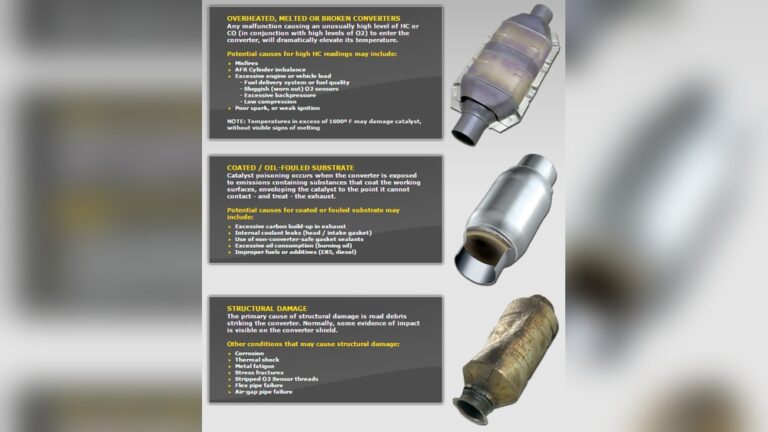
By 2026, modern vehicle engines rely heavily on precise electronic timing to run safely and efficiently. Continuing to drive a car with a failing camshaft sensor risks unexpected engine stalls in the middle of traffic, catastrophic internal damage from poor fuel injection timing, and permanent ruin of your expensive catalytic converter due to unburned fuel.
Key Takeaways
- Avoid driving long distances with a failing sensor to prevent unexpected engine stalling.
- A bad camshaft sensor can instantly trigger limp mode or prevent the car from starting.
- Unburned fuel reaching the exhaust can permanently ruin your catalytic converter.
- Address the issue immediately by towing the vehicle or replacing the faulty sensor.
- Diagnostic trouble codes (DTCs) like P0340 confirm exact sensor failure.
What Causes Camshaft Sensor Failure and Engine Symptoms
Common Causes of Sensor Breakdown
Camshaft position sensors endure extreme under-hood environments. Knowing what destroys them helps you understand why your car is failing right now:
- Extreme Heat: Constant thermal cycling degrades the internal computer chips inside the sensor housing.
- Oil Contamination: Leaking valve cover gaskets frequently pool oil inside the sensor connector, shorting out the electrical signal.
- Vibration and Age: High-mileage wiring harnesses and sensor brackets crack or vibrate loose over the years.
How Your Car Behaves on the Road
When the camshaft sensor goes bad, your daily commute will change dramatically. Expect to experience these specific driving symptoms:
- Extended Cranking: Your engine takes much longer than usual to start up because the computer has to guess the cylinder stroke.
- Sudden Stalling: The engine may completely die out when you come to a stoplight or slow down to turn.
- Severe Power Loss: Pressing the gas pedal yields sluggish acceleration as the powertrain control module cuts power to protect itself.
Driving with a Bad Camshaft Sensor: What Causes It and How to Fix It
Dealing with a failing camshaft position sensor can be a stressful experience for any driver. This comprehensive guide helps you understand exactly how long you can safely drive with a bad camshaft sensor, how to assess the severity of your specific symptoms, and the precise steps required to diagnose and resolve the issue before it leaves you stranded on the side of the road.
Step 1: Understand the Role of the Camshaft Sensor
What you need: Basic knowledge of internal combustion engines and access to your vehicle owner’s manual.
Instructions: Before deciding whether you can drive, you must understand what this sensor does. The camshaft position sensor monitors the rotational speed and exact position of the camshaft, sending this critical data to the engine control unit (ECU). The ECU uses this information to synchronize fuel injection and ignition timing. Without accurate data, your engine’s efficiency drops drastically. While some cars use a crankshaft sensor as a backup to keep running in “limp mode,” relying on this fallback is risky and puts immense stress on internal components.
Pro Tip: Never assume all engines behave the same; older vehicles might stall immediately upon sensor failure, while modern engines often manage to limp along for short distances.
Step 2: Evaluate the Urgency Based on Current Symptoms
What you need: A keen ear, attention to dashboard indicators, and observational skills while driving.
Instructions: Assess your vehicle’s current behavior to determine if driving is possible. If your car simply has an illuminated Check Engine Light (CEL) and a minor decrease in fuel economy, you can likely drive a very short distance to a repair shop (typically 5 to 10 miles). However, if you experience severe engine misfires, rough idling, sudden stalling at stoplights, or a complete failure to start, you must not drive at all. Driving with severe misfires can permanently destroy your catalytic converter, turning a cheap sensor fix into a thousand-dollar exhaust repair.
Pro Tip: If the engine stalls while driving on a highway, power steering and braking assist will fail shortly after, creating a catastrophic safety hazard.
Step 3: Retrieve and Confirm Diagnostic Trouble Codes (DTCs)
What you need: An OBD-II diagnostic scanner and your vehicle’s OBD-II port location (usually under the driver-side dashboard).
Instructions: Plug your OBD-II scanner into the port, turn your ignition key to the ON position (without starting the engine), and read the stored trouble codes. Look specifically for diagnostic codes P0340 through P0349, which directly indicate a circuit malfunction or performance issue with the camshaft position sensor. Write down any accompanying codes, such as random misfire codes (P0300 series), to get a complete picture of how severely the bad sensor is impacting your engine operations.
Pro Tip: Do not just rely on the code; sometimes a loose wiring harness or blown fuse triggers a camshaft sensor code even when the sensor itself is fully functional.
Step 4: Inspect the Sensor Wiring and Harness Connections
What you need: Flashlight, electronic contact cleaner, and a basic microfiber towel.
Instructions: Pop your vehicle hood and locate the camshaft sensor, typically mounted near the top of the cylinder head or valve cover. Visually inspect the electrical connector plugged into the sensor. Look for signs of frayed wires, melted plastic from engine heat, oil leaks saturating the plug, or severe corrosion on the metal pins. Gently disconnect the wiring harness, check for moisture or oil inside the terminal, clean it out using electrical contact cleaner, and securely snap it back into place.
Pro Tip: Oil leaks from a failing valve cover gasket frequently pool inside the camshaft sensor connector, causing electrical shorts that mimic a dead sensor.
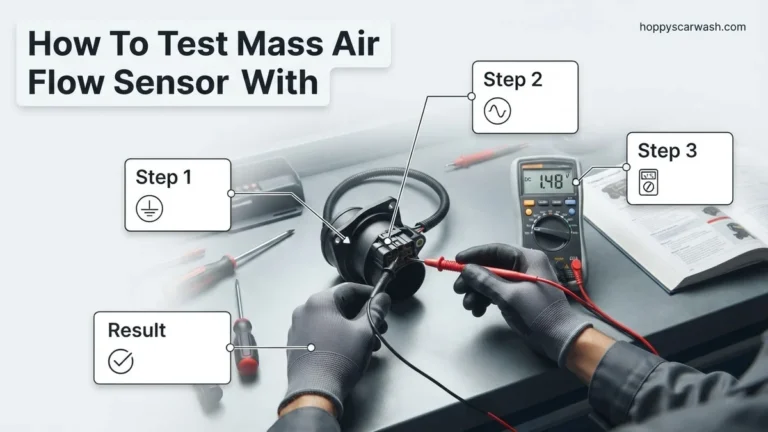
Step 5: Test the Sensor Resistance with a Multimeter
What you need: Digital multimeter set to ohms, and safety glasses.
Instructions: If the wiring looks pristine, test the electrical resistance of the sensor itself. Disconnect the negative battery terminal for safety. Consult your specific vehicle service manual for the exact manufacturer-specified ohm resistance range (usually between 200 and 2000 ohms for inductive sensors). Touch the multimeter probes to the appropriate sensor terminal pins. If the multimeter reads zero (a short circuit) or infinite resistance (an open circuit), your camshaft sensor has completely failed and must be replaced immediately.
Pro Tip: Keep in mind that some modern Hall-effect sensors cannot be accurately tested with a standard ohmmeter and require an oscilloscope to check square-wave voltage signals.
Step 6: Gather Replacement Parts and Tools
What you need: Replacement OEM or high-quality aftermarket camshaft sensor, socket wrench set, torque wrench, and shop rags.
Instructions: Once you’ve confirmed a bad sensor, purchase the correct replacement part matched to your vehicle’s make, model, year, and engine size. Gather your basic metric socket set. Ensure the engine is completely cool to the touch before starting any wrenching. Depending on your car layout, you may need to temporarily remove the engine cover, air intake duct, or serpentine belt accessories to gain clear physical access to the retaining bolt of the sensor.
Pro Tip: Always buy an OEM (Original Equipment Manufacturer) camshaft sensor. Aftermarket budget sensors from unknown brands have an exceptionally high out-of-the-box failure rate.
Step 7: Safely Remove and Replace the Defective Sensor
What you need: New sensor, socket wrench, clean engine oil for lubrication of the O-ring.
Instructions: Press the release tab on the electrical connector and gently pull it free from the old sensor. Remove the single mounting bolt holding the sensor in place using your socket wrench. Twist and pull the old sensor straight out of its mounting port, taking care not to let any dirt fall into the engine opening. Wipe the mounting surface clean. Take your new sensor, smear a tiny drop of clean engine oil onto its rubber O-ring seal to ensure a snug, leak-free fit, insert it into the port, hand-tighten the mounting bolt, and torque it to factory specifications.
Pro Tip: Never force a sensor into its port; if the O-ring is dry, it can bind and tear, causing a severe oil leak right onto your hot exhaust manifold.
Step 8: Clear Codes and Test Drive the Vehicle
What you need: OBD-II scanner and a safe stretch of open road.
Instructions: Reconnect your vehicle’s negative battery terminal. Plug in your OBD-II scanner and use the “Clear Codes” function to wipe the historical engine fault codes from the ECU memory. Start the engine; it should turn over smoothly and idle steadily without hesitation. Let the engine reach standard operating temperature. Take your car out for a test drive around your neighborhood, gradually accelerating up to highway speeds to verify that the Check Engine Light stays off and power delivery feels completely normal.
Pro Tip: If the Check Engine Light returns immediately with the same code, your issue may lie deeper within the timing chain stretch or a failing engine control module.
✅ Final Checklist
- OBD-II scanner confirms camshaft fault codes have been successfully cleared.
- New camshaft sensor is securely mounted and bolted down to proper torque specifications.
- Electrical wiring harness is cleanly clipped, free of oil, and securely locked.
- Engine starts smoothly, idles steadily without sputtering, and maintains normal power during acceleration.
- Check Engine Light remains off after a 15-minute test drive.
Important Notes:
- Never drive long distances with a failing camshaft sensor due to the high risk of sudden engine stalling in traffic and potential catalytic converter damage.
- Seek professional mechanic assistance immediately if engine misfires persist or if the sensor replacement requires specialized timing belt teardowns.
- Estimated professional repair cost ranges from $150 to $350 (parts and labor), while DIY cost is typically $40 to $120, requiring approximately 30 to 60 minutes of your time.
How to Diagnose a Bad Camshaft Position Sensor
Dashboard Warnings and Diagnostic Codes
Your car will typically give you direct electronic warnings before it completely refuses to run. Modern OBD2 diagnostic scanners are your best tool for confirming a sensor failure in 2026.
- Check Engine Light: This is almost always the first indicator that something is wrong with your engine management system.
- Specific Fault Codes: Look for diagnostic trouble codes ranging from P0340 through P0349, which specifically point to camshaft sensor circuit malfunctions.
- Intermittent Behavior: The car might run fine for twenty minutes, trigger a code, and then immediately start bucking once it reaches full operating temperature.
Simple Physical Inspection Steps
Before you tow your vehicle or buy replacement parts, you can perform a quick visual check under the hood to rule out external issues:
- Inspect the Wiring Plug: Unclip the electrical connector on the sensor and look for moisture, corrosion, or engine oil inside the pins.
- Check for Loose Bolts: Ensure the single bolt holding the sensor into the cylinder head or valve cover hasn’t rattled loose.
- Look for Frayed Wires: Trace the sensor harness back a few inches to check for heat damage, melted insulation, or rodent chewing.
Step-by-Step Fix to Replace a Faulty Camshaft Sensor
Replacing a faulty camshaft position sensor is a straightforward DIY project for most car owners. Gathering the right tools beforehand ensures a smooth repair process in 2026. Automotive technicians recommend having a socket set, a flathead screwdriver, and electrical contact cleaner ready.
Preparation and Access
Before turning a single bolt, disconnect the negative battery terminal to prevent electrical shorts. Locate the camshaft sensor, which typically sits near the top of the cylinder head or valve cover. Some vehicles require removing engine covers, air intake tubes, or nearby wiring harnesses for proper clearance.
Removal and Installation Steps
Follow this numbered sequence to complete the replacement safely:
- Press the release tab on the electrical wiring harness connector and gently pull to detach it from the sensor.
- Remove the single mounting bolt or screw securing the sensor using the appropriate socket or wrench.
- Twist and pull the old sensor straight out of its mounting port, taking care not to drop any debris into the engine.
- Inspect the O-ring seal on the new sensor and apply a small drop of clean engine oil to ensure a proper seal during insertion.
- Push the new camshaft sensor firmly into the port and secure it with the mounting bolt, tightening it to manufacturer specifications.
- Reconnect the electrical harness until it clicks securely into place, then reattach the vehicle’s negative battery terminal.
What If It Still Doesn’t Work After Sensor Replacement?
Replacing the sensor does not always resolve the underlying issue. If the check engine light remains on or drivability symptoms persist, secondary problems may exist within the ignition or timing systems. Drivers should execute these diagnostic fallback steps:
- Inspect the wiring harness and connector pins for corrosion, fraying, or breaks that disrupt signal transmission to the Powertrain Control Module.
- Check the engine timing components, as a stretched timing chain or worn belt can cause correlation codes even with a functioning sensor.
- Test the crankshaft position sensor, which frequently works in tandem with the camshaft sensor to manage fuel injection timing.
- Consult professional automotive repair services if the diagnostic trouble codes persist after wiring and secondary sensor checks.
Professional diagnosis and repair generally cost between $150 and $350, depending on labor rates and the specific vehicle model. Mechanics use advanced diagnostic scanners to view live data streams and pinpoint electrical faults accurately.
Conclusion
Driving with a bad camshaft sensor is risky, and most vehicles will only manage short distances before stalling completely or failing to start. Replacing a faulty unit restores proper fuel injection and ignition timing. According to verified research and expert automotive sources, addressing this sensor failure immediately prevents secondary engine damage and expensive roadside tow fees. The best actionable next step is to scan your vehicle for trouble codes today and replace the sensor before your commute leaves you stranded.
❓ Frequently Asked Questions
How long can I actually drive with a bad camshaft sensor?
You should only drive as far as the nearest safe parking spot or mechanic shop, ideally less than 5 to 10 miles. Continuing to drive risks sudden engine shutdown without warning.
What are the primary symptoms of a failing camshaft sensor?
Common symptoms include rough idling, engine stalling, decreased fuel efficiency, sluggish acceleration, and difficulty starting the vehicle.
Can I test a camshaft sensor with a multimeter?
Yes, you can check resistance and voltage output against manufacturer specifications using a digital multimeter, though a diagnostic scanner is more accurate.
Will the car start if the camshaft sensor is completely dead?
Often no. Many modern vehicles require a functioning camshaft signal combined with the crankshaft signal to coordinate ignition and fuel injection.
Does a bad camshaft sensor cause permanent engine damage?
The sensor itself does not cause internal mechanical damage, but the resulting misfires can overheat and ruin expensive catalytic converters.
Should I tow my car if the camshaft sensor goes bad?
Towing is the safest option to avoid being stranded in dangerous traffic or causing secondary damage to your exhaust system.